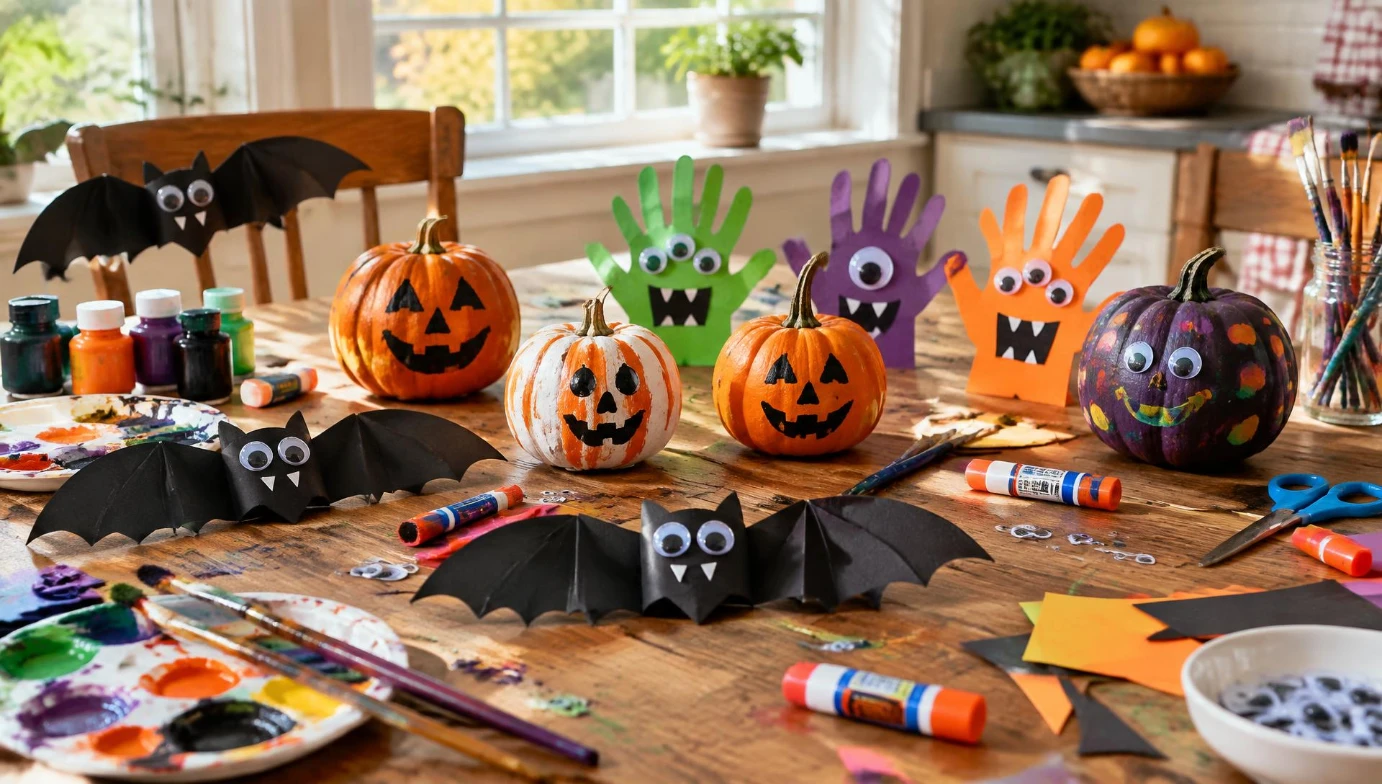
Halloween crafts don’t need a trip to the craft store. Most of the best ones use paper, paint, and stuff you already have lying around, like toilet paper rolls and egg cartons. A pile of supplies from the recycling bin can turn into an afternoon of real fun.
The crafts kids remember most aren’t the fancy ones. They’re the simple ones that let a kid make something silly and a little spooky, then show it off on the fridge for the rest of the season. Every idea below is easy enough for a weekday afternoon, and none of them need special tools or a trip to the store.
Quick Picks
- Best for toddlers: Ghostly handprints on black paper
- Best for recycling bin materials: Milk carton ghouls with tea lights
- Best mess-free option: Paper spiderwebs cut from folded paper
- Best group activity: A garland of paper bats to hang together
Did You Know?
Origami bats made from black paper are one of the oldest Halloween crafts still popular today. Kids have been folding and cutting paper bats to string up as garland for generations, and the design has barely changed. It’s simple enough for a five year old, yet it still looks good hanging over a party table decades later.
Before You Start
- Cover the table first. Paint and glue crafts go a lot smoother with old newspaper or a plastic cloth laid down ahead of time.
- Match the craft to the age. Toddlers do best with paint and stickers, since there’s nothing sharp or small to worry about. Older kids can handle scissors and tiny parts like googly eyes.
- Save your recycling for a week. Toilet paper rolls, egg cartons, and milk cartons turn into some of the best crafts on this list, so it’s worth holding onto a few before Halloween.
- Let the paint dry between steps. Rushing a wet craft usually smears the best part of the design right when it’s almost finished.
- Keep googly eyes and glue on hand. They’re the two supplies that fix almost any craft that’s not quite working the way you pictured it.
Paper and Cardstock Crafts
1. Origami paper bats
This is one of the oldest Halloween crafts, and it still works great today.
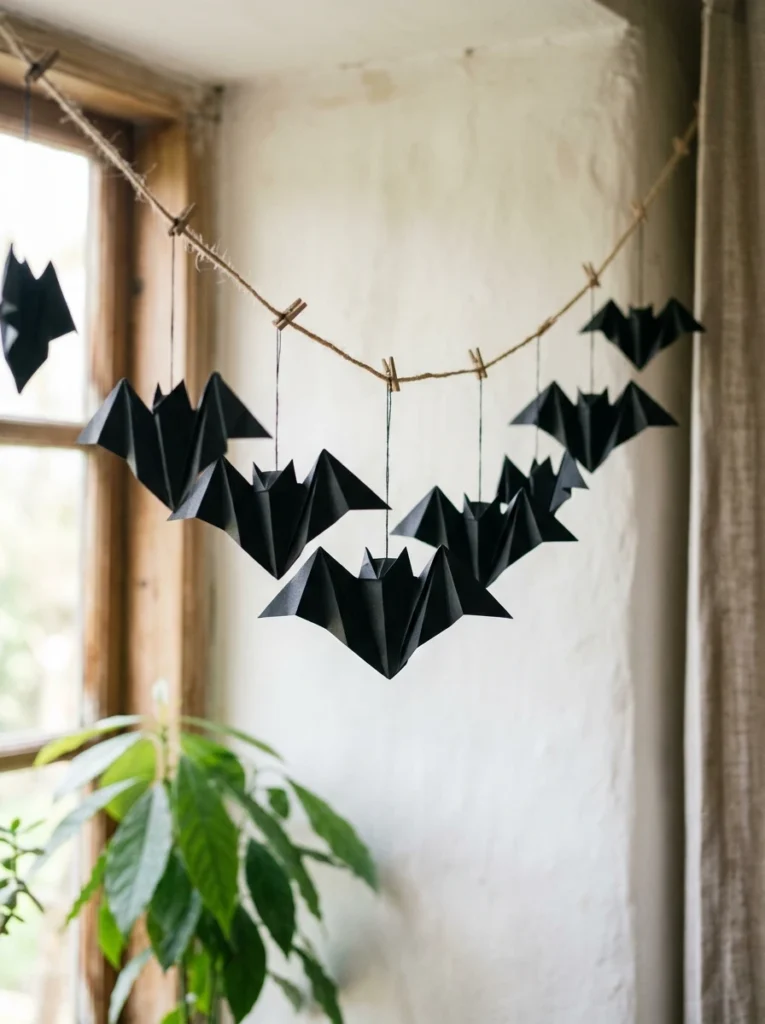
A few folds and one cut turn a plain sheet of black paper into a bat shape. There’s no glue needed for the bat itself, just careful folding, which makes this a good starting project for a kid who’s still building patience for crafts. String several together with black ribbon or thread and you’ve got an instant garland.
Hang the finished bats across a doorway or a window for a quick decoration the kids made entirely themselves. A dozen or so, spaced a few inches apart, looks like a little bat colony took over the house, and it costs almost nothing beyond a pack of black construction paper.
2. Paper spiderwebs
No mess, no paint, just paper and scissors.
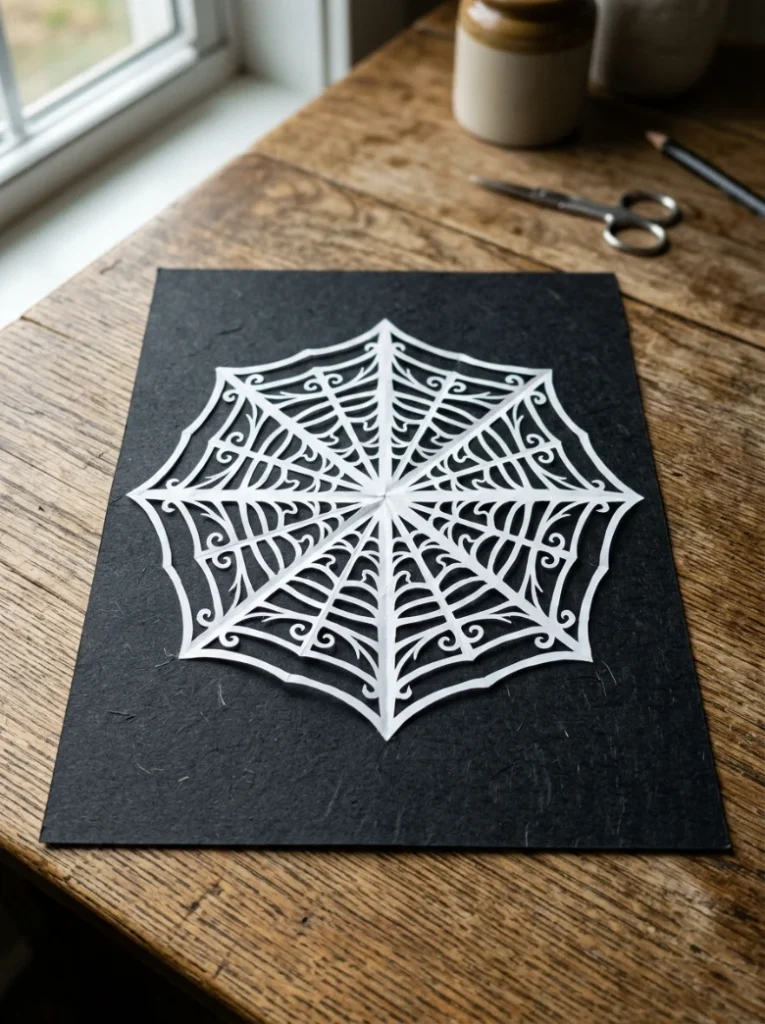
Fold a piece of white paper into a triangle, then fold it in half twice more the way you would for a paper snowflake. Cut wavy lines and small notches along the folded edges, then unfold it carefully to reveal the web pattern. Glue it onto a sheet of black construction paper so the white lines really stand out.
This is one of the easiest crafts on the whole list to clean up afterward, since there’s no paint or wet glue involved at any point. Kids who already know how to make paper snowflakes will pick this up in seconds, and older kids can experiment with different cut patterns to make each web look unique.
3. Cut-and-glue pumpkin patch
A simple project that works well for a whole classroom or group.
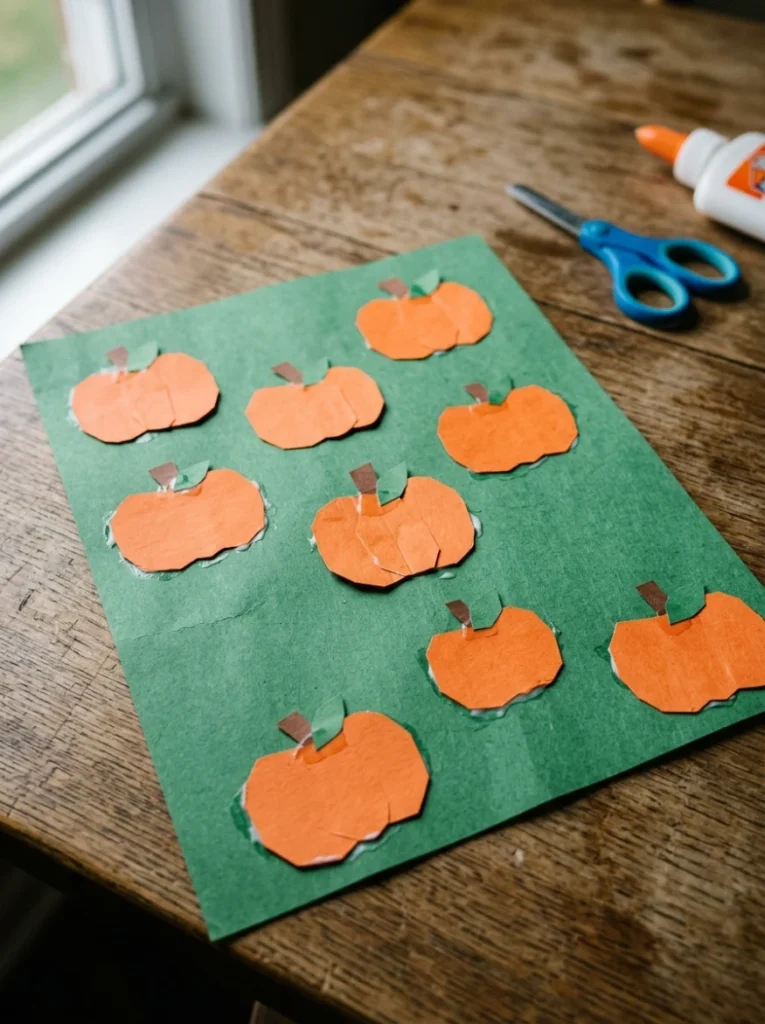
Cut a handful of circles from orange paper in a few different sizes, then glue on a small green stem and a curly paper vine to each one. Add a simple triangle-eyed face with a marker if you want the pumpkins to look like little jack-o-lanterns instead of plain gourds.
Little kids can practice both cutting and gluing with this one, since the shapes are big, round, and forgiving of a wobbly scissor hand. Glue several pumpkins onto one big sheet of green or brown paper to build a full pumpkin patch scene worth hanging up for the whole month.
4. Paper plate spiders
A paper plate is the perfect round base for a body.
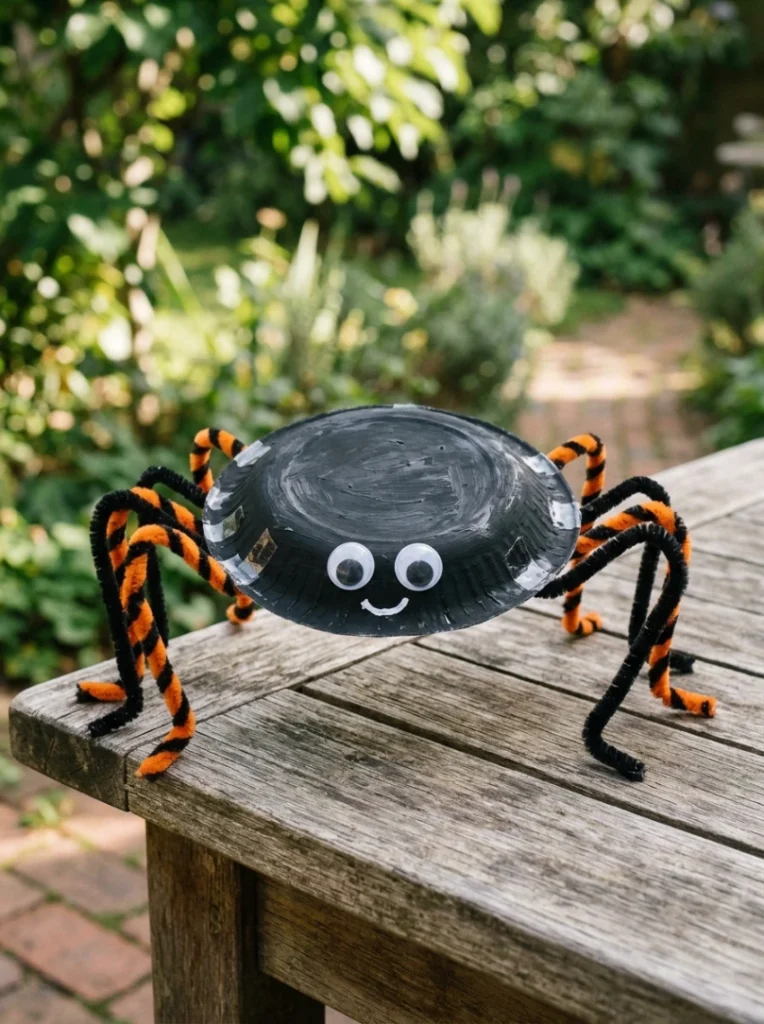
Paint a paper plate solid black and let it dry completely before moving on. Once it’s dry, poke eight small holes around the outer edge, evenly spaced, and thread a pipe cleaner through each pair to form four bent legs. Two googly eyes glued near the center finish the face.
Bending the pipe cleaner legs at a slight angle lets the finished spider actually stand up on a table or shelf instead of lying flat. This craft holds up well too, so it’s a good one to keep displayed through the rest of the season rather than tossing it after one day.
5. Accordion-fold paper ghosts
A folding trick that makes a flat piece of paper look 3D.
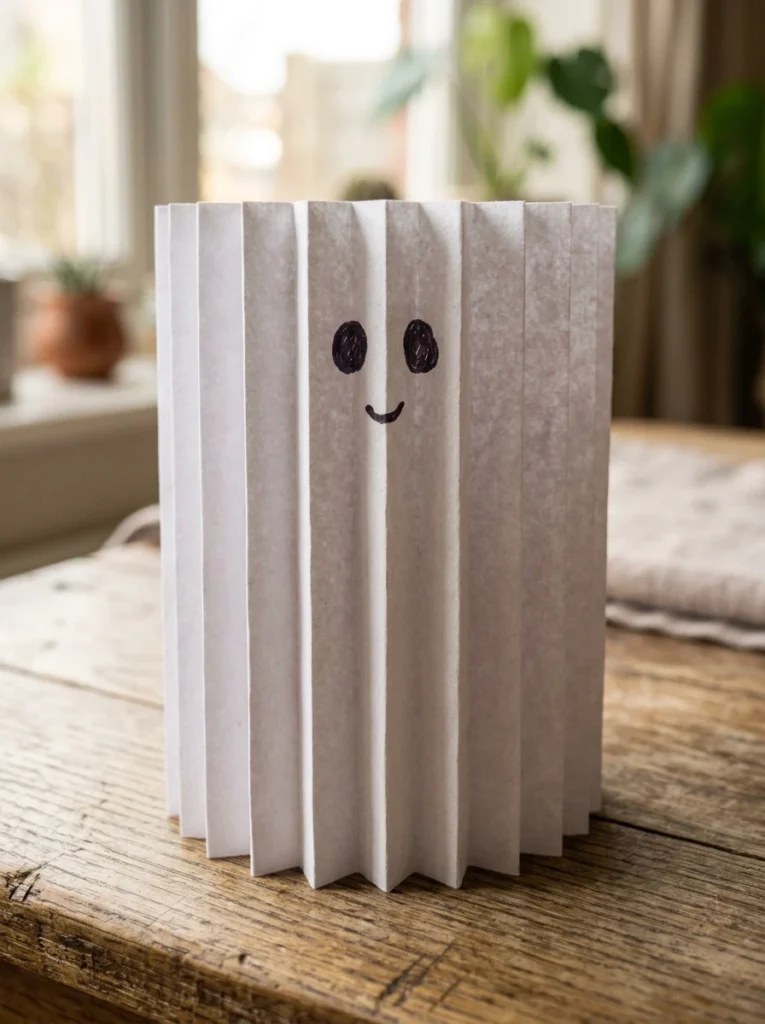
Fold a piece of white paper back and forth like a fan, the same way you’d make a paper hand fan, then round off the top edge into a soft ghost shape once the folding is done. The accordion folds give it enough structure to stand upright on its own without any tape or glue.
Draw a simple face near the top with a black marker, just two eyes and an open mouth works well, and stand the finished ghost on a windowsill or shelf. This craft teaches a folding skill kids can reuse later for fans, garlands, or other paper projects well past Halloween.
Recycled Material Crafts
6. Toilet paper roll monsters
This is a favorite because it uses something every home already has.
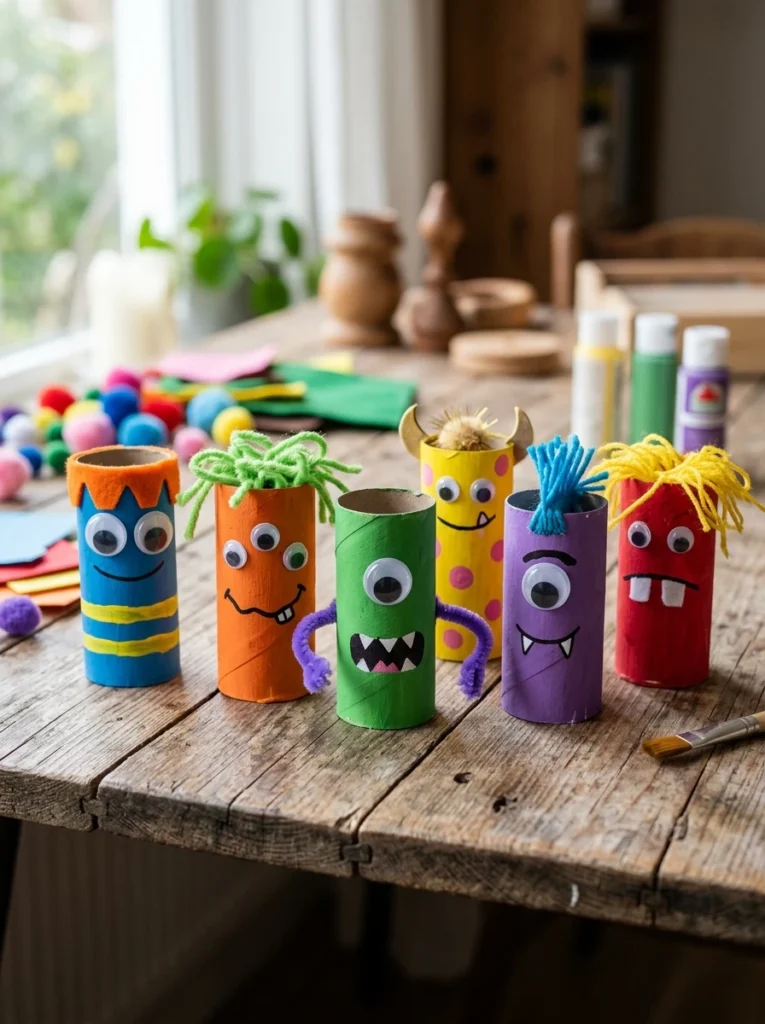
Paint cardboard tubes any color you like, then glue on paper eyes, teeth, or horns to build a little monster once the paint dries. Blue tends to work well for a friendly creature, black reads more like a vampire, and green leans classic monster.
Kids can make a whole set in one sitting, since each tube dries fast and doesn’t need much detail to look finished. Line them up on a windowsill like a little monster army, and the whole project uses supplies that would otherwise just go in the recycling bin.
7. Milk carton ghouls with lights
A budget-friendly craft that lights up after dark.
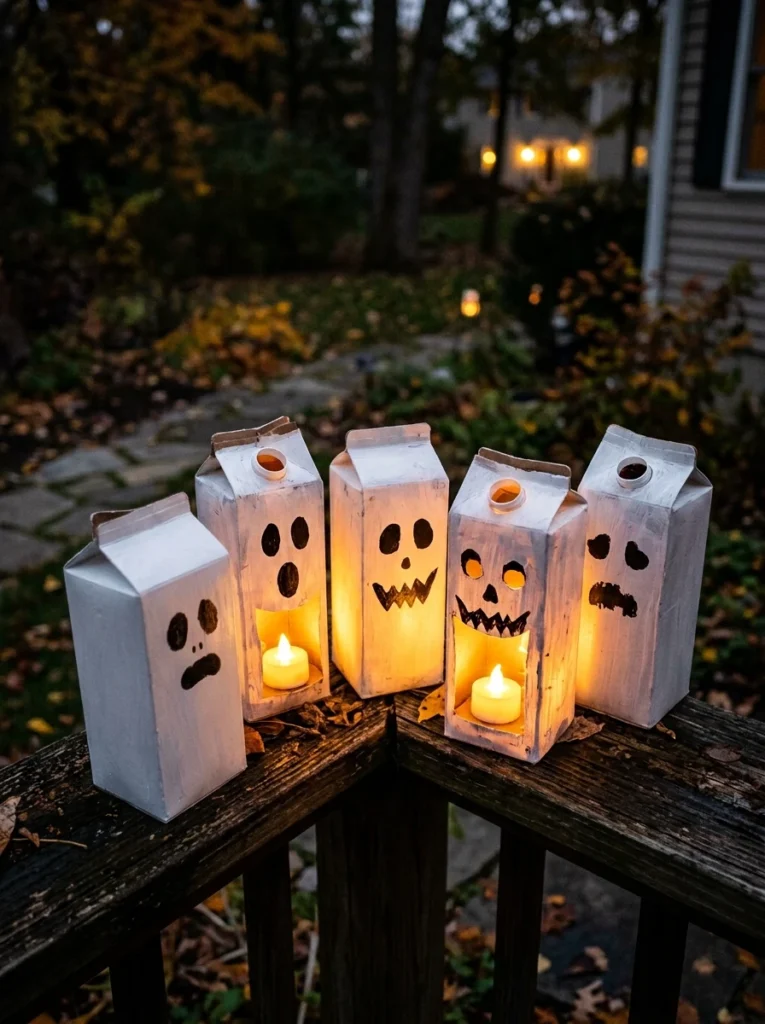
Rinse out an empty milk carton and let it dry completely, then draw a simple ghost face on the front with a black marker or paint pen. Cut a small opening if needed, and pop a battery-powered tea light inside once everything is dry.
The light glows softly through the carton once it’s dark outside, almost like a tiny paper lantern. Line a few of these along the porch steps or a front walkway, and they double as an actual nighttime decoration guests will notice on Halloween itself, not just a craft that gets put away.
8. Egg carton creatures
Turn something headed for the trash into tiny monsters.
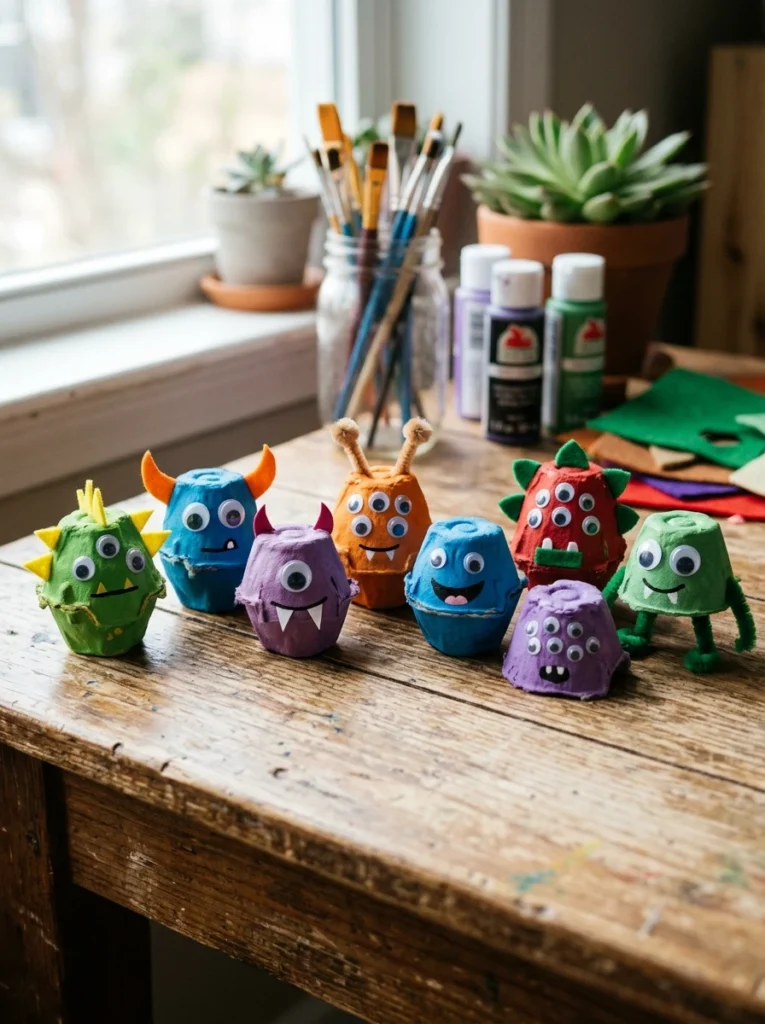
Cut an egg carton apart into single cups using scissors, then paint each cup a different spooky color, purple, green, or orange all work well. Once the paint dries, glue on googly eyes and small paper ears or wings to give each cup its own creature personality.
These tiny creatures are small enough that kids can make a whole colorful collection in one sitting, and they double nicely as candy cups once the craft part is finished. It’s also one of the few crafts on this list that turns actual trash into something worth keeping on display.
9. Tin can pencil monsters
An empty can becomes a desk organizer with personality.
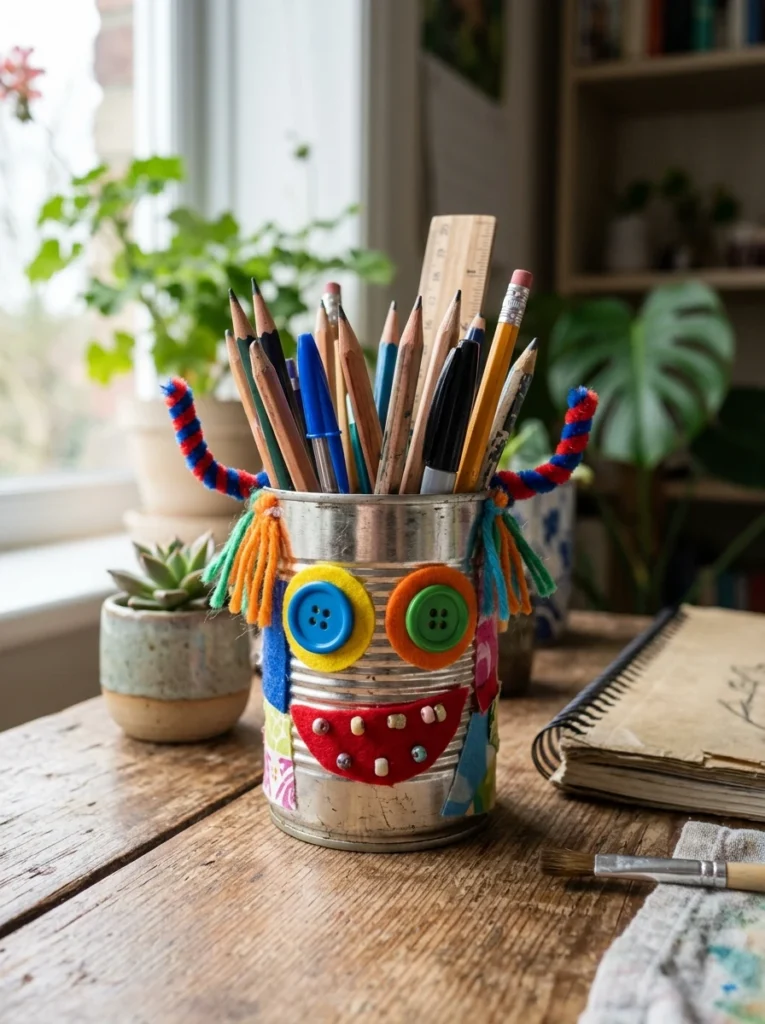
Wash out a clean, empty can and check that the edges are smooth before handing it to a kid. Cover the outside with a strip of colored paper glued on, then add googly eyes, paper fangs, or a bit of yarn for fur to give the can a monster face.
Unlike most crafts on this list, this one is genuinely useful once Halloween is over, holding pencils, crayons, or paintbrushes on a desk all year long. It’s a good project for a kid who likes making things that stick around rather than just decorations that get boxed up.
10. Cardboard box haunted house
A bigger project for a rainy afternoon.
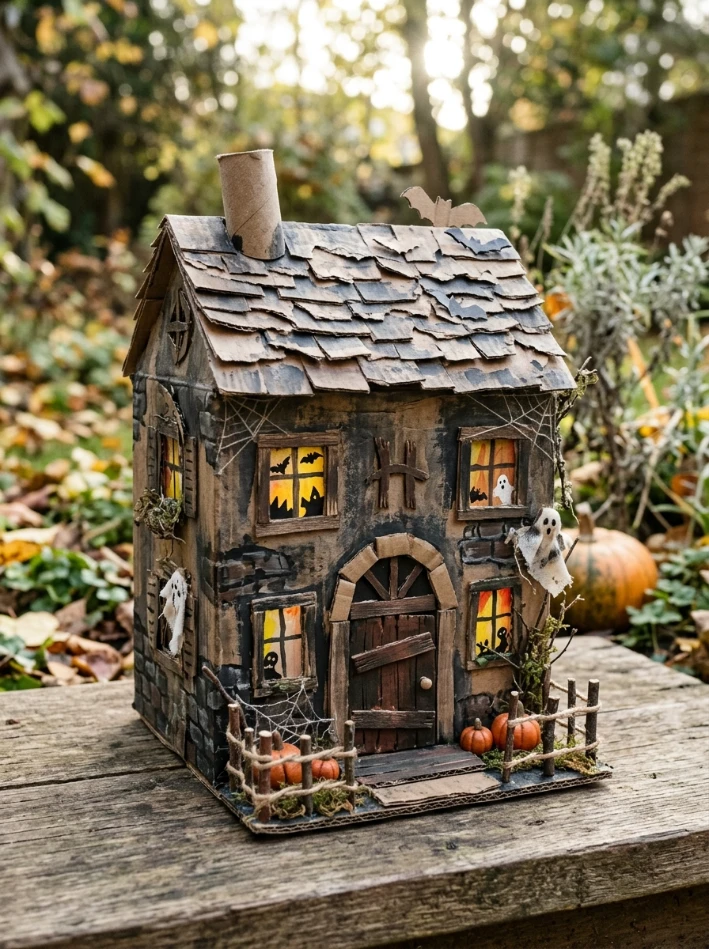
Cut a few window shapes and a door into the side of an old cardboard box using scissors or a craft knife handled by an adult. Paint the whole box black or gray, then let the kids add a few paper bats, a cotton ball spiderweb, or crooked paper shutters once it’s dry.
This craft takes longer than most others on this list, usually a full afternoon between painting, drying, and decorating, so it’s best saved for a weekend with no rush. The finished house makes a genuinely fun centerpiece for a Halloween display, and kids tend to be proud of it specifically because it took real effort.
Painting and Handprint Crafts
11. Handprint monster faces
A craft that doubles as a keepsake.
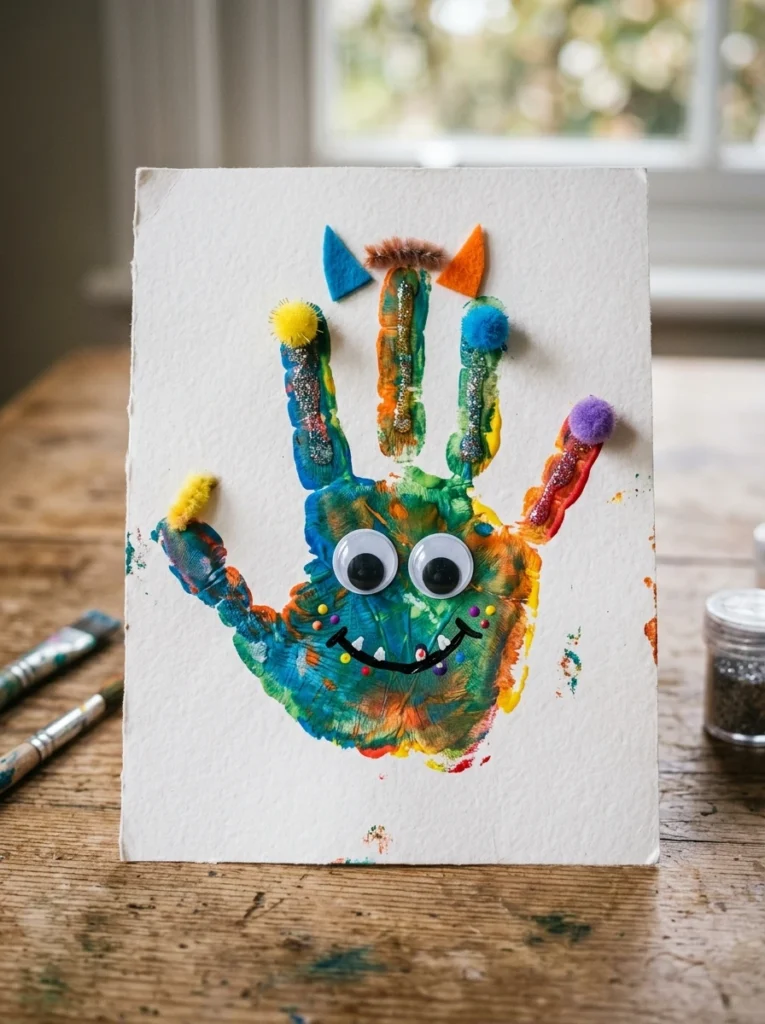
Paint a kid’s hand any color using washable paint, then press it firmly onto a sheet of paper and let it dry completely before touching it again. Once it’s dry, glue on googly eyes wherever they land naturally on the fingers, then draw fangs, horns, or hair with a marker to finish the monster.
This is worth saving each year rather than throwing away, since the handprint size changes as a kid grows. A few years of these lined up side by side makes for a genuinely sweet keepsake, not just a one-time craft.
12. Handprint Dracula puppet
Two handprints combine into one character.
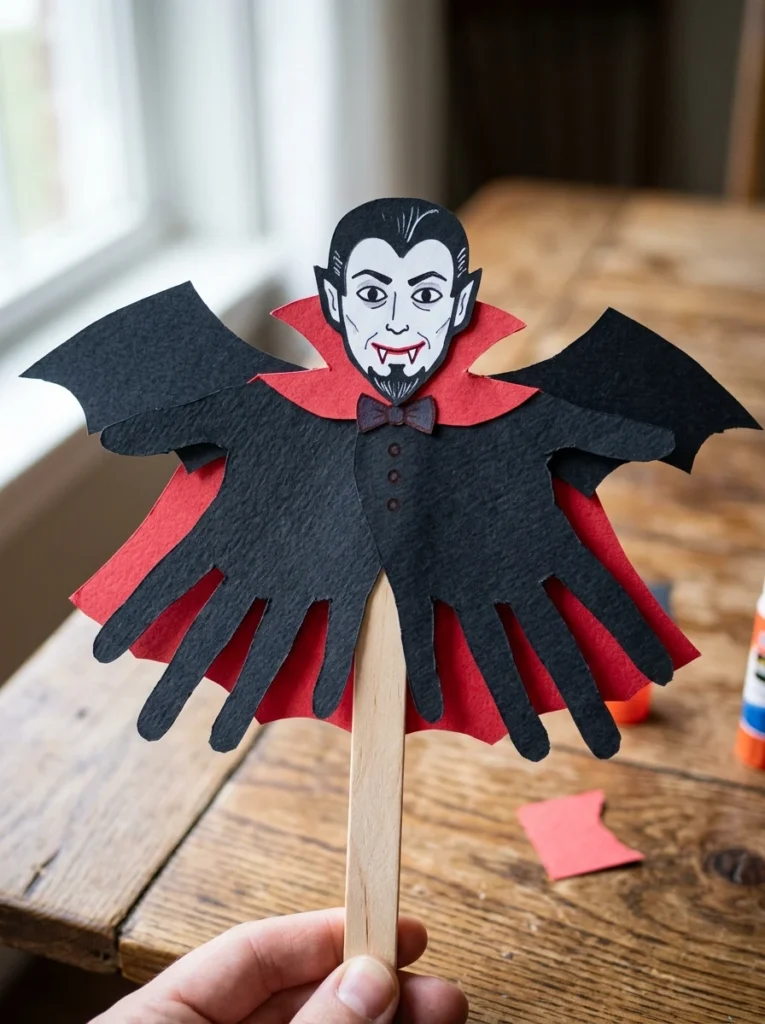
Trace both of a kid’s hands onto paper using a pencil, then cut out both shapes carefully with scissors. Glue the two handprints together to form a body shape, then add a small red paper cape, a bow tie, and two tiny fangs cut from white paper.
This one takes more cutting than most on this list, so it works best for kids who are already comfortable handling scissors on their own. The finished puppet can move around a little at the arms, which makes it more fun to play with afterward than a craft that just sits flat on a shelf.
13. Painted pumpkin patch
No knives needed, just paint and imagination.
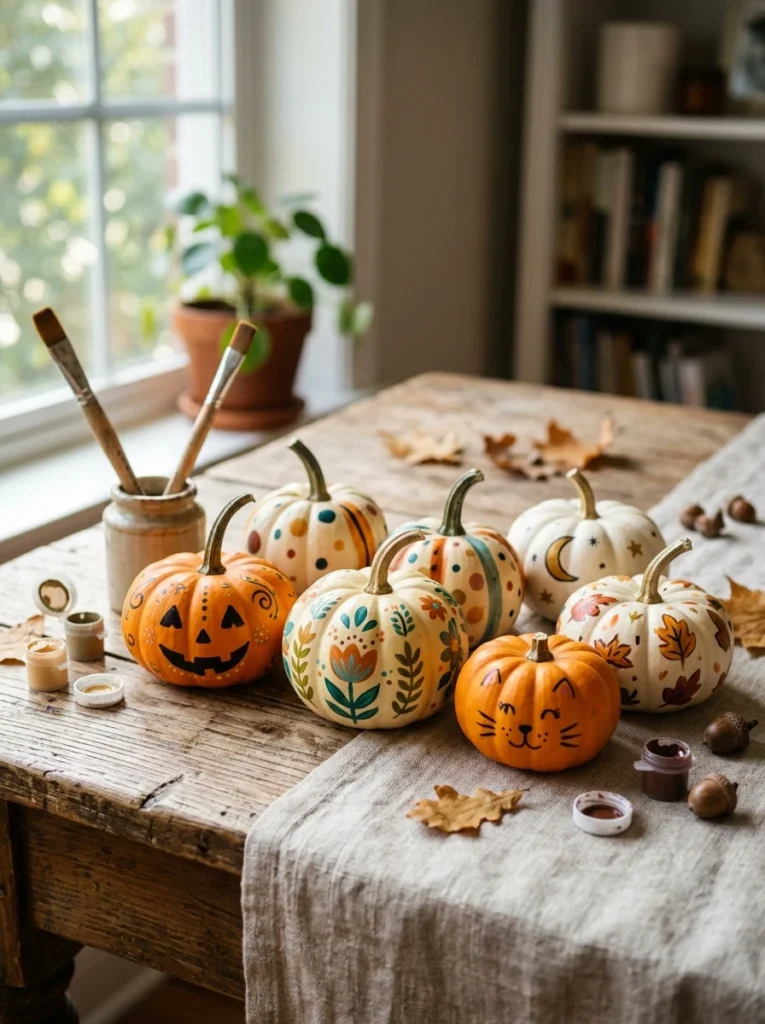
Grab a few small pumpkins from the store or a patch, along with some non-toxic craft paint and a couple of brushes. Let each kid paint their pumpkin however they want, there’s no wrong answer here, and no cutting or seed mess to deal with afterward.
This works especially well as a group activity, since every pumpkin turns out completely different even when the kids start with the same paint colors. Set several finished pumpkins along a porch or entryway once they’re dry for a display that’s genuinely kid-made from start to finish.
14. Fingerprint spiders
A tiny craft that’s perfect for the youngest crafters.
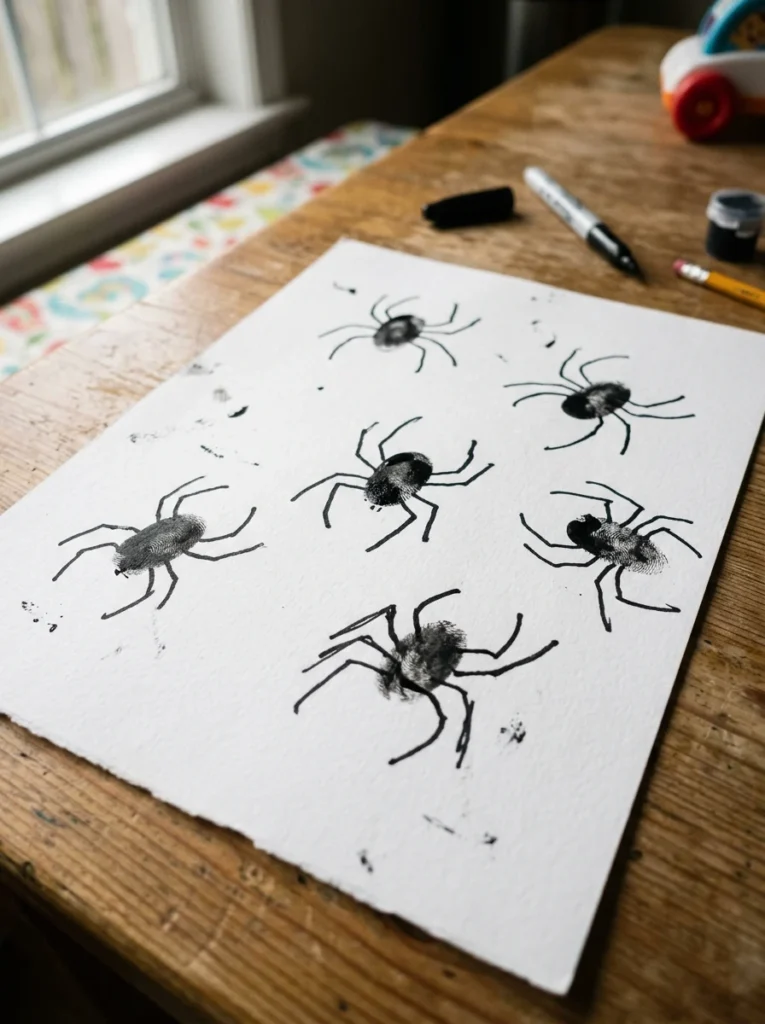
Dip a finger in black paint and press it firmly onto a sheet of paper, repeating as many times as you like across the page. Once the prints dry, hand over a marker so the kid can draw eight thin legs and two small eyes on each fingerprint, turning it into a spider.
A whole page of these makes for a fun, easy piece of art or a homemade Halloween card for a grandparent. This is one of the simplest crafts on the entire list, which makes it a solid choice for a toddler who’s still working on holding a paintbrush steady.
15. Painted rock ghosts and pumpkins
An outdoor craft that turns plain rocks into decorations.
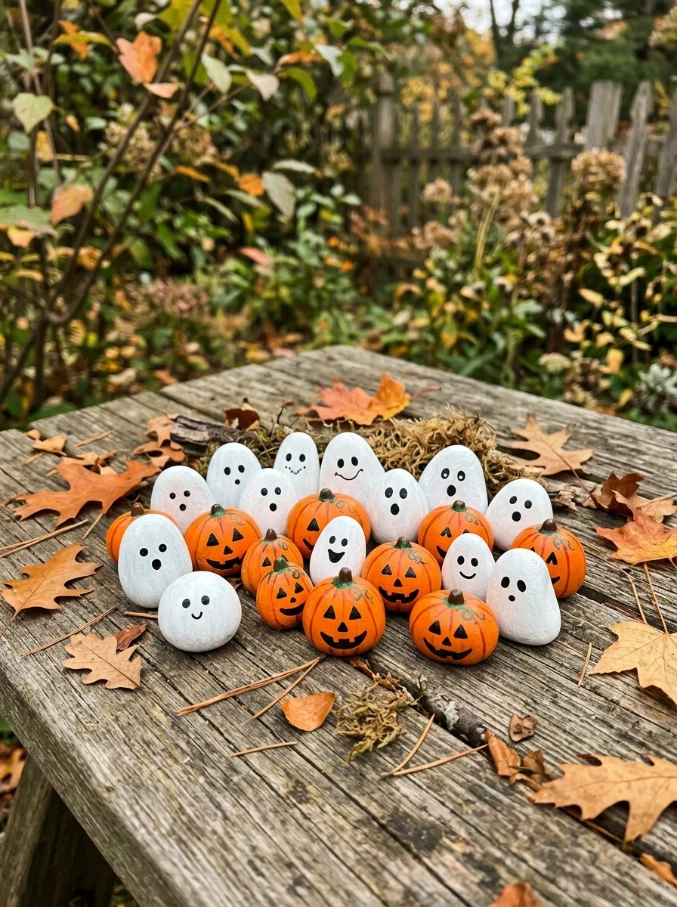
Collect a handful of smooth, flat rocks from the yard or a nearby park, since smooth surfaces hold paint much better than rough ones. Paint them white to make ghosts or orange to make pumpkins, then let the base coat dry fully before adding a simple face with a fine paintbrush or marker.
This craft is a nice excuse to combine an outdoor walk with the actual project, since gathering the rocks becomes part of the fun. Once finished, line the painted rocks along a garden path or windowsill, where they’ll hold up outdoors far better than paper crafts would.
No-Mess and Quick Crafts
16. Tissue paper ghosts
One of the fastest crafts on this whole list.
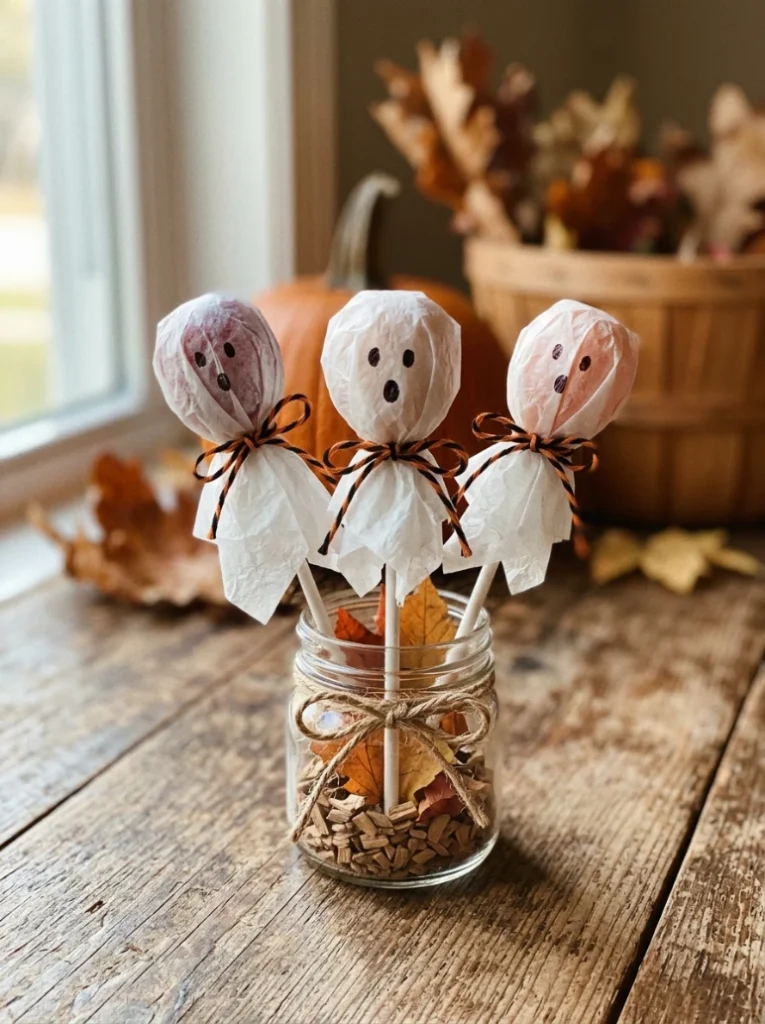
Wrap a square of white tissue paper around a lollipop or a cotton ball to form the ghost’s rounded head shape. Tie it off just below the head with a piece of orange ribbon to create a little neck, then draw a simple face with a black marker.
These take only a couple of minutes each, which makes them a good choice when you need a quick activity to fill a short window of time. They also work well as party favors, since there’s an actual treat hiding underneath the tissue paper.
17. Sticker pumpkin faces
No paint, no glue, just stickers.
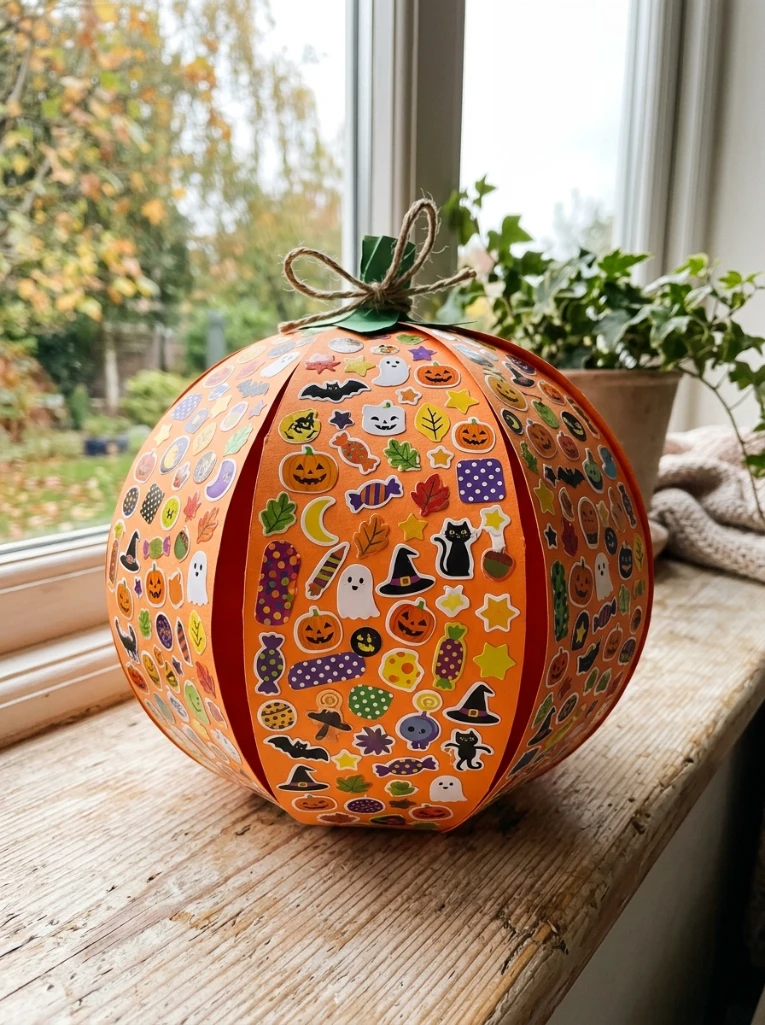
Cut a large pumpkin shape from orange paper ahead of time, then hand it to the kids along with a sheet or two of Halloween stickers. Let them build a face and decorate the pumpkin however they like using only the stickers provided.
This is the easiest craft on the entire list to clean up afterward, since there’s no paint, glue, or drying time involved at any step. It also makes a great backup activity for a car ride, a waiting room, or any moment you need something quiet and mess-free.
18. Yarn-wrapped spiders
A tactile craft that builds fine motor skills.
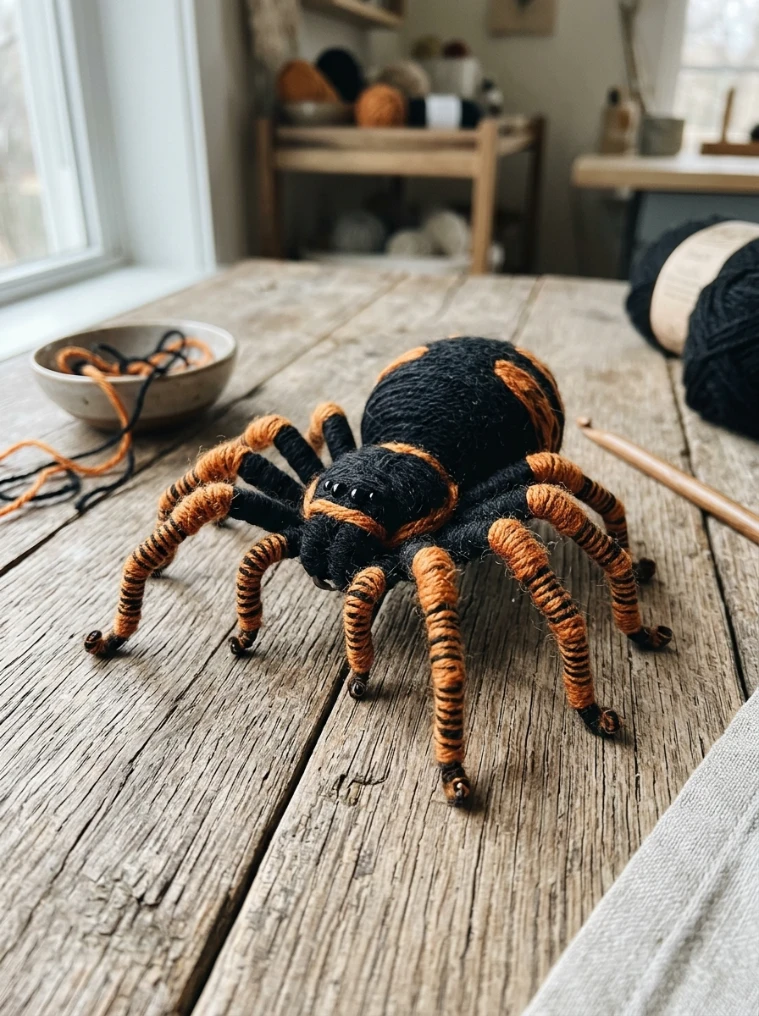
Cut a simple spider shape from stiff cardboard, then give the kids black or orange yarn to wrap around the shape over and over until it’s fully covered. Tie off the end and tuck it into the wrapped yarn so it doesn’t unravel.
Glue on two googly eyes once the wrapping is finished to complete the spider’s face. This craft takes longer than most on this list purely because of the repetitive wrapping, which makes it a good pick for keeping small hands busy on a slow afternoon.
19. Washi tape monster jars
Turns an empty jar into a fun candy holder.
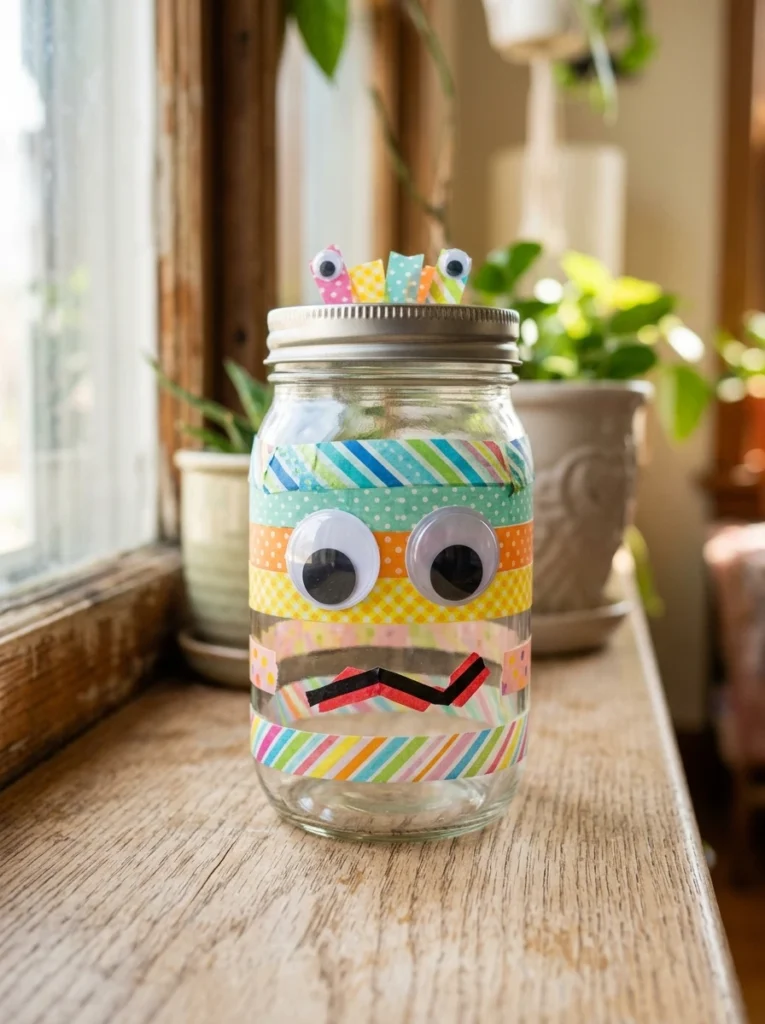
Wash and dry a clean glass jar first, then let the kids stick strips of colorful washi tape around it in whatever pattern they like. Add two googly eyes near the top of the jar to turn the whole thing into a friendly little monster.
There’s no glue drying time needed here, so kids get to see the finished result right away instead of waiting. Fill the jar with candy once it’s decorated, and it works just as well as a homemade gift as it does a decoration for a kid’s own room.
20. Sticker window clings
Decorate the window without any tape or glue at all.
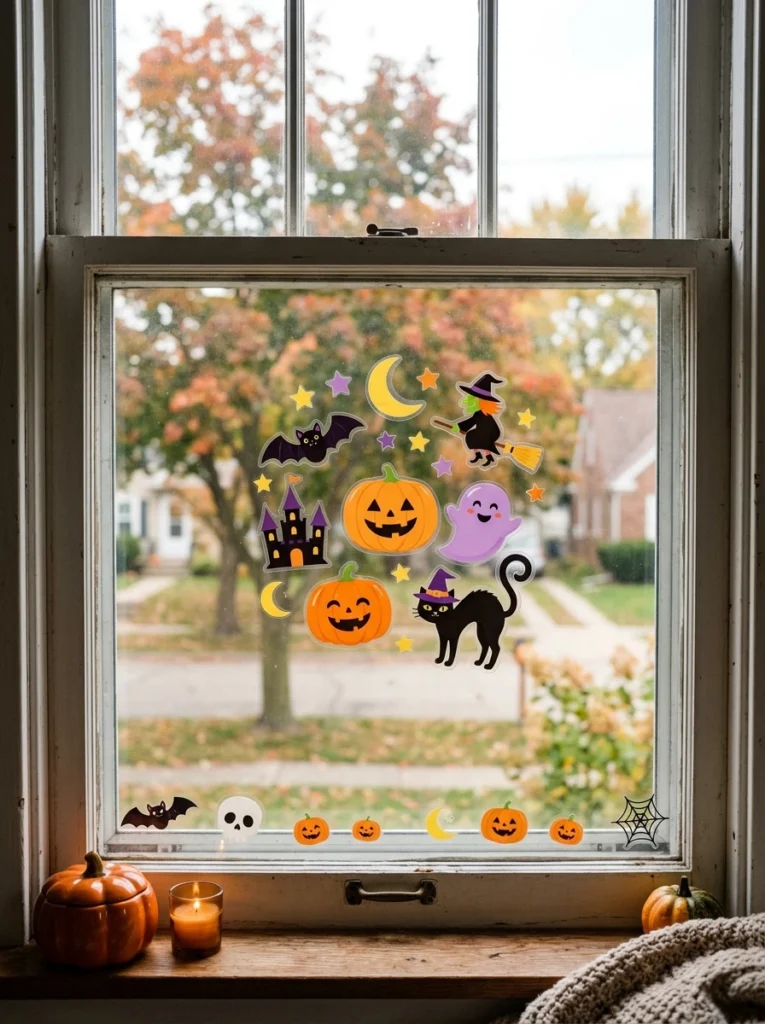
Halloween-themed static clings stick directly to a clean glass window using nothing but static, and they peel off just as easily whenever you’re ready to take them down. Let the kids arrange a whole spooky scene, bats, pumpkins, a witch, across one window in just a few minutes.
This is a particularly good option for a rental home or apartment, since it leaves absolutely nothing behind on the glass. It’s also one of the few crafts on this list that’s really more decorating than crafting, since the pieces come ready-made.
Crafts to Hang and Display
21. Ghost garland
A string of ghosts turns any room into a party.
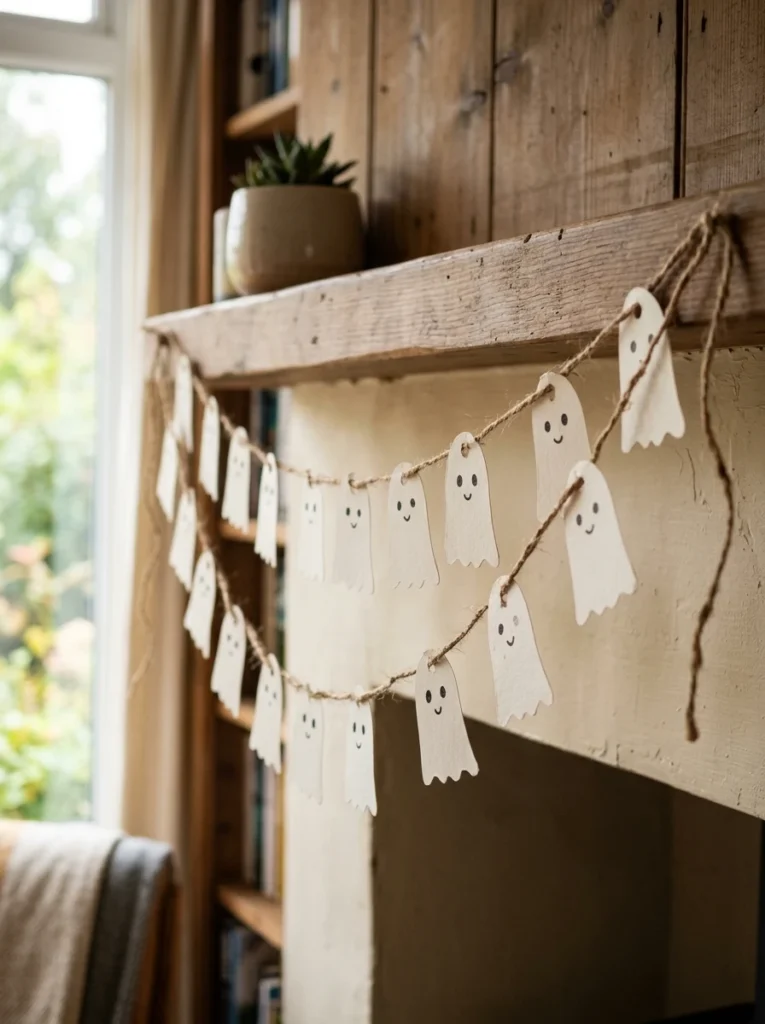
Cut several ghost shapes from white paper using a simple rounded template, then punch a small hole near the top of each one. Thread a length of twine or string through every hole, spacing the ghosts a few inches apart along the line.
Hang the finished garland across a mantel, doorway, or window for an easy decoration that took real effort but very little time. This one scales up or down easily too, add more ghosts for a longer garland or keep it short for a smaller space.
22. Paper bat wall display
A group project that fills a wall fast.
**Image prompt:** Wide shot of many paper bats taped to a wall in a flying formation, natural daylight, realistic group wall decoration detail, no text.
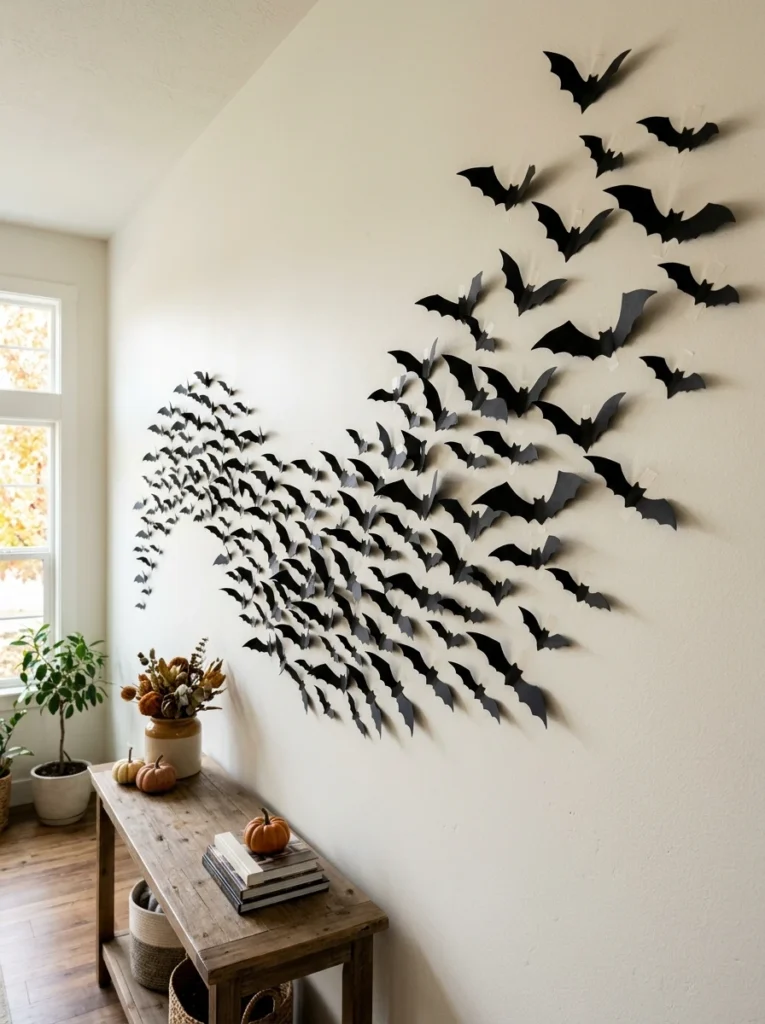
Have each kid cut out a handful of paper bats using a simple template traced onto black paper. Once everyone has their bats ready, tape them to a wall in a scattered, flying formation, some higher, some lower, to make it look like they’re actually in motion.
The more bats added, the better this display looks, so it’s a great project for a classroom or a group of siblings working together. It also fills a large blank wall fast without needing any paint or permanent decoration at all.
23. Popsicle stick candy corn
A quick, colorful craft using stuff from the craft drawer.
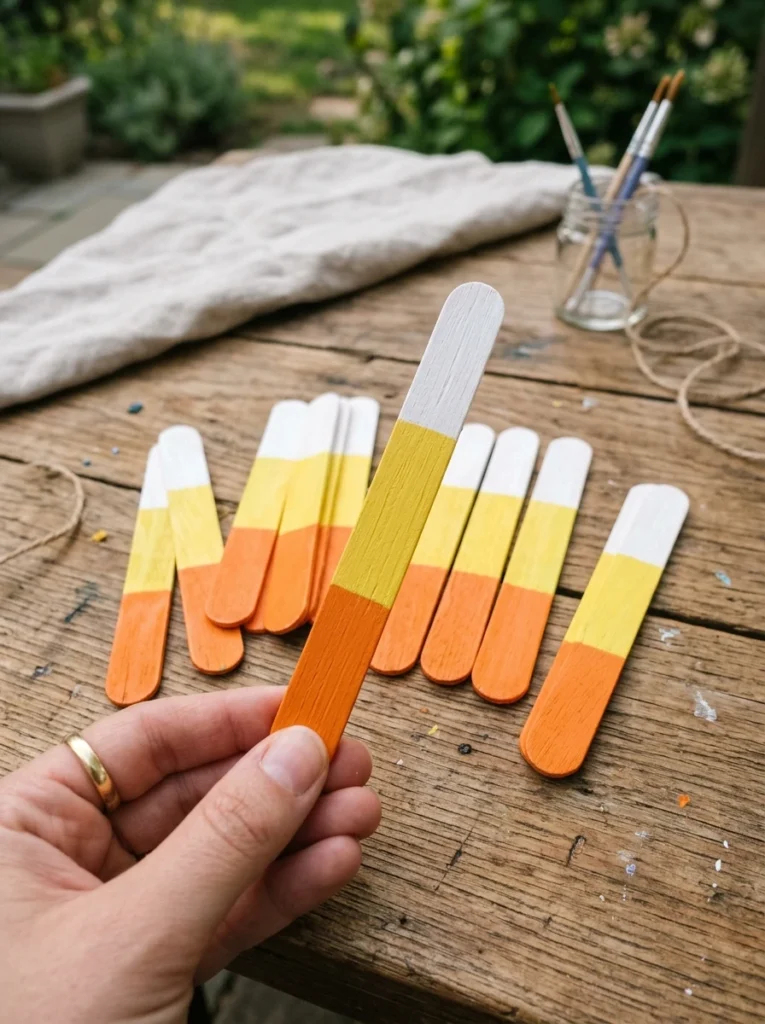
Paint a wooden popsicle stick in three clear sections, yellow at the bottom, orange in the middle, and white at the top, to mimic a classic piece of candy corn. Let each section dry before painting the next one so the colors don’t bleed together.
Once the stick is fully dry, glue a small magnet on the back to turn it into a fridge decoration. Kids can make a whole batch of these in one sitting, since each stick only takes a minute to paint and dries fast between colors.
24. Trick-or-treat bag decorating
Turn a plain bag into a piece of art before the big night.
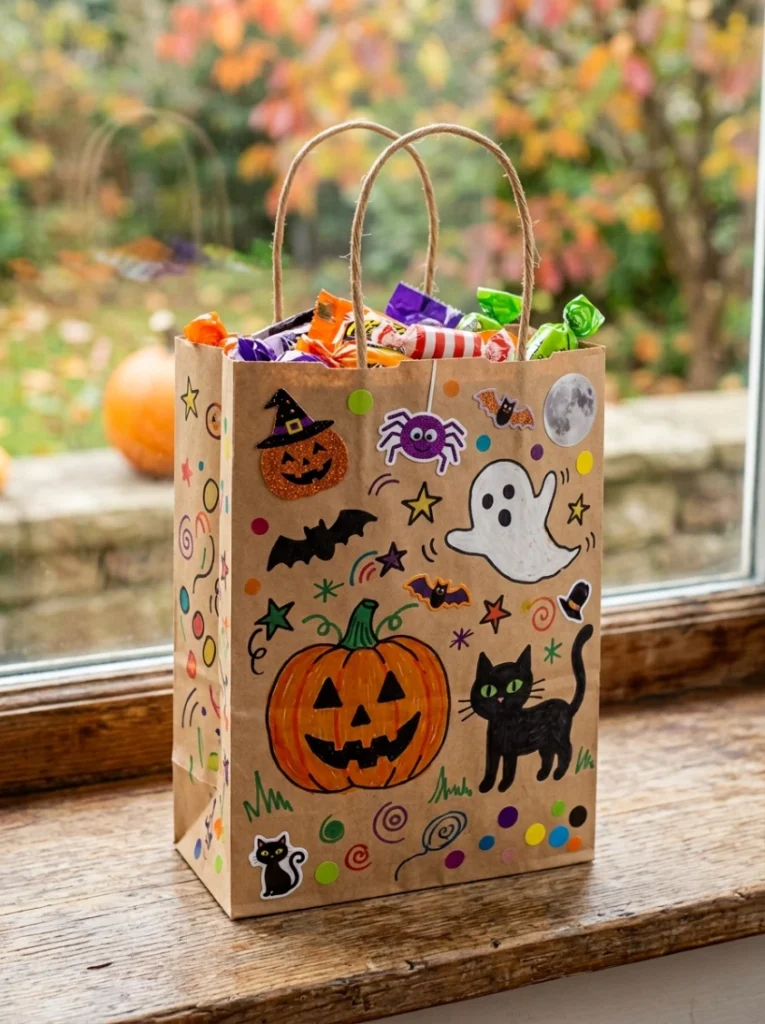
Give each kid a plain paper trick-or-treat bag along with markers, stickers, and any stamps you have on hand. Let them decorate it however they like before the actual trick-or-treating starts, whether that’s a spooky face, their name, or just a pile of stickers.
This adds a bit of extra excitement to Halloween night itself, since kids get to carry something they made rather than a plain store-bought bag. It’s also a quick craft, usually done in fifteen minutes or less, which makes it easy to fit in on the day itself.
25. Paper chain countdown
A craft that keeps giving all month long.
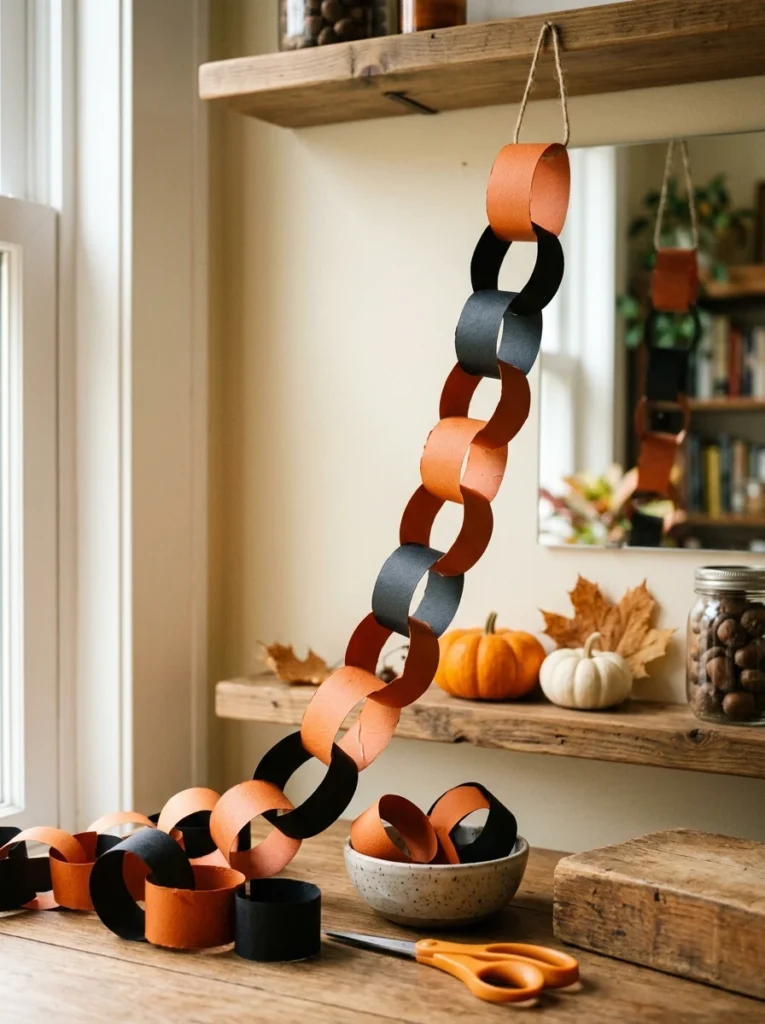
Cut several strips of orange and black paper, then loop them together into a chain, one link for each day left until Halloween. Glue or tape each loop closed before linking the next one through it.
Hang the finished chain somewhere visible, and tear off one link every morning as Halloween gets closer. This craft builds excitement across the whole month rather than just on the day itself, and it pairs nicely once the big day finally arrives with the finishing touches in your Halloween yard display.
Common Mistakes to Avoid
- Picking a craft with small parts for a toddler who still puts things in their mouth.
- Skipping the newspaper or tablecloth before a paint project starts.
- Rushing glue or paint before it’s dry, which usually ruins the best part of the craft.
- Choosing a craft with too many steps for a young kid’s attention span.
Frequently Asked Questions
What’s the easiest Halloween craft for toddlers?
Handprint or fingerprint crafts work well since they only need paint and paper, with no small parts or sharp scissors involved anywhere in the process.
What household items work best for Halloween crafts?
Toilet paper rolls, egg cartons, milk cartons, and paper plates are the most useful, since most homes already have a few of these on hand without needing to buy anything new.
How do I keep a Halloween craft activity mess-free?
Stick to sticker crafts, tissue paper ghosts, or paper cutting projects, which skip paint and glue almost entirely and clean up in seconds.
Conclusion
The best Halloween crafts for kids aren’t the fanciest ones, they’re the ones that get made and actually get used, hung up, or played with long after the glue dries. Pick a few from this list based on your kid’s age and how much mess you’re up for that day, and you’ll have a fun afternoon without a single trip to the store.