A scary front yard doesn’t need a truck full of store-bought props. Some of the best outdoor Halloween displays come from a garbage bag, a few pool noodles, and a trip to the dollar store. The trick is knowing which cheap materials actually look good once they’re outside in the dark.
Most of the ideas below cost under twenty dollars, and several cost almost nothing if you already have the supplies at home. Every one of them leans on the same idea, take an everyday object and give it a spooky twist rather than buying something already built.
Quick Picks
- Best under $15: Cheesecloth ghosts made from styrofoam balls
- Best free option: Blood-splattered plastic sheets taped inside windows
- Best group project: Trash bag spiders with pool noodle legs
- Best lighting trick: Colored cellophane over regular porch lights
Did You Know?
A set of three cheesecloth ghosts, built from styrofoam balls, black paint, and fabric, typically costs under $15 to make, and that same basic technique, wrapping fabric around a shape and adding simple features, shows up again and again across nearly every budget Halloween idea, from ghosts to mummies to monsters.
Before You Start
- Shop the dollar store first. Garbage bags, cheesecloth, foam balls, and pool noodles cover most of what’s on this list.
- Wait to buy pumpkins until closer to Halloween. Prices usually drop as the holiday gets closer.
- Test lighting after dark before the big night. What looks subtle in daylight can look completely different once it’s actually dark outside.
- Bring fabric-based decor in if rain is expected. Cheesecloth and sheets hold up fine in dry weather but sag and stain when soaked.
- Keep a consistent color palette. Sticking mostly to black, white, and orange makes a mix of DIY projects look like one cohesive display.
Ghosts and Spirits
1. Cheesecloth ghosts on styrofoam heads
This is one of the most repeated DIY Halloween projects, and it holds up because it actually looks good in the dark.
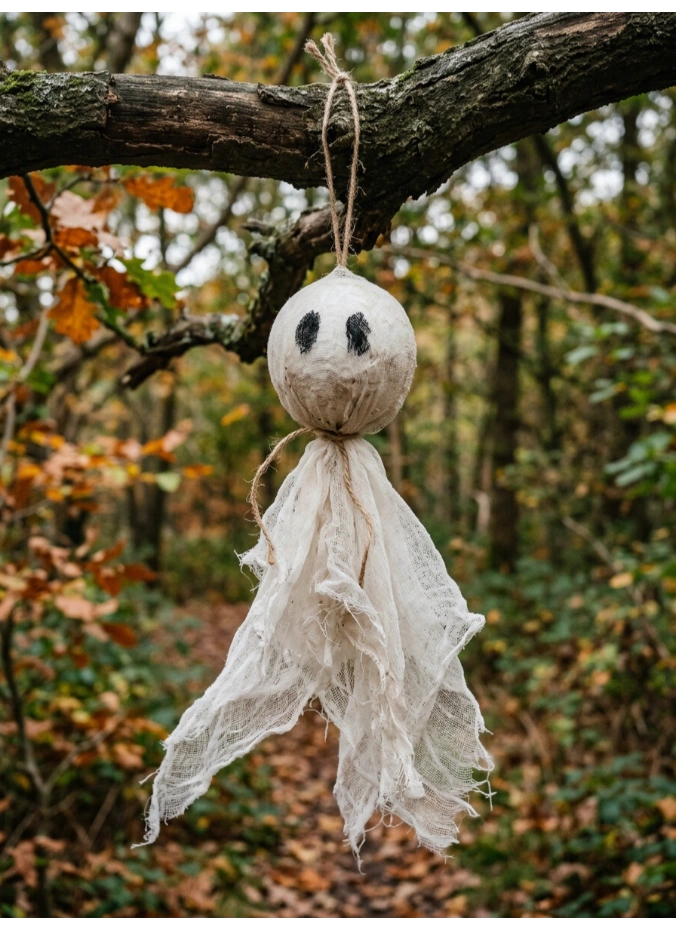
Styrofoam balls, painted black for eyes and wrapped in stiffened cheesecloth, create a floating ghost head that costs under fifteen dollars for a set of three. Hanging them at different heights from a tree branch gives them a more natural, drifting look.
Stiffening the cheesecloth with a diluted fabric stiffener or starch beforehand helps it hold its draped shape instead of going limp overnight.
2. Classic bedsheet ghosts on a frame
The most traditional Halloween decoration still works because it’s simple and instantly recognizable.
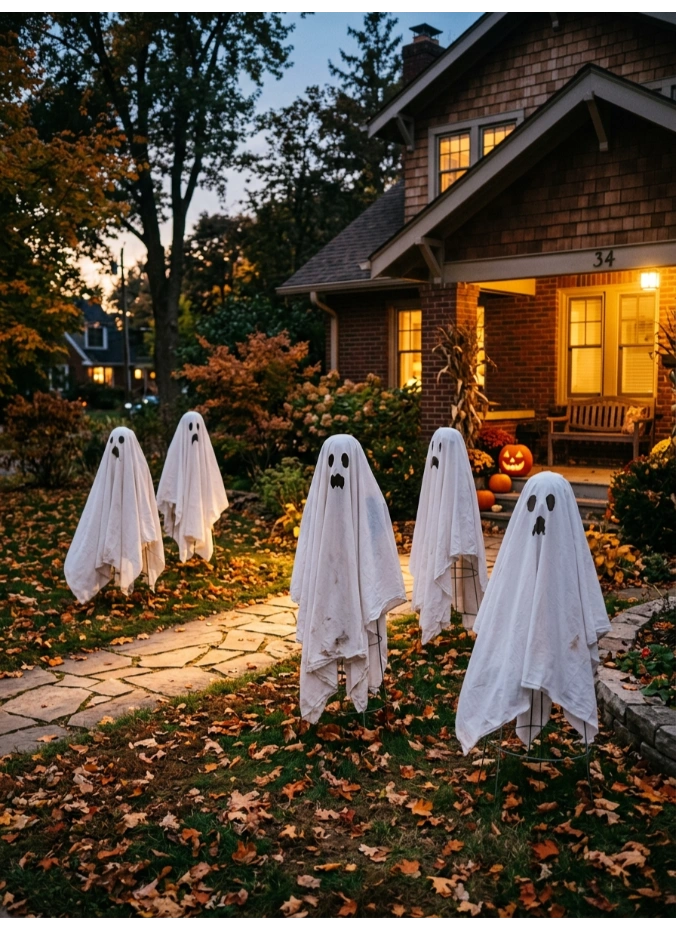
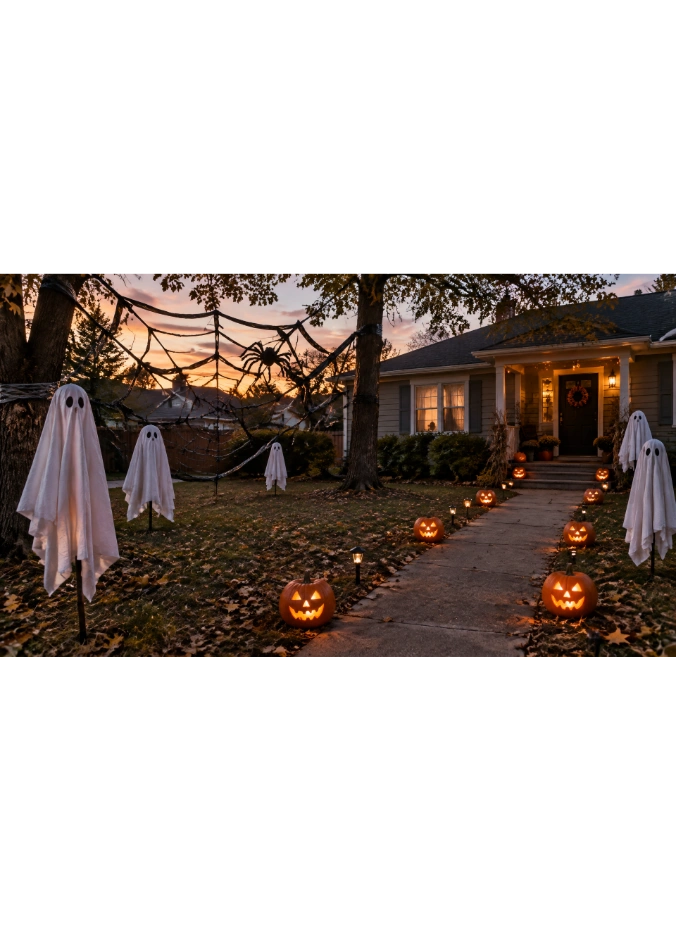
An old white sheet, draped over a simple wire frame or a tomato cage and tied off at the neck, creates a life-size ghost using materials most households already own. A string of small lights tucked inside makes the whole figure glow after dark.
Using a tomato cage as the frame gives the ghost a rounded, standing shape without needing to build anything from scratch.
3. Milk jug ghosts with lights inside
A recycling project that doubles as functional pathway lighting.
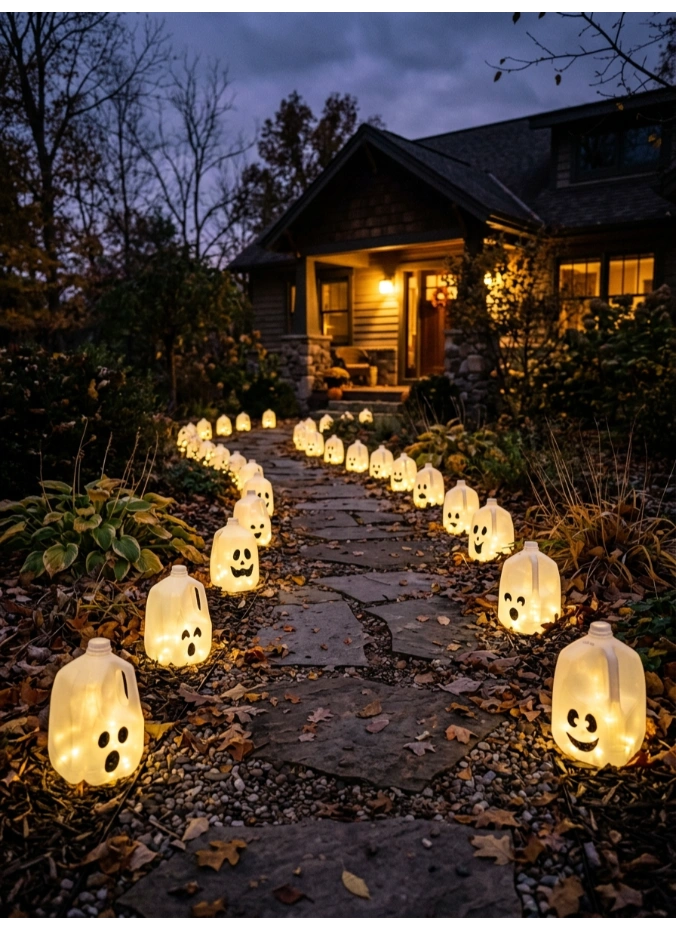
An empty plastic milk jug, with a simple ghost face drawn or painted on, glows softly once a battery-powered tea light or string of lights goes inside. Lining several along the front walkway turns a practical recycling project into real path lighting.
This is one of the cheapest ideas on the entire list, since the main material is something most households throw away weekly.
4. A mason jar mummy
A tiny decoration that works well scattered across a porch railing or steps.
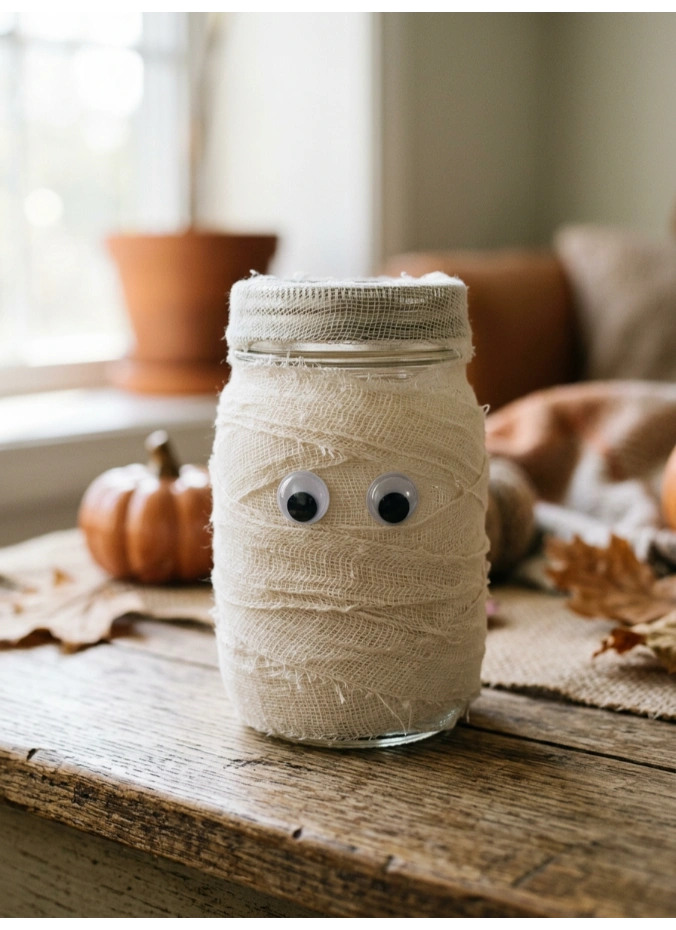
Wrapping a plain mason jar in gauze bandages, then adding two googly eyes peeking through the wrap, turns an ordinary jar into a mummy, and a tea light inside gives it a soft glow after dark. This scales well, since a few jars grouped together look far more intentional than just one on its own.
Leaving small gaps in the gauze wrap where the eyes show through makes the mummy face read more clearly at a glance.
5. A ghost circle made from tomato cages
A group of ghosts arranged together makes a stronger visual statement than one alone.
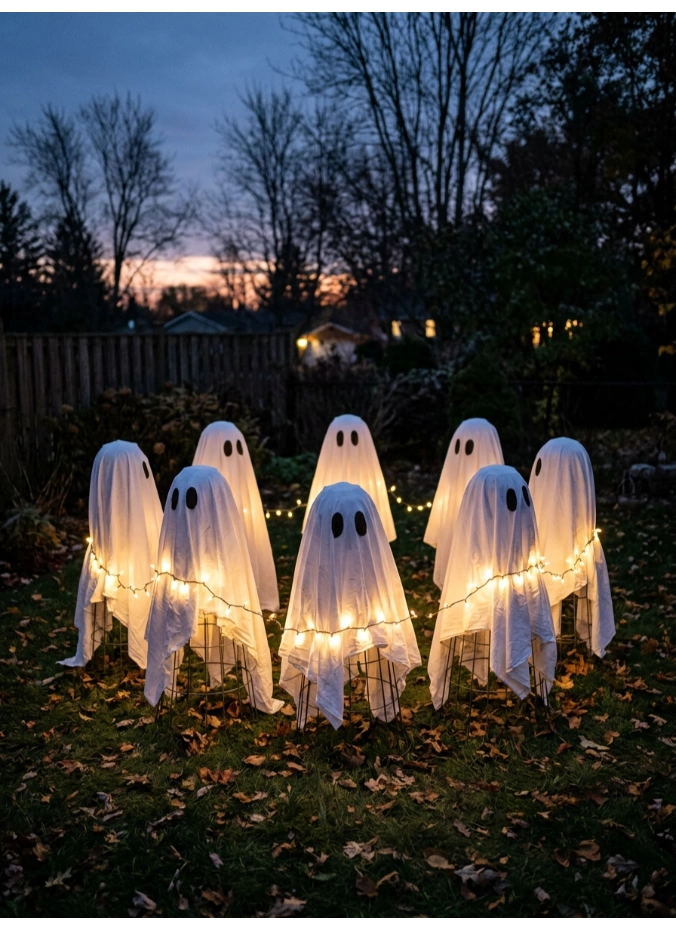
Several sheet ghosts, each built the same way on a tomato cage frame, arranged in a loose circle or cluster in the yard, create the effect of a small gathering rather than a single scattered figure. Running one strand of string lights through the whole group ties them together visually.
This project runs about fifteen dollars total for a full circle, since sheets and cages are inexpensive and often already on hand.
Spiders and Webs
6. Trash bag spiders with pool noodle legs
A five-dollar project that makes a genuinely large, dramatic spider.
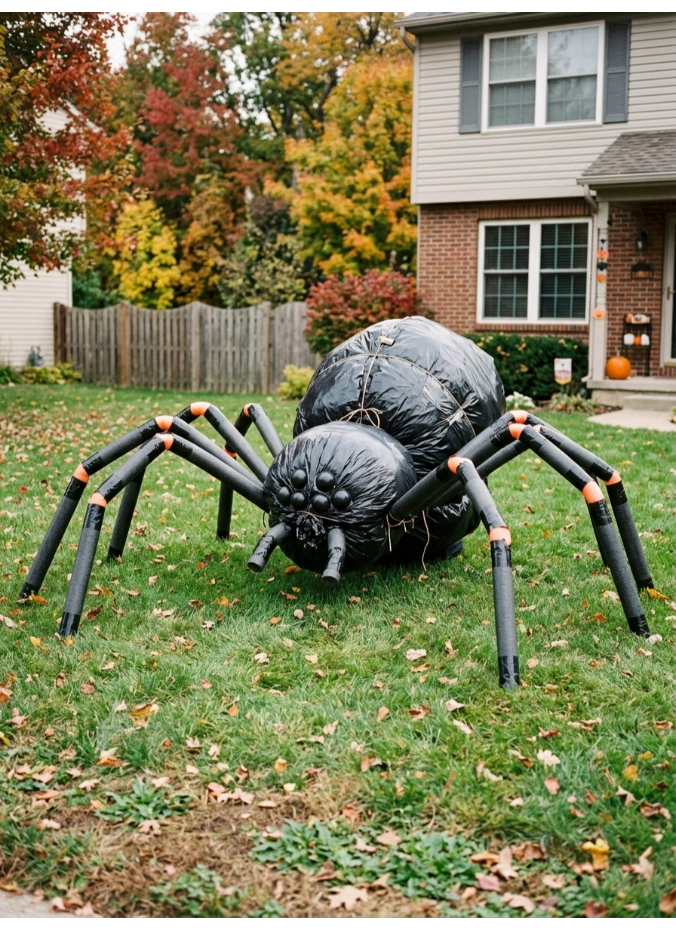
Black garbage bags, stuffed with newspaper or plastic bags and tied off into a round body, combine with pool noodles cut and bent into eight legs to build a spider large enough to genuinely startle guests. Adding two small white circles for eyes finishes the look.
This whole project typically costs around five dollars, making it one of the best value ideas on this entire list.
7. A garbage bag spiderweb
A stretched, torn trash bag creates a surprisingly convincing web texture.
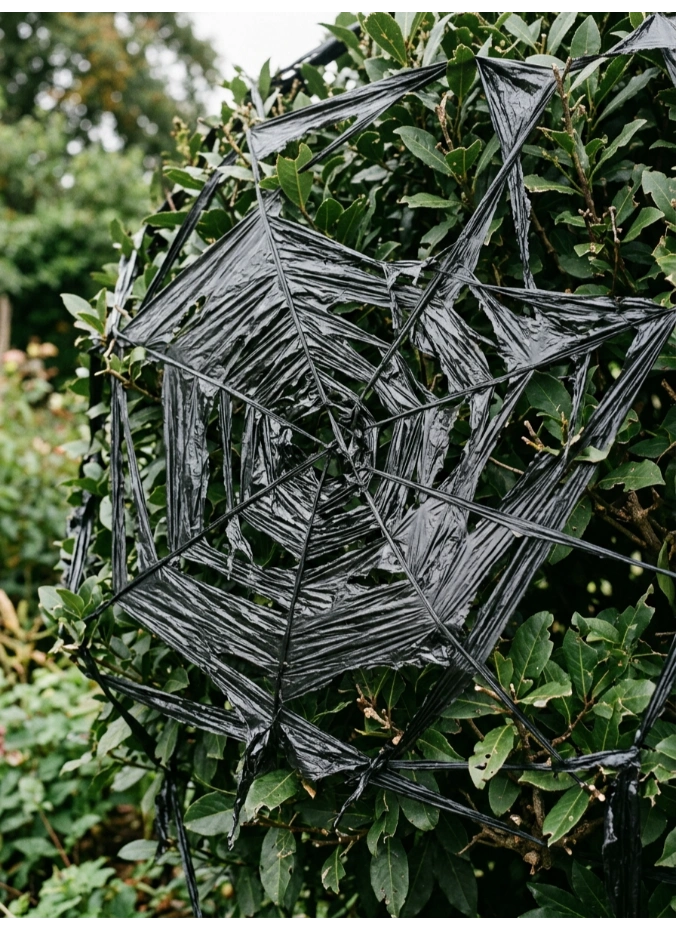
Cutting and stretching a black garbage bag over a bush or railing, then tearing small holes throughout, creates a rough, webbed texture that reads as genuinely creepy once it catches evening light. This costs almost nothing and takes only a few minutes to assemble.
Layering a second stretched bag at a slight angle over the first adds more depth to the web effect.
8. A doormat spiderweb
A small, clever detail right at the entrance.
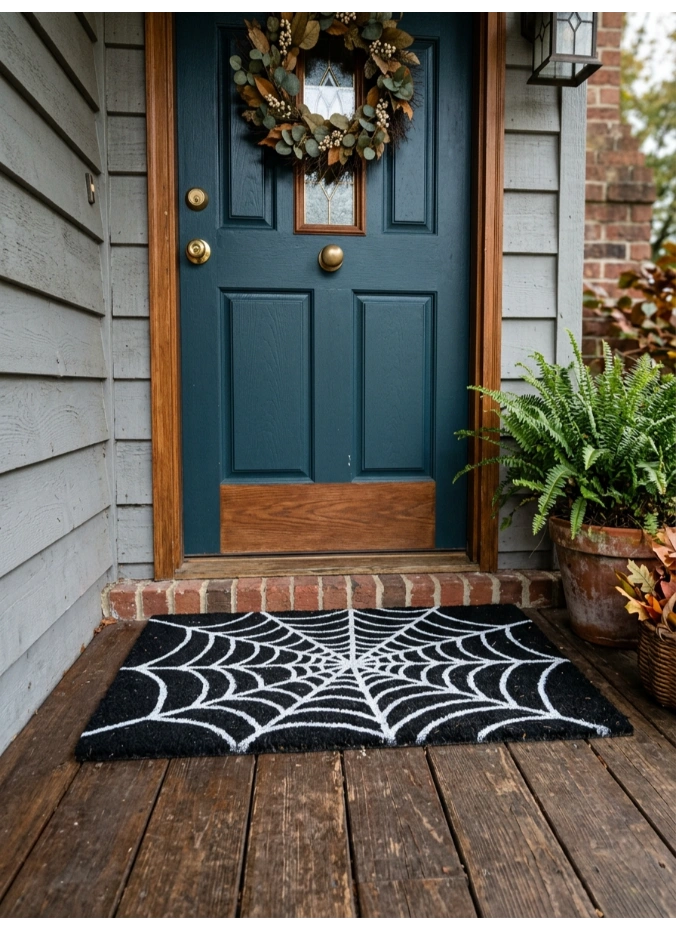
A plain black half-circle doormat, painted with a simple white spiderweb pattern using fabric paint and a thin brush, turns a practical item into a themed decoration for under ten dollars. This detail greets every trick-or-treater right at the first step.
Painting the web freehand with light pencil guidelines first makes the lines easier to keep even.
9. A framed spiderweb using a thrifted frame
An unusual take on the classic wreath spot beside the door.
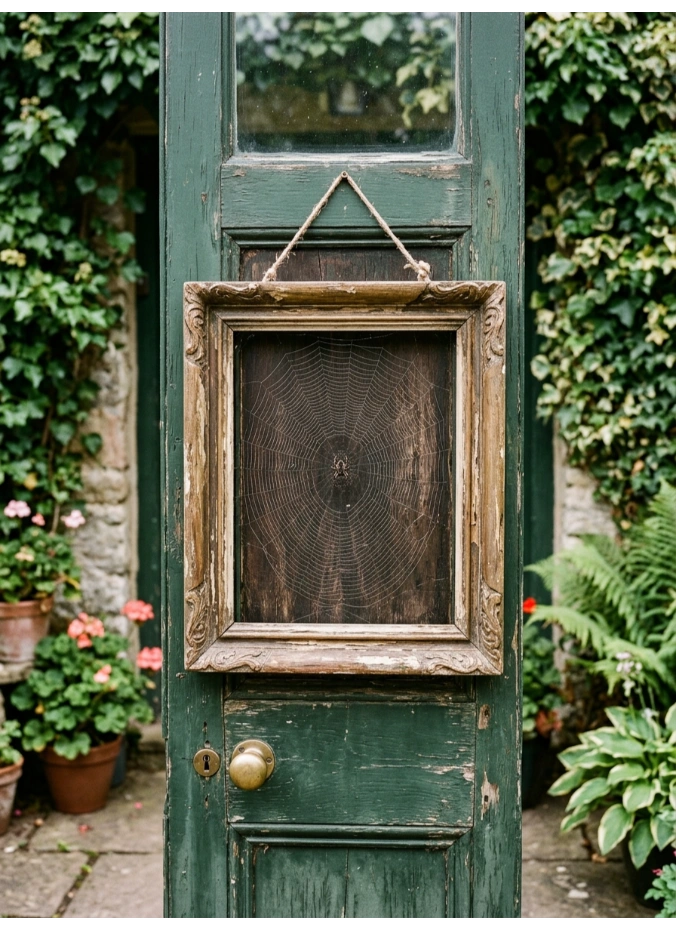
A thrifted or dollar store picture frame, strung with black yarn or thin rope in a web pattern across the opening, makes a genuinely different alternative to a traditional wreath. A small plastic spider glued to one corner finishes the effect.
This project works well hung right where a wreath would normally go, giving guests something unexpected to notice at the door.
10. Draped Spanish moss for texture
A material that looks creepy no matter how it’s used.
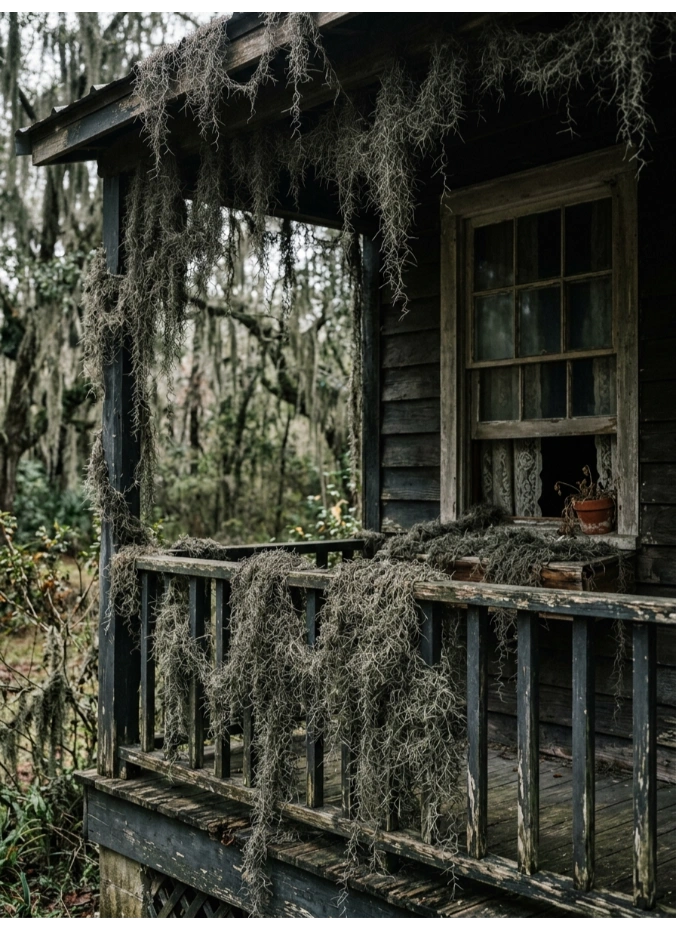
Spanish moss, especially the browner and more weathered-looking varieties, drapes naturally over windowsills, railings, and porch furniture to add an eerie, overgrown texture without any construction at all. This is one of the simplest ideas on this list, since it only requires draping the material where you want it.
Layering it over an existing spiderweb or pumpkin display adds a second texture without much extra effort.
Pumpkins and Jack-o-Lanterns
11. A DIY wood pumpkin
A rustic, reusable alternative to a real carved pumpkin.
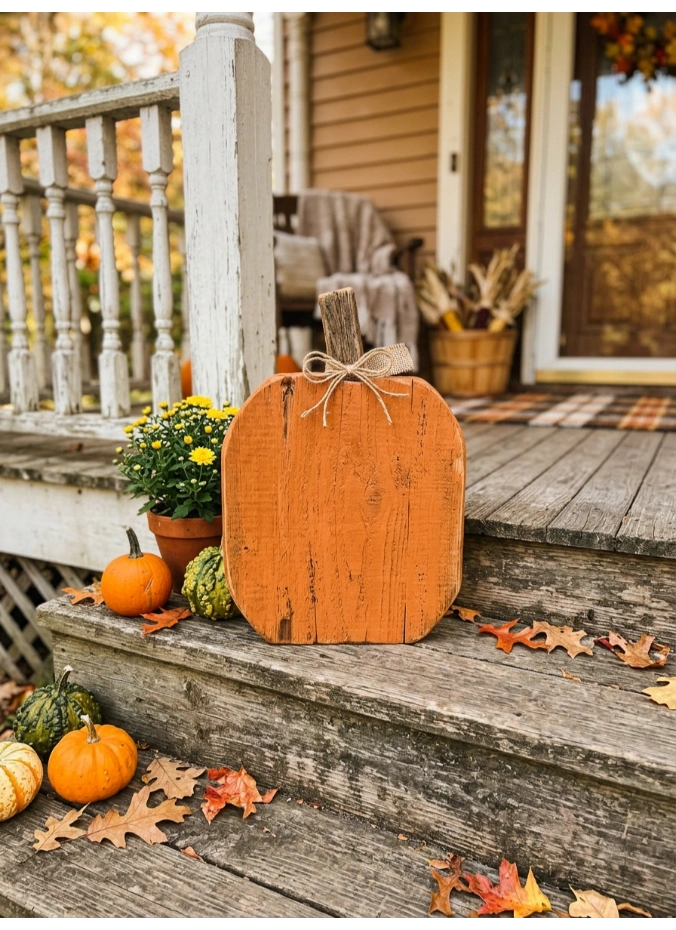
A pumpkin shape, cut from scrap wood and painted orange with a simple black stem, gives you a decoration that comes back out every year without ever rotting on the porch. This is a strong option for anyone who wants the pumpkin look without the annual grocery trip.
Sanding the edges smooth before painting keeps the finished piece looking clean rather than roughly cut.
12. Bandana-wrapped pumpkins
A colorful, no-carve option using fabric instead of paint.
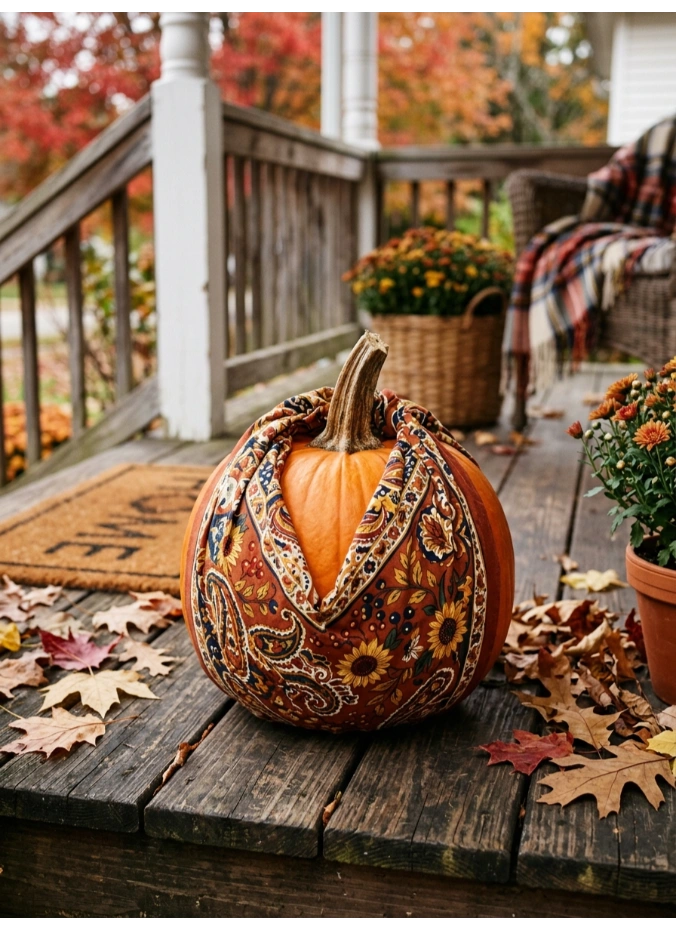
Wrapping a real or faux pumpkin in a bandana, tied off at the top like a small bundle, adds pattern and color without any carving or paint at all. This works especially well for a fall-leaning display that isn’t purely spooky.
Mixing a few different bandana patterns across several pumpkins keeps the display from looking too uniform.
13. Stacked light-up pumpkins
A glowing tower that works as a real focal point after dark.

Stacking three plastic pumpkins in decreasing sizes, with a strand of orange string lights threaded through the middle, builds a glowing tower that reads as a real statement piece once the sun goes down. This is a strong pick for anyone without much porch floor space to spare.
Drilling a small hole through the center of each pumpkin makes it easy to thread the light strand straight through.
14. Dollar tree pumpkin wreath
Small dollar store pumpkins become a full wreath with almost no cost.
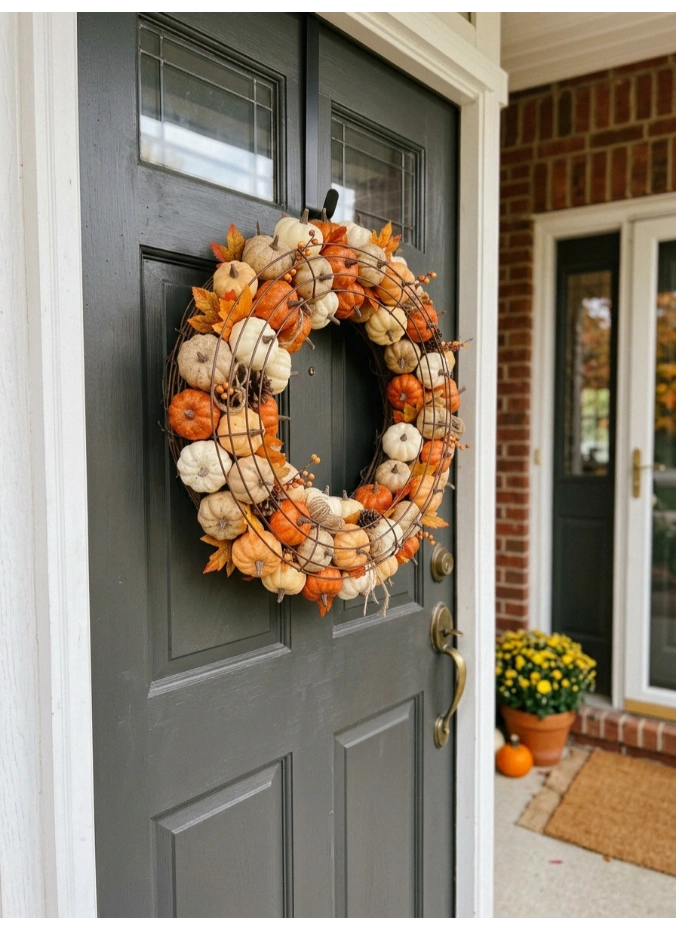
Small foam pumpkins from the dollar store, glued around a plain wire or foam wreath base, create a full seasonal wreath for a fraction of what a store-bought one costs. Adding a few plastic leaves or a simple ribbon bow finishes the look.
Gluing the pumpkins at slightly varied angles rather than in a perfectly even row gives the wreath a more natural look.
15. The upside-down pumpkin man
A silly, memorable twist that guests actually stop to look at.
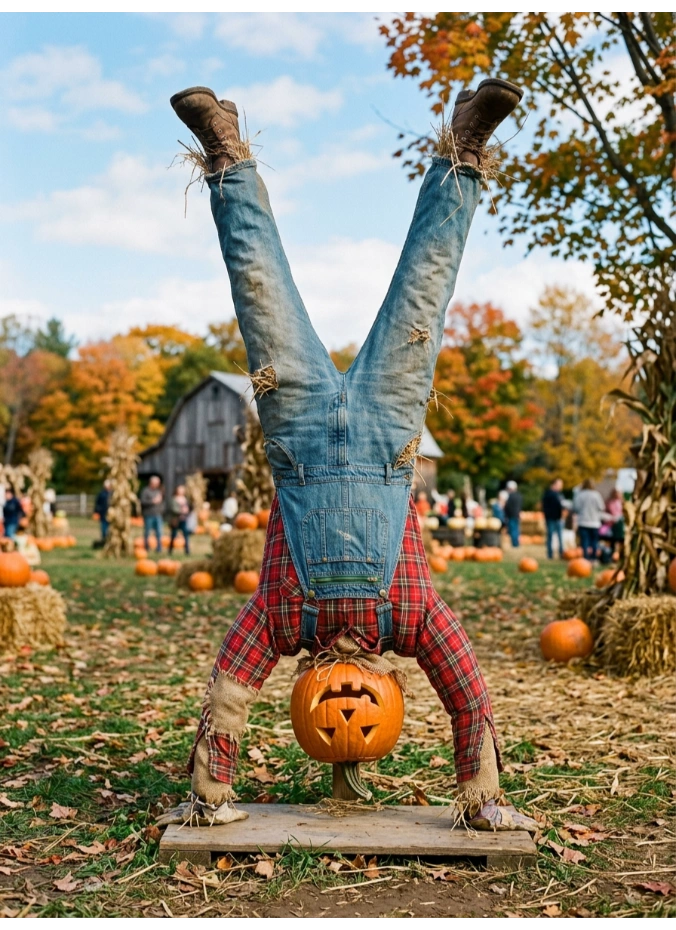
A carved jack-o-lantern, attached upside down to a scarecrow-style body posed like it’s doing a handstand, gives the yard a genuinely funny, unexpected detail that most displays don’t have. This idea works especially well as one standout piece rather than something repeated multiple times.
Building the scarecrow body from old clothes stuffed with straw or leaves keeps the whole project practically free. For more carving techniques to use on the pumpkin itself, a set of kid friendly pumpkin carving ideas can help if kids want to help build this one too.
Lighting Effects
16. Colored cellophane over porch lights
The fastest, cheapest lighting trick on this entire list.
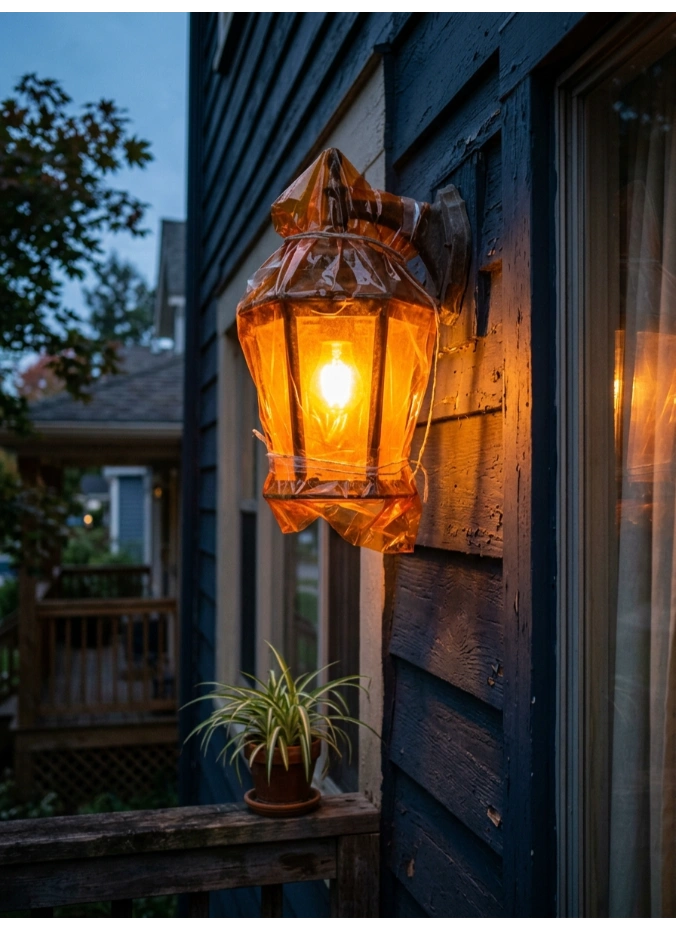
A sheet of orange or purple cellophane, secured over an existing porch light fixture, instantly changes the whole entrance’s mood for less than five dollars. This is one of the easiest ways to make a normal porch light feel seasonal without buying a single new fixture.
Securing the cellophane loosely, rather than tightly, avoids any heat buildup from the bulb underneath it.
17. Glow stick path markers
A simple, safe way to light a walkway for trick-or-treaters.
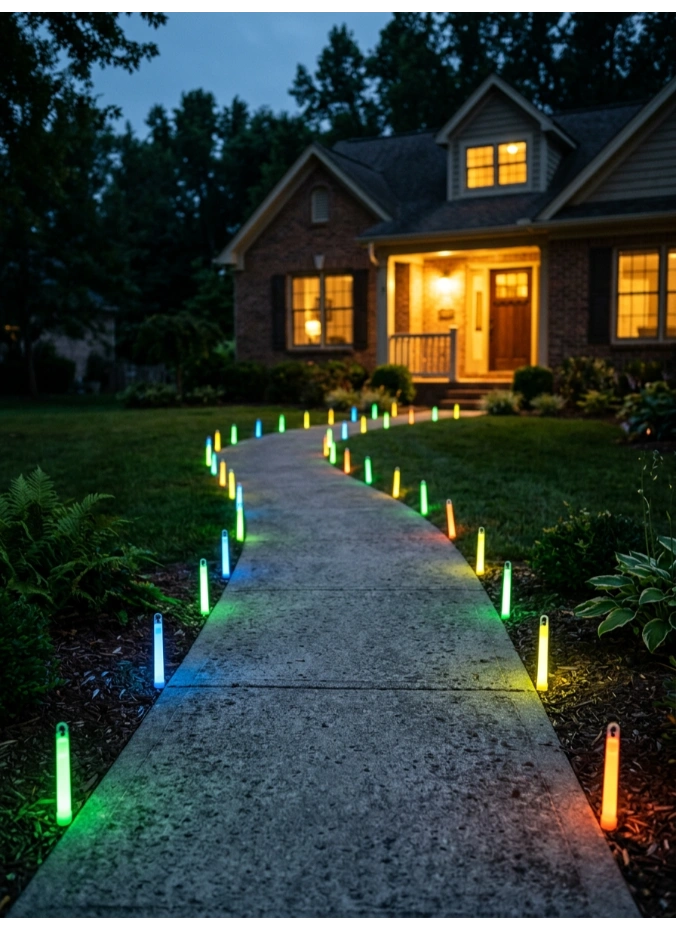
Glow sticks, collected gradually from the dollar store or bought in bulk, line the walkway and activate right before trick-or-treaters arrive, giving the path a genuinely spooky green or orange glow. This is a safe lighting option for a yard with younger visitors, since there’s no heat or electrical cord involved.
Buying a bulk pack ahead of time works out considerably cheaper than picking up a few at a time throughout the month.
18. LED tea lights in paper bag luminarias
A classic lighting trick adapted for Halloween.
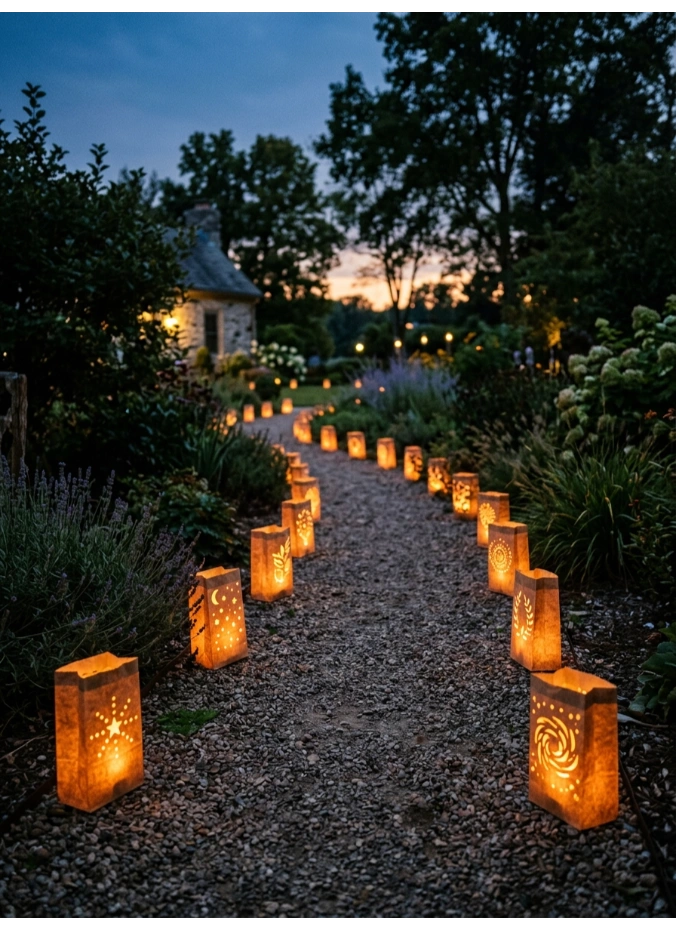
Small brown paper bags, weighted with a bit of sand and cut with simple shapes like bats or stars, glow softly once a battery-powered tea light goes inside each one. Lining a whole walkway with these creates a warm, flickering path without any real fire risk.
Using LED rather than real tea lights matters here, since paper and an open flame don’t mix well outdoors.
19. Window silhouette projections
A free effect using a device you already own.

Playing a looping silhouette video on a tablet or laptop, angled to project onto the inside of a window, creates a moving shadow effect that people passing by can see from the street. This is a completely free option, since it only needs a device you already have.
Turning off other interior lights near that window makes the silhouette read much more clearly from outside.
Signs and Finishing Touches
20. A cheap DIY welcome sign
A single sign ties the whole display together.

A piece of scrap wood or a thrifted sign, painted with a simple phrase like “Enter if you dare,” gives the whole yard a clear focal point that pulls the rest of the decorations together. This costs very little if you already have leftover paint and wood on hand.
Placing it near the start of the walkway sets the tone before guests even reach the rest of the display.
21. A haunted birdhouse village
A clever way to fill empty spots in the lawn.

Small birdhouses, painted black and gray with a tiny skeleton or bat added to each one, mounted on stakes across the lawn, create a whimsical haunted neighborhood that fills gaps a single large prop can’t reach. This is a great filler project for a yard that already has a few bigger pieces but feels a little sparse in between.
Grouping several birdhouses at slightly different heights makes the little village look more natural.
22. A gravestone archway entrance
A bigger project that makes a real statement at the front walk.
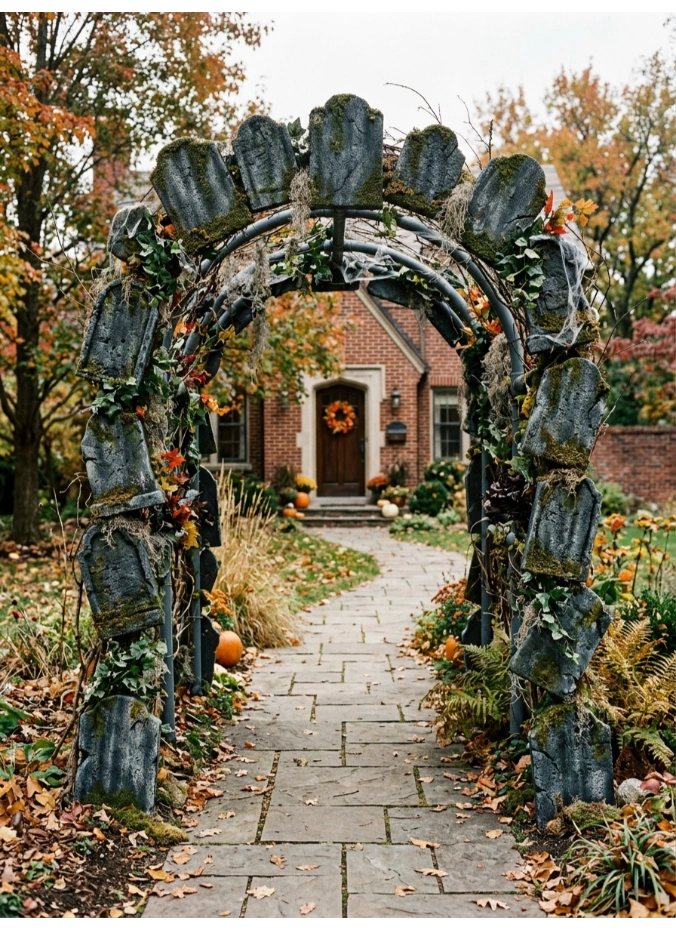
An arch built from PVC pipe, covered in foam gravestones and spray-painted gray, creates a dramatic entrance piece for the front path, especially with a simple sign reading something like “Enter if you dare” attached to the top. This is one of the more involved projects on this list, but it makes a genuinely memorable first impression.
Anchoring the base of the arch with weighted buckets keeps it stable if the wind picks up on Halloween night. For a full look at pulling the whole display together, a broader guide to Halloween yard ideas covers layout and additional styling beyond just the entrance.
Common Mistakes to Avoid
- Buying pumpkins too early in the season, when prices are usually higher than closer to Halloween.
- Using real candles in paper or fabric decorations outdoors instead of battery-powered LED lights.
- Leaving fabric-based decor out in the rain, which causes sagging and staining overnight.
- Mixing too many different colors across projects instead of sticking mostly to black, white, and orange.
Frequently Asked Questions
What’s the cheapest DIY outdoor Halloween decoration?
Trash bag spiders and stretched garbage bag spiderwebs cost only a few dollars and use materials most households already have.
How do I keep DIY Halloween decorations from getting ruined by rain?
Bring fabric items like cheesecloth ghosts and sheets inside before rain, and choose weather-resistant materials like plastic and foam for anything left outside overnight.
What household items work best for DIY Halloween decor?
Garbage bags, milk jugs, pool noodles, cheesecloth, and mason jars cover most of the classic budget projects, and all are either free or already at home.
Conclusion
A genuinely spooky yard doesn’t need a big budget, it needs a few clever twists on ordinary materials: a garbage bag turned into a spider, a milk jug turned into a glowing ghost, a bedsheet turned into a floating figure. Pick three or four ideas from this list that fit your yard’s layout, keep the color palette simple, and let the details do the work once the sun goes down.