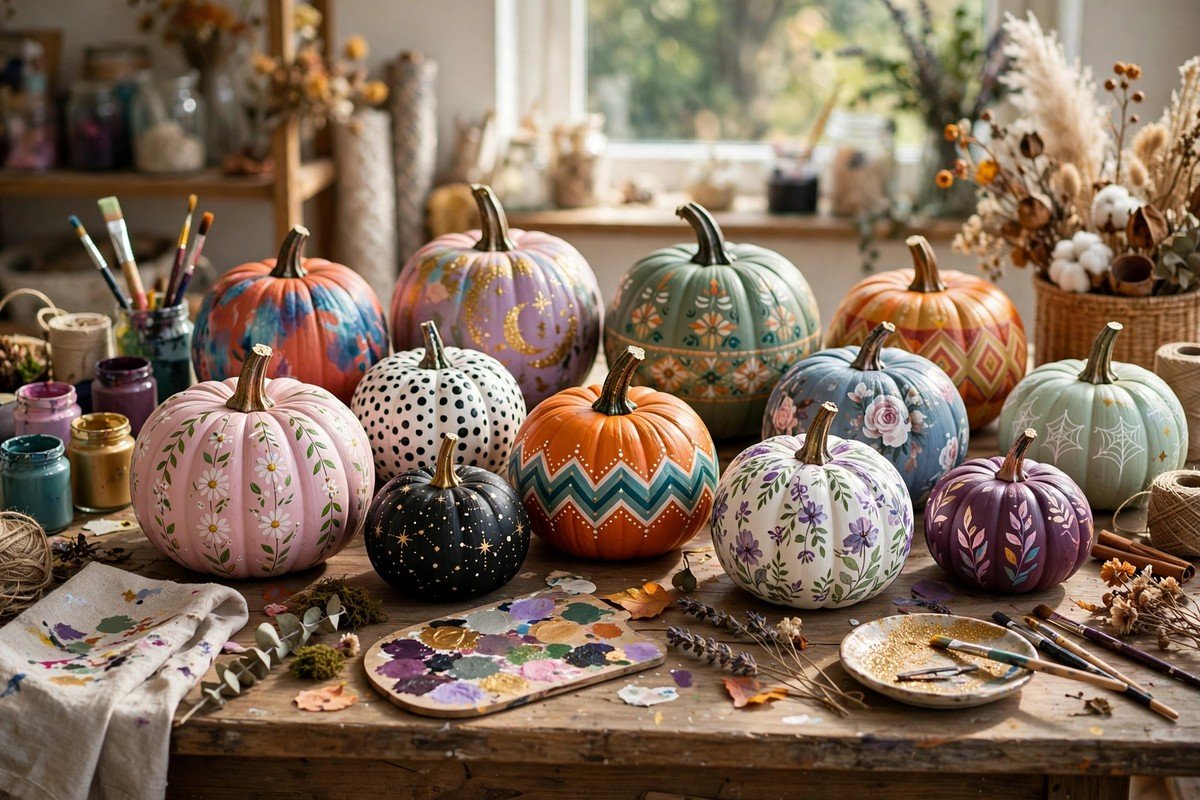
Painting pumpkins beats carving them in almost every way. No sharp tools, no slimy guts, no rotting in three days. These 27 ideas turn plain pumpkins into art that lasts all season long.
All you need is acrylic paint ($1 a bottle at craft stores), some brushes, and a free afternoon. Kids can do most of these safely. Your pumpkins are about to get a serious upgrade.
Quick Picks
- Use acrylic paint: It sticks to pumpkin skin and dries fast. A $1 bottle covers 2 to 3 small pumpkins.
- Start with white: A white base coat makes every color pop. One coat of white primer spray saves you two coats of color.
- Seal when done: A clear matte sealer ($6) protects your art from rain and adds weeks of life.
- Paint the stem too: A gold or black stem looks finished. A green stem looks like you forgot.
- Work in thin coats: Two thin coats beat one thick gloppy one. Let each coat dry 20 minutes.
Did You Know?
Painted pumpkins last 2 to 3 times longer than carved ones because the skin stays intact and keeps moisture in. A carved pumpkin rots in about a week, but a painted one can look great for a month. Museums have displayed painted gourds that lasted entire seasons.
Before You Start
- Wash the pumpkins: Wipe each one with a damp cloth. Paint sticks poorly to dusty, waxy skin.
- Cover your table: A plastic tablecloth or old sheet saves your furniture. Acrylic paint does not wash out of wood.
- Pour small amounts: Put quarter-sized puddles on a paper plate. You waste less and colors stay clean.
- Keep wipes handy: Baby wipes fix mistakes fast while paint is wet. Dried mistakes need a repaint.
- Let kids wear smocks: An old adult t-shirt works perfectly. Acrylic on clothes is permanent.
Classic Painted Faces

1. Traditional Jack Face
The classic, minus the knife.
Paint the traditional triangle eyes and jagged mouth with black acrylic. Use a steady hand or a printed stencil. It reads as Halloween from across the street.
Outline in white first as a guide. Pro tip: make the mouth slightly crooked because perfect symmetry looks less handmade and charming. Prefer carving over painting? Try these kid-friendly pumpkin carving ideas.
2. Goofy Grin Face
Give your pumpkin a personality transplant.
Paint big round eyes and an oversized lopsided grin. Add raised eyebrows for surprise. This one makes kids laugh every time they see it.
Use a small round brush for the details. Pro tip: paint the teeth separately in white after the black mouth dries.
3. Vampire Fang Face
Two white fangs change everything.
Paint the whole pumpkin deep purple or black. Add white eyes and two sharp fangs dripping red paint drops. Spooky and simple.
Let the red drips run naturally downward. Pro tip: a black pumpkin with white fangs shows up best at night.
4. Witch Face Pumpkin
She is green, she is grumpy, she is perfect.
Paint the pumpkin witch-green. Add a black pointed hat (paint it right on or glue a mini hat). Paint warts, wrinkles, and a crooked smile. Big nose is mandatory.
Use a dry brush for wrinkle lines. Pro tip: glue on googly eyes instead of painting them for extra character.
5. Ghost Face Pumpkin
The friendliest face in the patch.
Paint the pumpkin white. Add two black oval eyes and an open oval mouth. That is the whole design, and it works every single time.
Keep the features large and centered. Pro tip: cluster three ghost pumpkins together and they look like they are chatting.
6. Scaredy Cat Face
Wide eyes and whiskers for the win.
Paint the pumpkin orange. Add big white eyes with black pupils, a pink triangle nose, and long black whiskers. Glue on paper ears at the top.
Cut ears from black felt for durability. Pro tip: paint the whiskers last because they cross over everything else.
7. Monster Mash Face
One eye, three eyes, no rules.
Paint a wild monster face: mismatched eyes, zigzag mouth, maybe horns. The weirder the better. Kids love designing their own monsters.
Let kids go completely free on this one. Pro tip: glow-in-the-dark paint on the eyes makes it spooky after sunset.
Patterns and Textures

8. Polka Dot Delight
Dots are foolproof and always look great.
Paint the pumpkin a solid base color. Add dots in a contrasting color using a pencil eraser as a stamp. Even rows or random scatter both work.
Dip the eraser lightly to avoid blobs. Pro tip: metallic gold dots on a black pumpkin look expensive.
9. Chevron Stripes
Zigzags give pumpkins a modern edge.
Tape chevron stripes with painter’s tape. Paint between the lines in your chosen color. Peel the tape while the paint is slightly tacky for crisp edges.
Measure the tape spacing with a ruler first. Pro tip: two-tone chevrons in cream and gray fit farmhouse decor perfectly.
10. Buffalo Check Plaid
The coziest pattern in the patch.
Paint the pumpkin white. Add wide black horizontal and vertical stripes to create the check. It matches every fall blanket you own.
Use a wide flat brush for straight lines. Pro tip: red and black buffalo check is the classic, but try navy and white for a twist.
11. Lace Stencil Overlay
Real lace makes the fanciest stencil you will ever use.
Wrap a piece of lace tightly around the pumpkin. Dab paint over it with a sponge. Remove the lace to reveal the delicate pattern underneath.
Hold the lace firmly so it does not shift. Pro tip: white paint over a dark pumpkin gives the strongest lace effect.
12. Ombre Fade
Fade from dark to light like a sunset.
Paint the bottom dark and blend upward to a lighter shade while wet. Work fast with a dry brush to blur the transition. Three shades maximum.
Blend on the pumpkin, not on the palette. Pro tip: orange to cream ombre looks like a glowing ember.
13. Chalkboard Message
Write a new message every day.
Coat the pumpkin in chalkboard paint ($8 a can). Once dry, write messages with chalk markers. Boo, welcome, or the date all work.
Season the surface by rubbing chalk all over first. Pro tip: keep a damp cloth nearby because chalk messages smudge in rain.
14. Confetti Splatter
Flick paint like a pro and embrace the mess.
Paint a solid base. Dip an old toothbrush in contrasting paint and flick the bristles for splatter. Cover nearby surfaces first because this gets everywhere.
Practice on newspaper to get the flick right. Pro tip: gold splatter on teal is the most pinned color combo for a reason.
Metallics and Glam

15. Full Gold Glam
A solid gold pumpkin is pure luxury.
Spray paint the whole pumpkin metallic gold in two light coats. Let it dry fully between coats. It catches every bit of light in the room.
Spray outdoors on a calm day. Pro tip: rub a tiny bit of dark wax into the crevices for an antique gold depth.
16. Copper and Rose Mix
Warm metallics feel modern and rich.
Paint alternating pumpkins in copper and rose gold. Group them in threes on a tray with eucalyptus. They look like they cost $50 each.
Use foam pumpkins so they last for years. Pro tip: add one matte black pumpkin to the group for contrast.
17. Glitter Dipped Bottom
Dip it in glitter and call it done.
Paint the top half a solid color. Brush craft glue on the bottom half and roll it in fine glitter. Shake off the excess over newspaper.
Use fine glitter, not chunky, for even coverage. Pro tip: seal the glitter with clear spray so it stops shedding everywhere.
18. Marble Effect
Fake marble is easier than it looks.
Paint the pumpkin white. Drag thin gray lines across it with a small brush, then blur them with a damp sponge. Add gold vein accents for luxury.
Study a marble photo first for realistic veining. Pro tip: less is more, so stop before you think you are done.
19. Bejeweled Pumpkin
Glue on gems and embrace the sparkle.
Paint the pumpkin black. Hot glue flat-back rhinestones in swirls or rows. Start at the top and work down in a pattern. It catches light from every angle.
Buy rhinestones in mixed-size packs for variety. Pro tip: do the gluing outdoors because hot glue strings stick to everything inside.
20. Pearl Finish Pumpkin
Soft shimmer for an elegant table.
Mix white paint with pearl medium ($5) and apply two coats. The finish glows softly instead of shouting. Perfect for dining tables.
Stir the medium well before mixing. Pro tip: add a velvet ribbon around the middle for a gift-wrapped look.
Kid-Friendly and Fun

21. Fingerprint Ghosts
Tiny fingerprints become a ghost family.
Paint the pumpkin black. Let kids press white-painted thumbs all over it. Add tiny black eyes to each print once dry. Every ghost is unique.
Wash hands between colors to keep prints clean. Pro tip: write each child’s name under their ghost with a paint pen.
22. Handprint Spider
One handprint makes a whole spider.
Paint a child’s hand black (washable paint!) and press it on an orange pumpkin. Add googly eyes above the palm. Fingers become legs instantly.
Press firmly and lift straight up. Pro tip: do a practice print on paper first so kids know what to expect.
23. Sticker Resist Art
Stickers do the hard work for you.
Stick foam Halloween stickers on the pumpkin. Paint over the whole thing in one color. Peel the stickers off to reveal the shapes underneath.
Press sticker edges down firmly. Pro tip: this works great for toddlers who cannot paint details yet. For more mess-free projects, see these fall crafts for kids.
24. Cotton Ball Sheep Pumpkin
Fluffy, silly, and irresistible to touch.
Glue cotton balls all over a white pumpkin. Add a black painted face with ears. It looks like a sheep and kids cannot stop petting it.
Use a low-temp glue gun for kid safety. Pro tip: add a small bell on a ribbon collar to complete the sheep look.
25. Superhero Emblem Pumpkin
Every kid wants a superhero pumpkin.
Paint the pumpkin in the hero’s main color. Paint or glue on the emblem: a bat, a spider, a lightning bolt. Stencils help with tricky logos.
Let the base coat dry fully first. Pro tip: print the emblem, cut it out, and trace it for perfect shapes.
26. Emoji Face Pumpkins
Paint the faces kids already love.
Paint pumpkins yellow and add classic emoji faces: heart eyes, laughing tears, cool sunglasses. They are instantly recognizable and hilarious.
Keep the features big and simple. Pro tip: line up five emoji pumpkins and let guests guess each one.
27. Treasure Map Pumpkin
X marks the spot on this one.
Paint the pumpkin tan like old parchment. Draw a dotted treasure trail, palm trees, and a big red X. Burn the edges slightly with brown paint for age.
Use a thin brush for the map details. Pro tip: hide a real small treat inside a hollow faux pumpkin for the finder. For more kid craft ideas, see these halloween crafts for children.
Common Mistakes to Avoid
- Painting on a dirty pumpkin: Dust and wax repel paint. A quick wipe first saves you from peeling later.
- Using washable kids paint: It looks great for a day, then rain washes it off. Acrylic is the only paint that lasts outside.
- Skipping the sealer: Unsealed paint fades and chips within two weeks. One clear coat doubles the life.
- Painting too thick: Thick coats crack as the pumpkin breathes. Thin coats flex and last.
- Forgetting the bottom: Set the pumpkin on a cup while painting so you can reach the base. Unfinished bottoms show.
- Storing wet pumpkins stacked: They stick together and peel. Let each one dry fully with space around it.