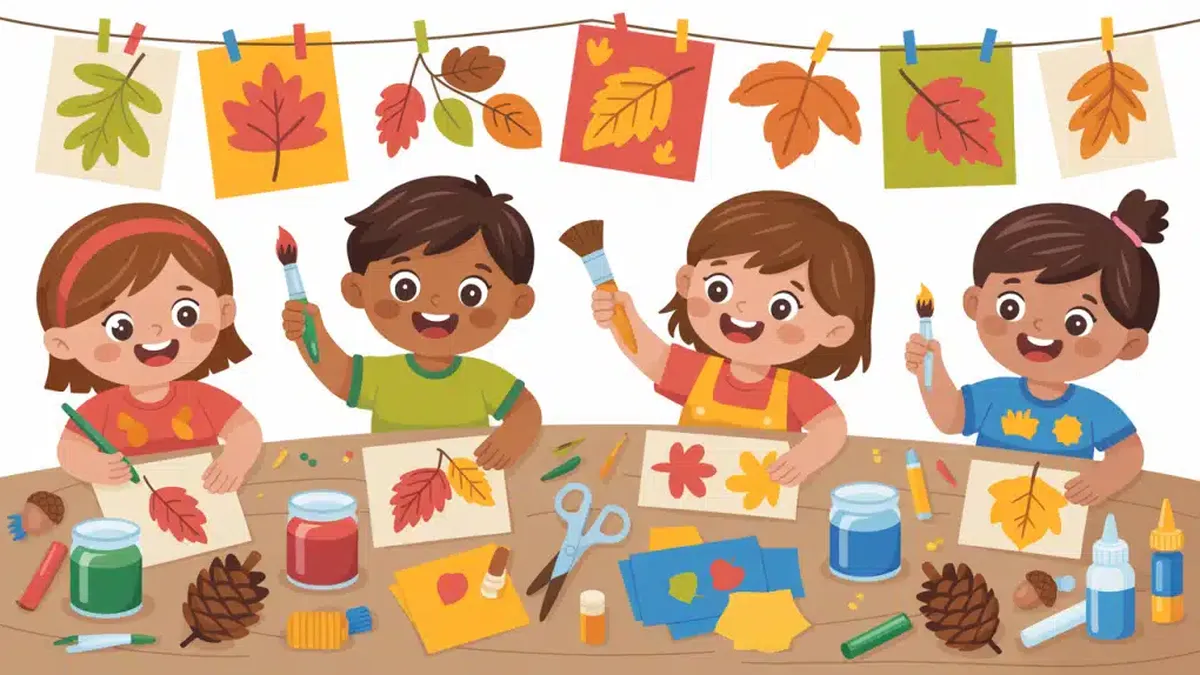
Fall is the best season to craft with kids. The colors do half the work, supplies cost almost nothing, and most projects go from setup to cleanup in under 30 minutes.
Every idea below uses washable supplies, steps a child can truly do alone, and a finished piece worth keeping. Most need under five dollars in new supplies, and several are completely free.
The 22 crafts are grouped by type so you can plan by week or by mood. Grab a tray, cover the table, and let the kids make a happy mess you can actually clean up.
Quick Picks
- Best for toddlers: Handprint Leaf Art takes ten minutes and needs only washable paint.
- Cheapest craft: Coffee Filter Fall Leaves costs about two dollars for a whole classroom.
- Best keepsake: Felt Acorn Necklaces make sweet gifts for grandparents.
- Best for a rainy afternoon: Pumpkin Spice Playdough keeps little hands busy for an hour.
Before You Start
- Cover the table with a plastic cloth or opened paper grocery bags. Cleanup takes two minutes instead of twenty.
- Put kids in old shirts or smocks. Washable paint still stains favorite clothes if it sits too long.
- Set out supplies in small bowls or a muffin tin. Kids waste less paint when portions are small.
- Keep baby wipes within reach. They clean hands fast and save trips to the sink mid project.
- Make a drying spot before you begin. A cookie rack or a cleared shelf beats the kitchen counter.
Paper and Paint Crafts
1. Handprint Leaf Art
A painted handprint becomes a colorful autumn leaf with a few drawn veins. Toddlers can do it with help, and older kids love making a whole tree of family handprints.
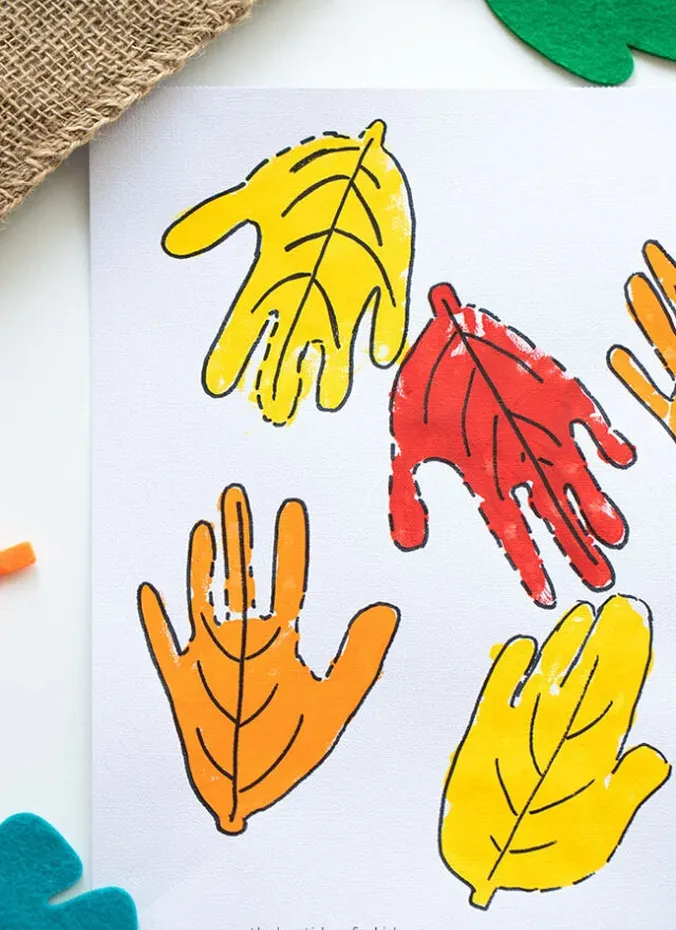
Brush washable tempera paint onto the palm in red, orange, and gold. Press onto white card stock, lift straight up, then draw veins with a brown marker once dry. A washable paint set costs about seven dollars.
Kids love watching their own hand turn into something new. The project takes ten minutes, the mess stays on one sheet, and the result looks sweet framed on a mantel.
2. Coffee Filter Fall Leaves
Kids color coffee filters with markers, mist them with water, and watch the colors bleed together like real autumn leaves. Cut the dry filters into leaf shapes for the window.
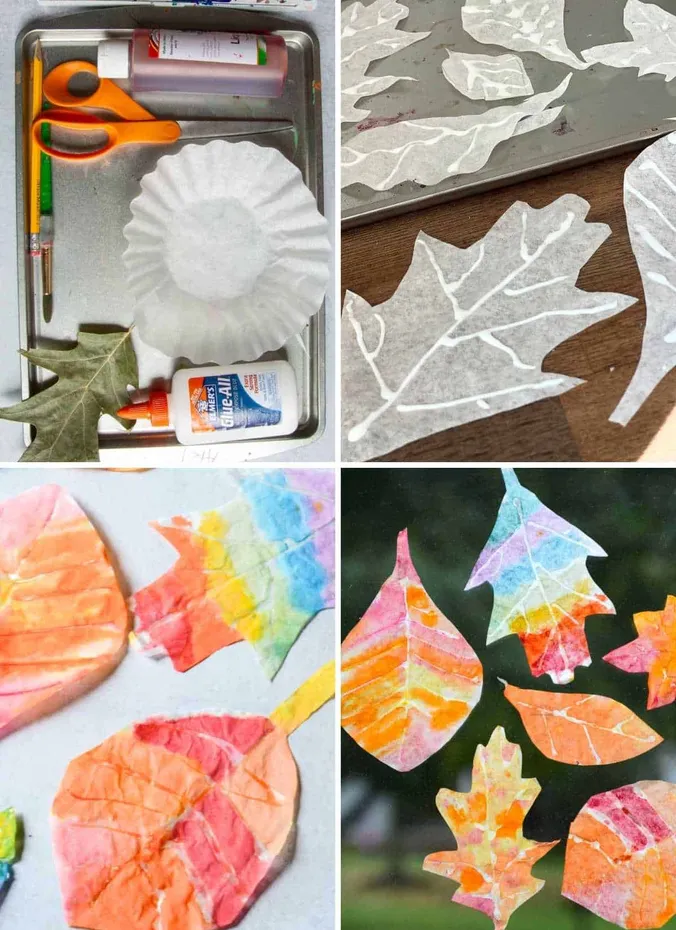
Flatten two or three basket filters per child and scribble with washable markers in fall colors. Spritz lightly with a spray bottle, let dry for 20 minutes, then cut simple leaf shapes. A pack of 200 filters costs about two dollars.
The color blending feels like a science experiment, and there is no wrong way to do it. Tape the finished leaves to a sunny window and they glow like stained glass.
3. Paper Plate Sunflowers
A paper plate, yellow paint, and a brown center make the happiest sunflower. The steps are simple and the result is big, bold, and cheerful.

Cut slits around a paper plate edge to form petals, then paint the plate yellow. Glue on a brown paper circle and dot it with black paint or small pom poms for seeds. Plates cost about three dollars for 50.
Cutting petals builds scissor skills while the painting stays easy. Line finished sunflowers along a hallway wall and the whole house feels like fall.
4. Cotton Swab Painted Fall Trees
Trade the paintbrush for cotton swabs and dot a plain tree drawing into a canopy of fall color. The texture looks surprisingly real from a few steps back.
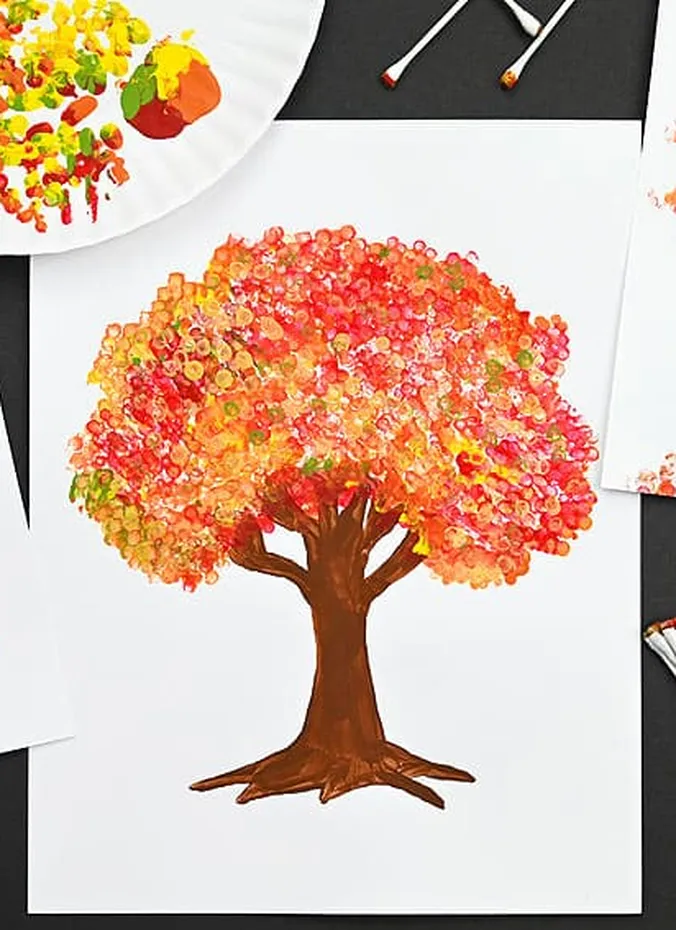
Draw or print a bare tree trunk on white paper. Pour small dabs of washable paint onto a paper plate, then dot the canopy with swabs, layering red, orange, and yellow. A bag of 500 swabs costs about two dollars.
Dotting is calming and nearly mess proof, ideal for kids who overdo it with a brush. It sneaks in fine motor practice without feeling like work.
5. Torn Paper Pumpkins
No scissors needed. Kids tear orange construction paper into pieces and glue them inside a pumpkin outline. The torn edges give great texture.
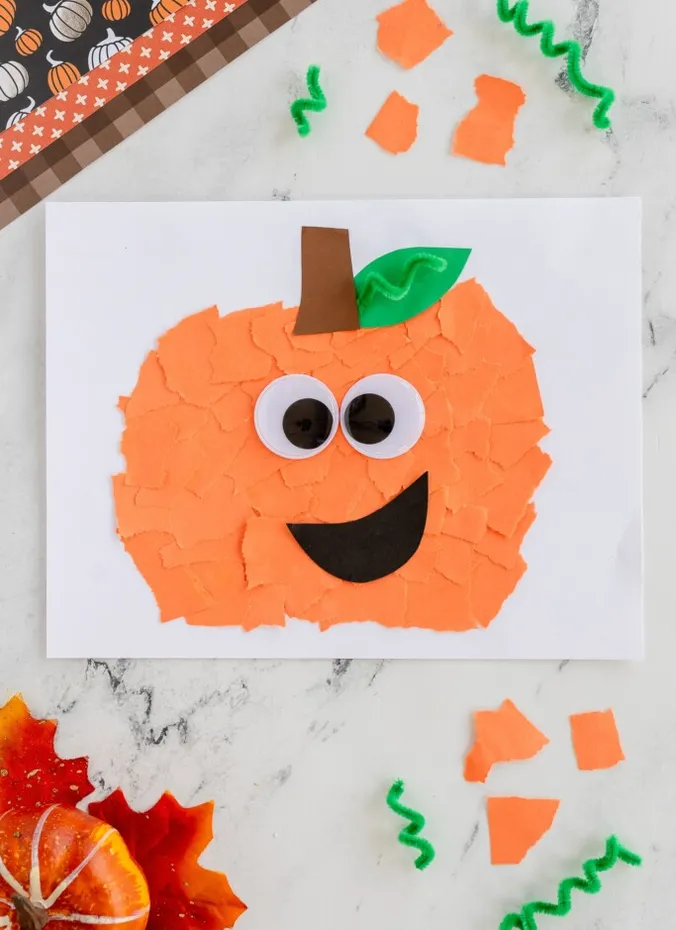
Draw a large pumpkin shape on white paper. Kids tear orange paper into stamp sized pieces and glue them on, overlapping as they go. Add a green stem, a black smile, and googly eyes. Construction paper packs cost about five dollars.
Tearing builds the hand muscles kids need for writing, and there is no wrong way to do it. For more pumpkin fun, see these kid friendly pumpkin carving ideas for safe ways to decorate real pumpkins together.
6. Paper Bag Scarecrow Puppets
A brown lunch bag becomes a scarecrow puppet with a paper hat, stitched smile, and googly eyes. Kids slip a hand inside to make their scarecrow talk and tell fall jokes.
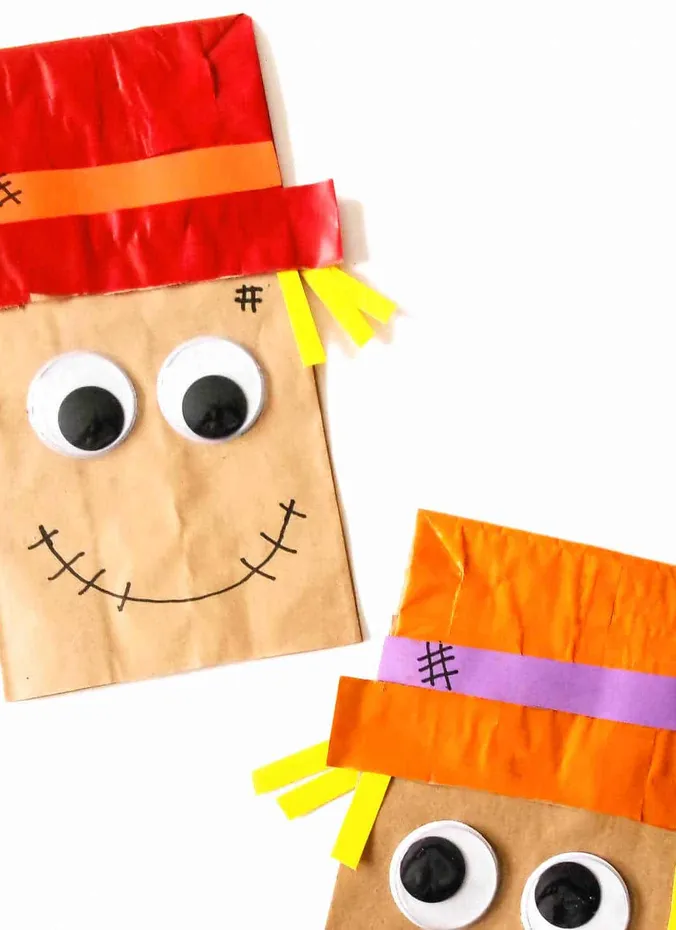
Flatten a lunch bag so the folded bottom faces up. Glue on a paper hat, draw a stitched smile, and add googly eyes and yellow paper straw hair. Bags cost about two dollars for 50.
The craft does not end when the glue dries. Puppets invite storytelling and silly voices, stretching ten minutes of crafting into an hour of play.
Nature Crafts
7. Pinecone Owls
Turn a nature walk into a craft session. Kids collect pinecones, then turn them into wide eyed owls with felt wings and googly eyes. Each one comes out different.
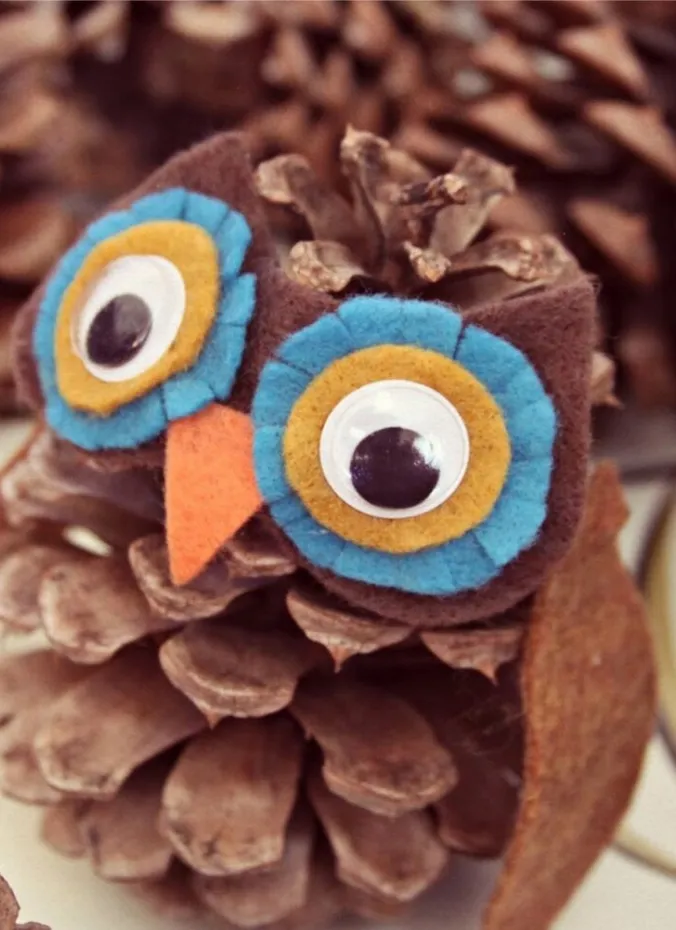
Pick dry, open pinecones and brush off dirt. Cut wing, ear, and beak shapes from craft felt, about four dollars a pack, and glue on with a low temp glue gun handled by an adult. Finish with googly eyes, around three dollars a bag.
The treasure hunt outside is half the fun. Finished owls look adorable on a windowsill or tucked into a fall centerpiece.
8. Crayon Leaf Rubbings
Place a leaf under paper, rub a crayon over the top, and the veins appear like magic. Kids never tire of trying new leaves.
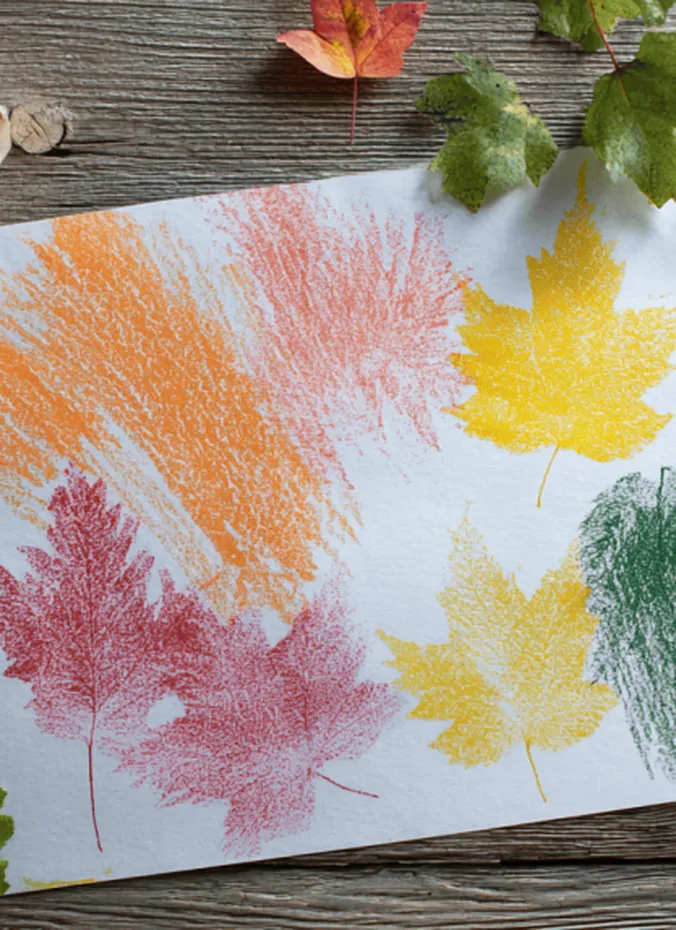
Gather fresh leaves with strong veins, oak and maple work best. Lay each leaf vein side up under thin paper and rub firmly with the side of an unwrapped crayon. Use crayons you already own. Total new cost is zero.
The reveal is exciting every time, and comparing vein patterns sneaks in a little science. Frame the best rubbings together for easy seasonal wall art.
9. Felt Acorn Necklaces
Little makers string their own fall jewelry. Felt balls in autumn colors thread onto cord with a felt acorn pendant, sturdy enough for daily wear and pretty enough to gift.
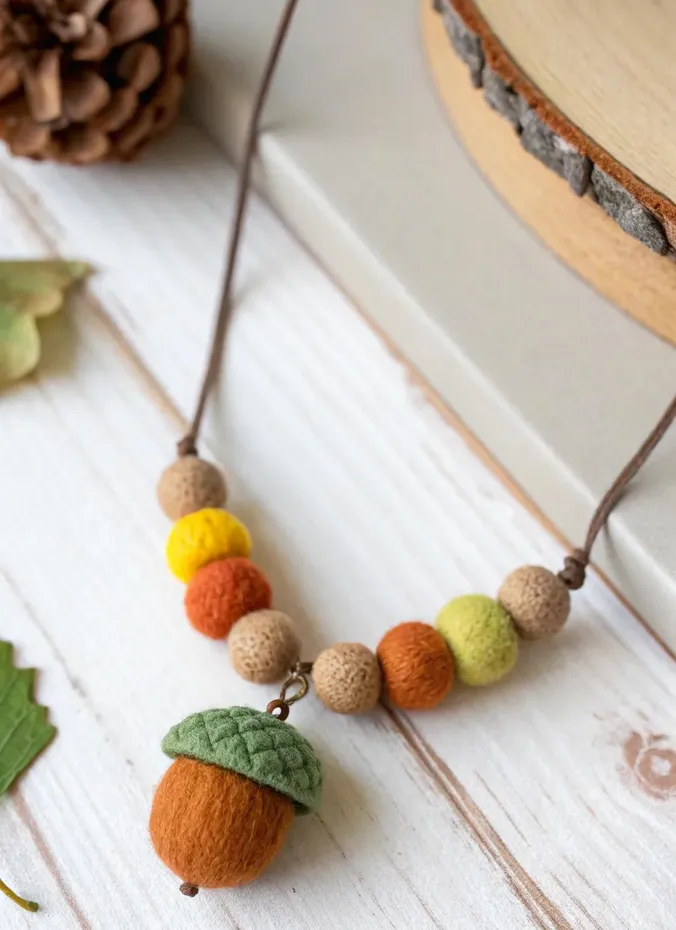
Buy assorted felt balls, about six dollars for 50, plus a felt acorn pendant or make one from brown and green felt. Thread onto waxed cord with a blunt needle, knotting between beads. Older kids finish one in 20 minutes.
Kids get to wear what they make, which is a special pride. Planning color sequences builds early math skills. Make extras for teachers and grandparents.
10. Contact Paper Nature Collages
Sticky contact paper turns collected leaves into a glowing suncatcher with zero glue. Kids press leaves onto the sticky side, then you seal it with a second sheet.
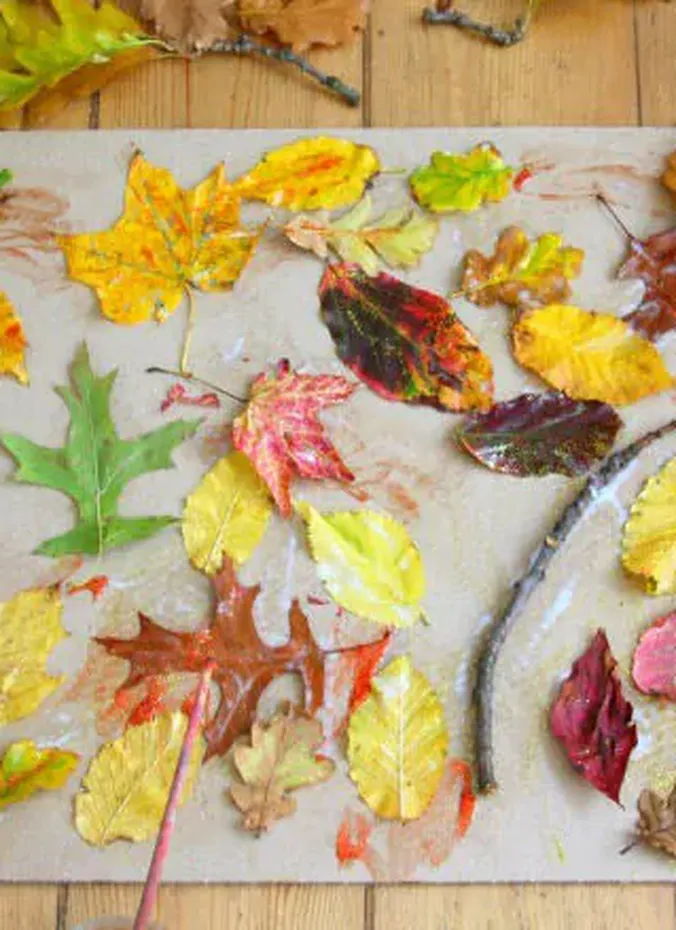
Cut two matching rectangles of clear contact paper, about six dollars a roll. Tape one sheet sticky side up, let kids arrange their finds, then lay the second sheet on top to seal. Trim edges for a clean finish.
No drying time and no sticky fingers, ideal for toddlers who just want to place things. Hang in a window and light shines through beautifully.
11. Painted Rock Pumpkins
Smooth rocks become a patch of mini pumpkins with orange paint and marker faces. They never rot, survive the rain, and kids can hide them for others to find.
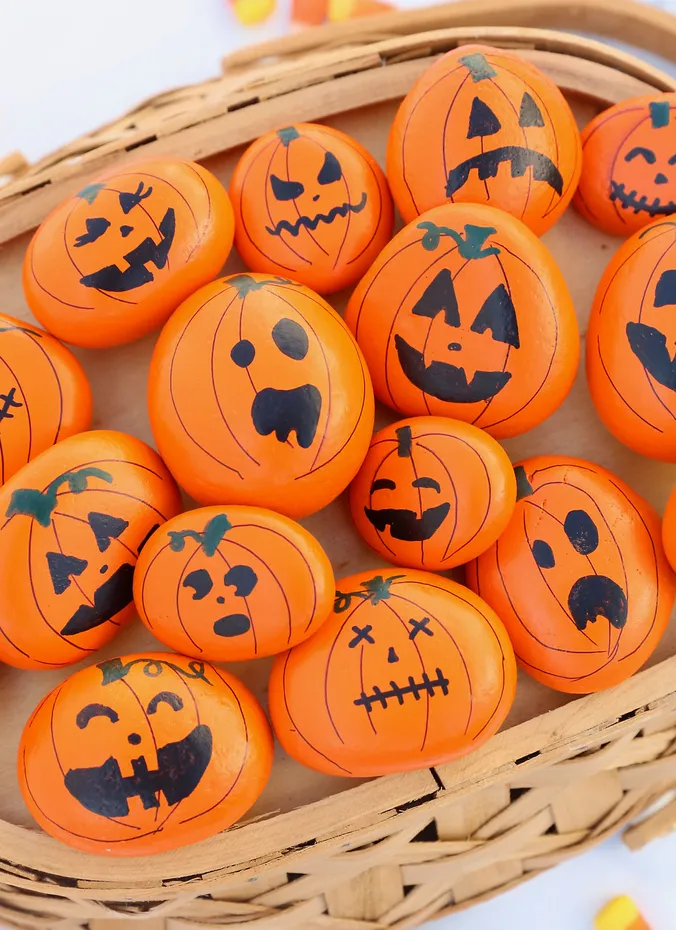
Wash smooth, flat rocks well. Paint each orange with acrylic paint or paint pens, about nine dollars a set, then draw faces with black marker once dry. Seal with clear spray if they will live outdoors.
Rocks are free and nearly indestructible, so kids paint boldly. They make sweet porch decor all season. Pair with these neutral fall decor ideas for a pulled together look.
Halloween and Spooky Crafts
12. Decorated Foam Pumpkins
Foam craft pumpkins give all the fun of pumpkin decorating with none of the slimy scooping. Paint them, stick shapes on them, and keep them for years.
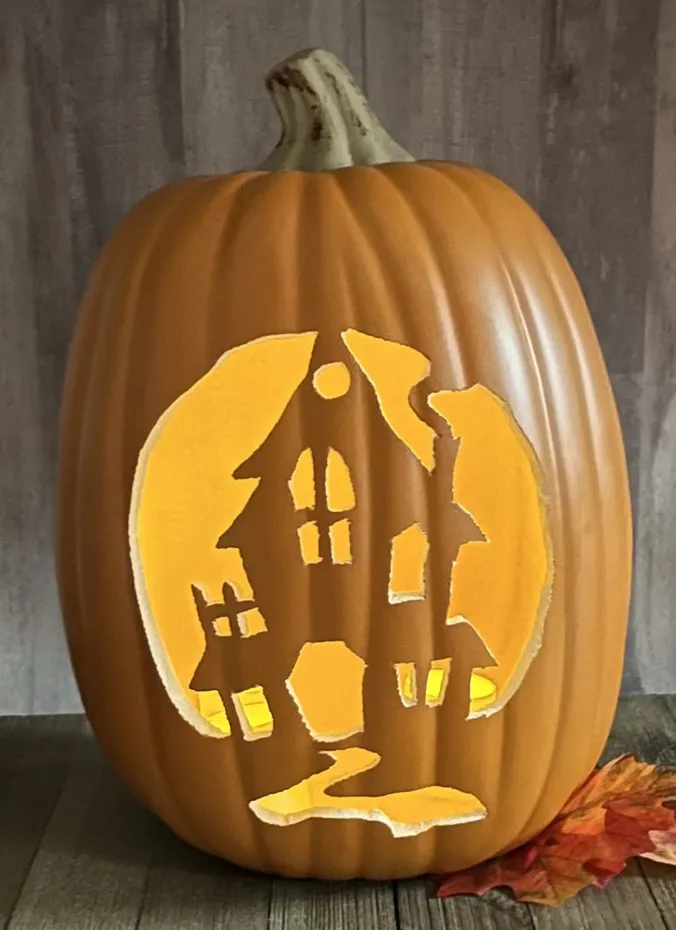
Pick up foam pumpkins for three to six dollars each, cheaper in multi packs. Set out acrylic paint, foam stickers, and glitter glue, then let kids decorate freely. No carving tools means even preschoolers join safely.
Foam pumpkins never rot or attract fruit flies, so decor stays fresh from October through Thanksgiving. A fresh coat of paint next year makes the cost per use wonderfully low.
13. Paper Cup Ghost Lanterns
White paper cups, marker faces, and a battery tea light become the cutest glowing ghosts. Line them along a dark hallway for delight every October evening.
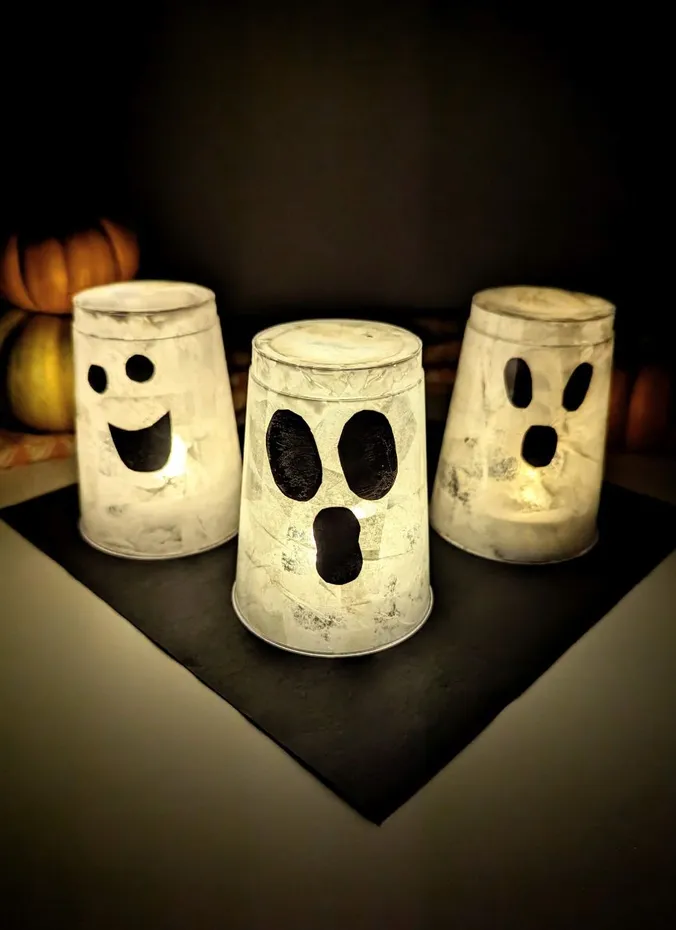
Draw simple ghost faces on white paper cups with black marker. Drop in one LED tea light, about five dollars for 12, and turn off the lights. Use only battery lights, never real candles.
The glow feels like magic to young kids, and the craft takes five minutes. For more not too spooky projects, see these Halloween crafts for children that keep the cute factor high.
14. Popsicle Stick Scarecrows
Glued craft sticks become a sturdy scarecrow with a painted hat and stitched grin. They stand alone as shelf decor, place cards, or stick puppets.
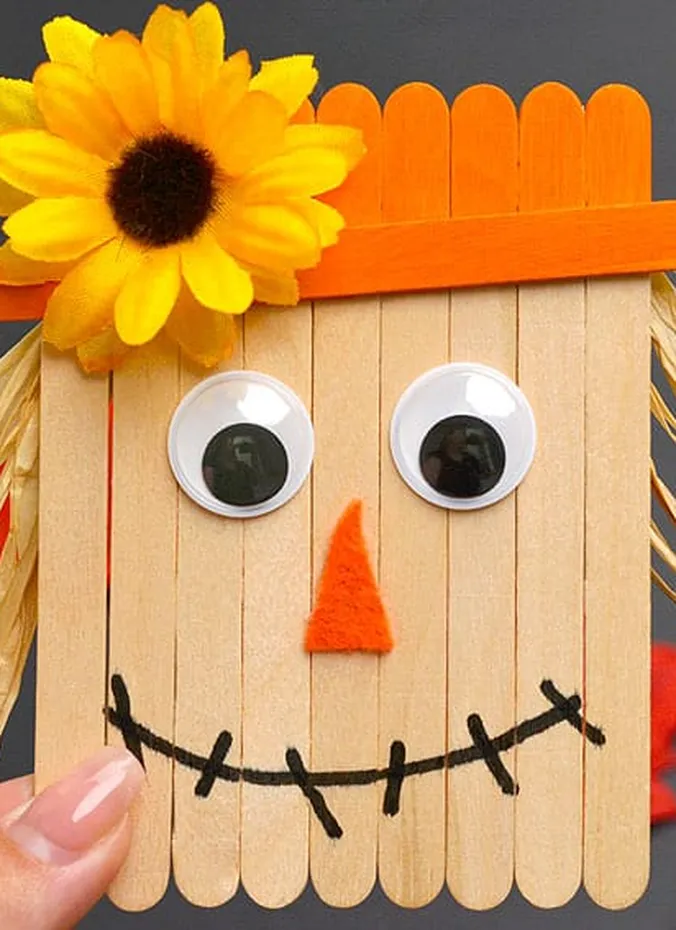
Glue seven to nine sticks side by side, with one across the back for support. Paint the top sticks orange for a hat, add a triangle nose, googly eyes, and a marker smile. Sticks cost about three dollars a box.
The finished scarecrow feels sturdy and giftable, not flimsy. Kids practice straight gluing and simple painting in one project. Make a family of them for a windowsill.
15. Handprint Spiders
Two black handprints become a spider with eight wiggly legs. Even spider wary kids find this one funny instead of scary, especially on a yarn paper plate web.
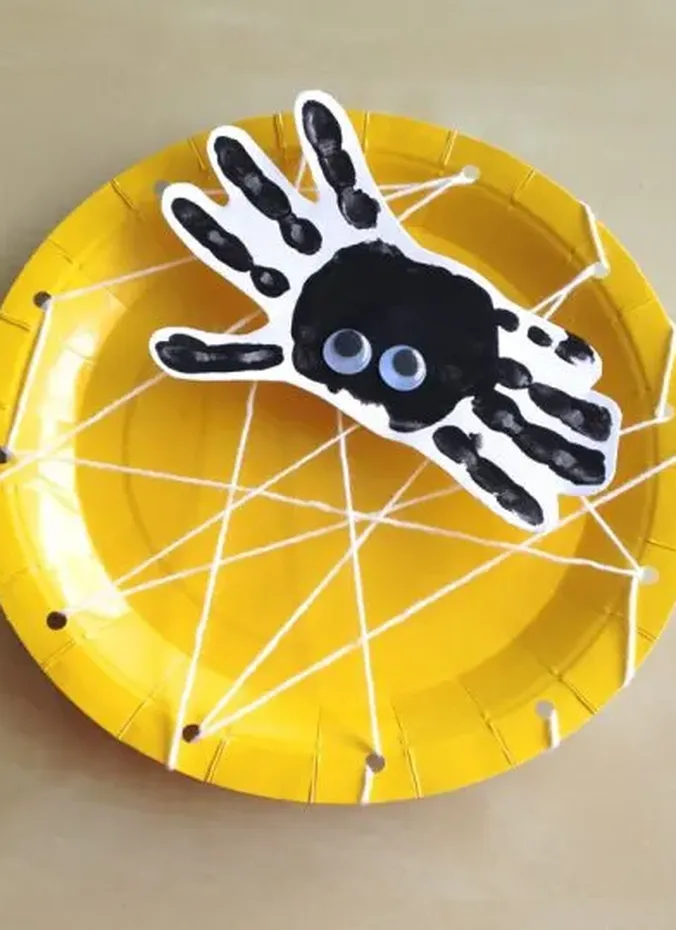
Paint both hands black and press onto white paper with fingers out, thumbs overlapping for the body. Add googly eyes once dry. For the web, punch holes around a plate rim and weave white yarn across.
Handprint crafts double as keepsakes that show how little hands grow. The theme stays seasonal without frightening, and yarn weaving challenges older kids.
16. Mason Jar Bat Lanterns
Old mason jars get a Halloween makeover with paint and paper bat silhouettes. Add a battery tea light and the bats seem to fly across glowing glass.

Paint a clean jar with a thin coat of orange, purple, or black acrylic paint, about four dollars a bottle. Glue black paper bats on the outside, add a tea light inside, and tie twine around the rim. Pantry jars keep costs near zero.
Glass plus light always impresses, and kids feel proud giving these as gifts. They double as nightlights. Keep paint coats thin so light shines through.
Thanksgiving and Harvest Crafts
17. Paper Bag Turkeys
The paper bag puppet gets a Thanksgiving twist. A lunch bag becomes a turkey with a fan of paper feathers, googly eyes, and an orange beak, perfect for the kids table.

Flatten a lunch bag and glue paper feather shapes along the top in fall colors. Add a head circle on the flap with googly eyes, an orange triangle beak, and a red wattle. Bags cost about two dollars for 50.
Kids can make one for every Thanksgiving guest. Writing each name on a turkey turns them into place cards, which makes little ones feel important at the big table.
18. Paper Plate Leaf Wreaths
Cut the center from a paper plate for a perfect wreath base. Kids glue on paper leaves until the ring is full, then hang it on the front door with ribbon.
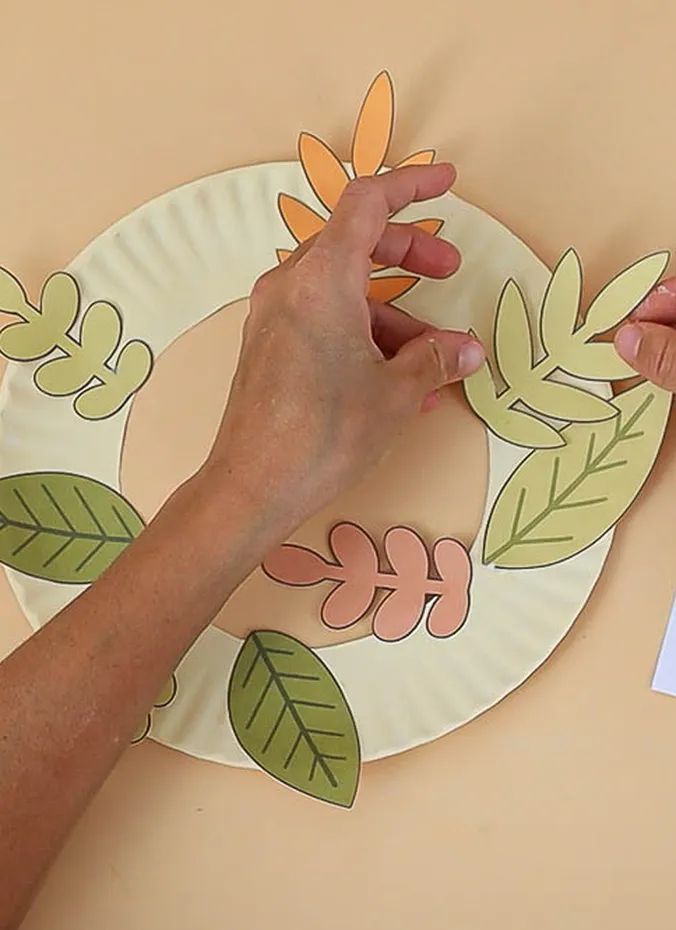
Cut a large circle from a sturdy plate, leaving a two inch ring. Cut leaf shapes from red, orange, yellow, and brown paper, or use real pressed leaves. Glue around the ring, overlapping, and add a ribbon loop.
Wreaths feel like real decor, not just kid art, and hanging their work on the door gives huge pride. The project also uses up paper scraps from other crafts.
19. Simple Corn Husk Dolls
This old fashioned craft connects kids to harvest traditions. Dried corn husks soak soft, then fold and tie with twine into sweet little dolls.
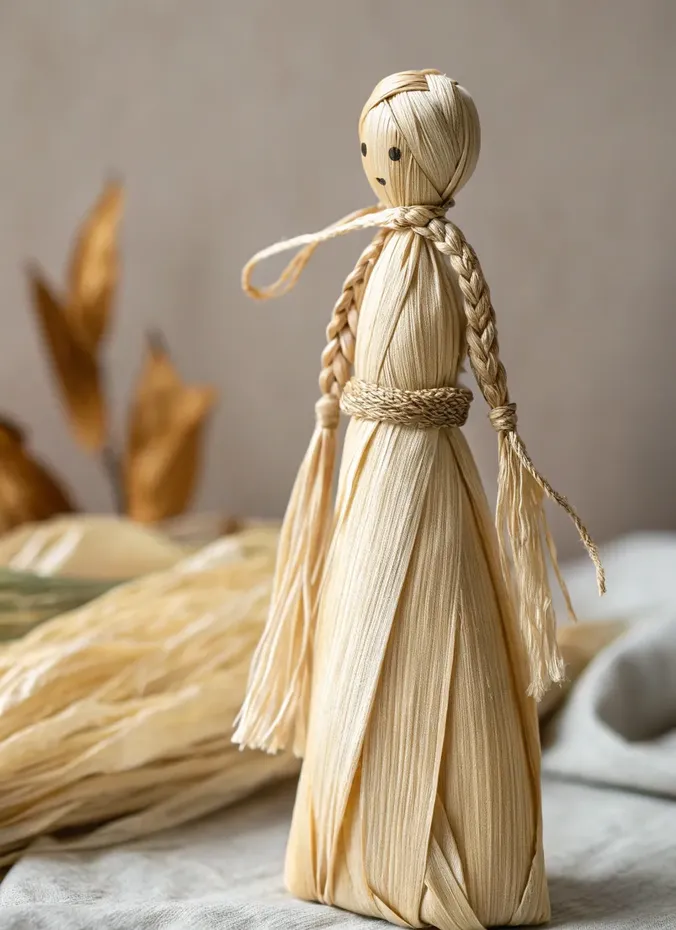
Soak dried husks in warm water for 15 minutes until pliable. A bag costs about five dollars, or save husks free from fresh corn.
The craft is screen free, quiet, and wonderfully tactile. It opens lovely conversations about harvest time and how people played long ago.
20. Apple Stamping Art
Cut an apple in half for a perfect star shaped stamp. Kids dip the cut side in paint and press rows of apple prints. Part art project, part snack time.
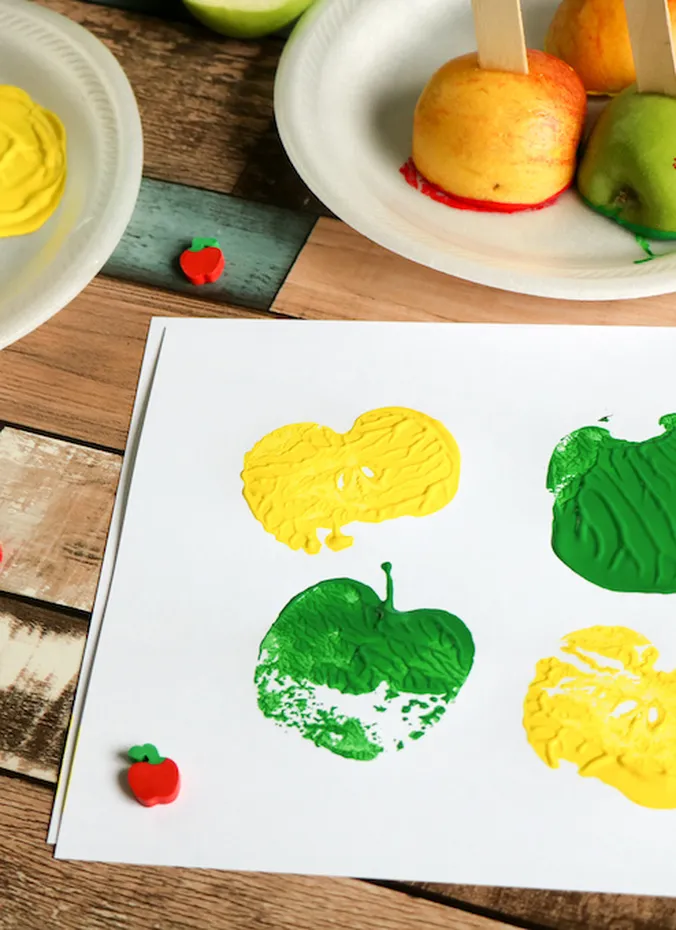
An adult cuts apples in half across the middle to reveal the star core. Pour washable paint into shallow dishes and let kids dip and stamp. Red, green, and yellow show the shapes best. Apples cost about a dollar each.
Stamping is instantly rewarding with no skill needed, so toddlers join safely. Use finished prints as fall gift wrap or Thanksgiving placemats.
21. Fall Leaf Garlands
String fall leaves along twine for instant mantel or doorway decor. Use real pressed leaves, paper leaves, or a mix. It is the fastest way to make a room feel like autumn.
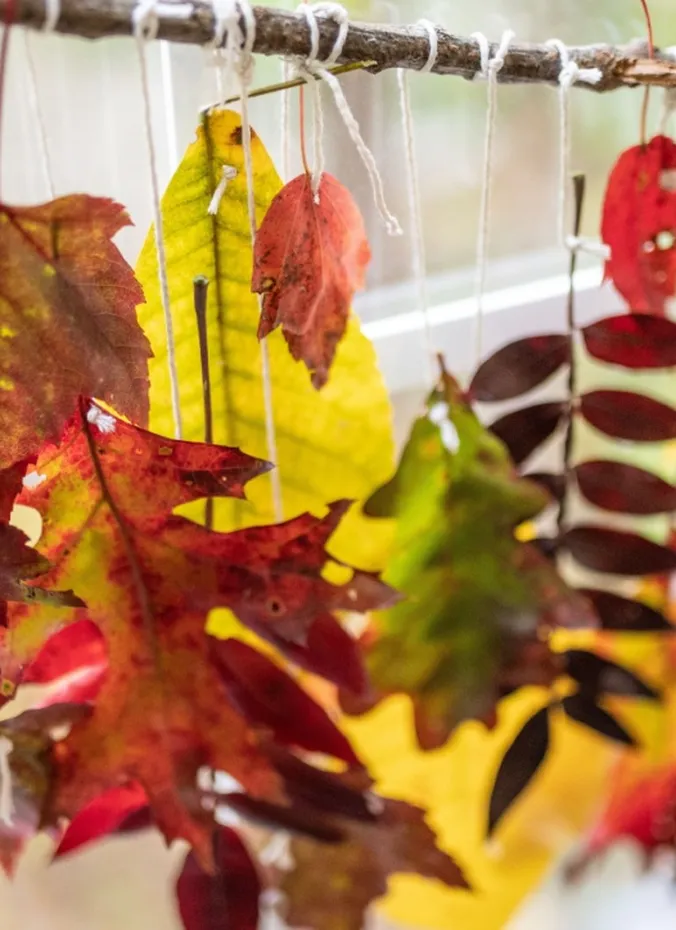
Cut twine, about three dollars a roll. Kids thread leaves with a punched hole near the stem, or clip them on with mini clothespins for a no sew version. Space evenly and tie loops at both ends.
Garlands make big impact for little effort, and prominent display motivates more crafting. Drape over a mirror or staircase to fit with neutral fall decor ideas in a calmer palette.
22. Pumpkin Spice Playdough
Homemade playdough gets the fall treatment with pumpkin spice and orange coloring. It smells like a bakery, stays soft for weeks sealed, and costs a fraction of store bought dough.
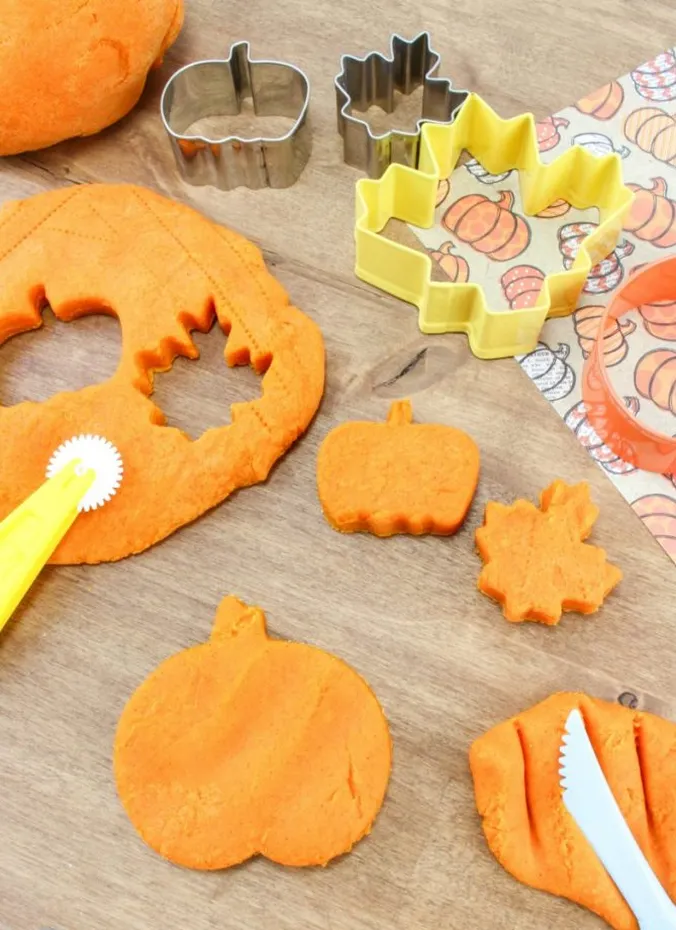
Mix one cup flour, half cup salt, two teaspoons cream of tartar, one tablespoon oil, and one cup boiling water. Stir in two tablespoons pumpkin spice, about three dollars a jar, plus orange coloring. Knead five minutes until smooth.
Scented dough engages more senses and holds attention longer. Add fall cookie cutters and dried beans for open ended play. One batch keeps two kids busy all afternoon, the best value on this list.
Budget Tips
- Buy washable everything. Washable paint and markers cost the same as regular ones and save clothes, tables, and sanity.
- Hit the dollar store first. Paper plates, craft sticks, googly eyes, and pipe cleaners run a dollar or two there.
- Let nature supply the craft box. Pinecones, leaves, acorns, and smooth rocks are free, and kids love collecting them.
- Build one fall supply kit. A paint set, glue sticks, construction paper, and scissors cover almost every craft here.
- Save jars, boxes, and bags all year. Mason jars, shoeboxes, and paper bags become free craft bases instead of trash.
- Print free templates instead of buying kits. Pumpkin outlines, bat shapes, and leaf patterns cost nothing online.
- Craft in batches. One setup for three projects wastes less paint and less weekend than three separate setups.
Common Mistakes to Avoid
- Starting without covering the table. Two minutes of prep with a plastic cloth saves twenty minutes of scrubbing.
- Handing toddlers permanent markers or glitter. Stick to washable supplies until kids can aim carefully.
- Picking crafts with too many steps for the age. If a project needs more than five steps, simplify it.
- Rushing the drying time. Moving wet crafts smears the work, so plan a drying spot before you start.
- Buying a separate kit for every craft. Most projects here share basic supplies, so one kit goes further.
Frequently Asked Questions
What are the easiest fall crafts for toddlers?
Handprint leaf art, torn paper pumpkins, and apple stamping suit ages two and three best. Each needs only two or three steps, uses washable supplies, and forgives wobbly hands. Keep sessions near 15 minutes and praise the process, not the result.
How do I keep fall crafts mess free with kids?
Use washable paint and markers, cover the table, and pour paint into small containers so spills stay tiny. Smocks protect clothes and baby wipes handle quick cleanups. Glue free crafts like contact paper collages are the lowest mess of all.
Set up near a sink or outside on nice days. Tell kids the cleanup plan before starting and they will happily help wipe the table after.
What basic supplies should I buy for fall crafting?
A washable tempera paint set, glue sticks, construction paper, kid safe scissors, googly eyes, and paper plates carry you through nearly every craft here. Add cotton swabs, lunch bags, and contact paper and you are set for the season for under 25 dollars.
What ages are these fall crafts for?
Most suit ages three to ten with small tweaks. Toddlers do best with stamping, tearing, and sticking, while older kids enjoy pinecone owls and mason jar lanterns. An adult can prep tricky steps ahead so the child still does the fun part.
How should I display finished fall crafts?
Garlands and wreaths shine on mantels, doors, and stair railings. Flat art like leaf rubbings frames nicely in cheap frames for a seasonal gallery wall. Pinecone owls and rock pumpkins make charming Thanksgiving centerpieces.
Do not forget gifting. Grandparents treasure handmade fall art, and felt necklaces or jar lanterns are genuinely gift worthy. Photograph oversized projects before recycling them.
Conclusion
Fall crafting with kids does not need to be complicated or expensive to be wonderful. With a few washable supplies and ideas from this list, you can fill the season with creative afternoons that cost less than a pizza night.
The real payoff is not the finished art. It is the half hour of focused time together, the proud grin when a handprint becomes a leaf, and the wreath your child points out to every visitor.
Start with one easy win this weekend, maybe the coffee filter leaves or the apple stamping, and see where the afternoon takes you. Soon you will have a house full of handmade autumn.