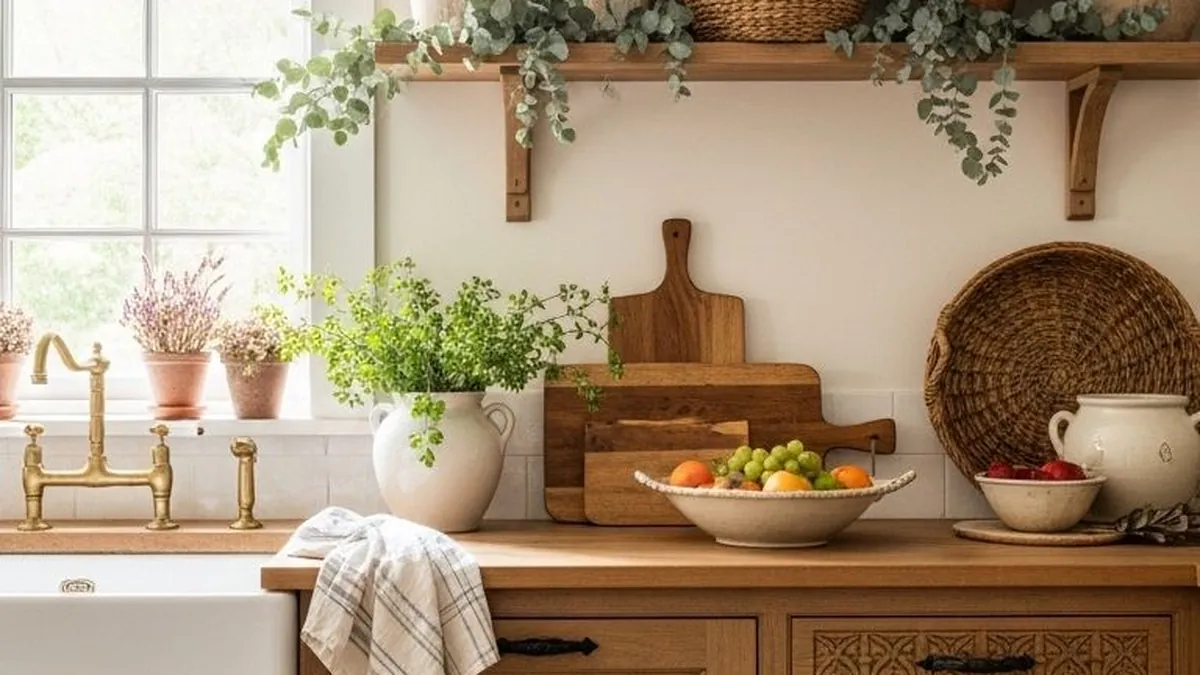
Decorating above kitchen cabinets is one of those projects that looks simple until you actually try it, since that strip of space is too visible to ignore and somehow just as easy to overdo. Most kitchens either leave it completely bare or turn it into a dusty shelf of random objects, and neither one does the room any favors.
What actually makes decorating above kitchen cabinets work isn’t filling every inch, it’s choosing a handful of pieces at varying heights that feel collected rather than placed. A few well-chosen items with real visual weight beat a cluttered row of small objects every single time, and that’s the idea behind every tip below.
I’ve grouped these twenty-two into five directions: baskets and woven texture, plants and greenery, vintage and collected display, pottery and ceramic styling, and lighting and seasonal touches, so there’s a starting point whatever your kitchen’s style.
Quick Picks
- Best budget way to decorate above kitchen cabinets: A row of matching baskets
- Best focal piece: One oversized plant or a single vintage sign
- Best lighting: Rope lights on a timer for an evening glow
- Best for renters: Everything leaned, nothing mounted
Before You Start: Quick Styling Tips
- Vary the heights. Three items at the same height reads flat, the same three staggered reads intentional.
- Leave visible negative space. Filling every inch of the gap is the fastest way to make it look like a clutter shelf.
- Pick one material story. Baskets in the same weave, or frames in the same metal tone, tie a mixed collection together.
- Consider what’s actually visible from below. Anything under about 12 inches tall tends to disappear from normal sightlines.
- Dust access matters. A stool-free reach or a light coat of sealant on porous items saves a lot of maintenance later.
Baskets and Woven Texture
1. Line up a row of matching round baskets
This is the single most common above-cabinet look, and it earns that popularity honestly.

A row of three or four round woven baskets in the same tone, sized between 10 and 16 inches wide, sits flat against the cabinet top and reads as intentional storage rather than clutter, even though most are left empty. Coastal and farmhouse kitchens both lean on this look heavily since the natural texture softens white or painted cabinetry.
Keeping every basket in the same weave and color family is what makes a row like this look curated instead of thrifted at random. It’s one of the lowest-effort updates on this entire list relative to how finished it makes the space look.
2. Layer one oversized basket with smaller accents around it
A single large piece does more visual work here than several small ones.

One oversized woven basket, roughly 18 to 24 inches wide, anchors one end of the cabinet run while two or three smaller items, a small plant or a stack of books, fill in around it at varying heights. This layered, slightly asymmetrical arrangement is one of the most-cited above-cabinet styles for 2026 specifically because it reads as collected rather than staged.
The size contrast between the large basket and the smaller pieces is what creates the visual interest. Matching everything to the same size is the mistake this approach specifically avoids.
3. Use a flat woven tray leaned against the wall
Leaning instead of laying flat adds a completely different visual line to the space.

A flat woven or rattan tray, roughly 20 inches wide, leaned at a slight angle against the wall above the cabinets breaks up the horizontal monotony that a row of flat-topped baskets can create. It works especially well tucked behind a shorter item in front of it, adding depth without taking up much actual surface space.
This is a detail most people don’t think to try, since the instinct is almost always to lay everything flat. A single leaned piece changes the whole rhythm of the display for very little cost or effort.
4. Mix basket sizes with visible gaps between them
Negative space is doing as much work here as the baskets themselves.
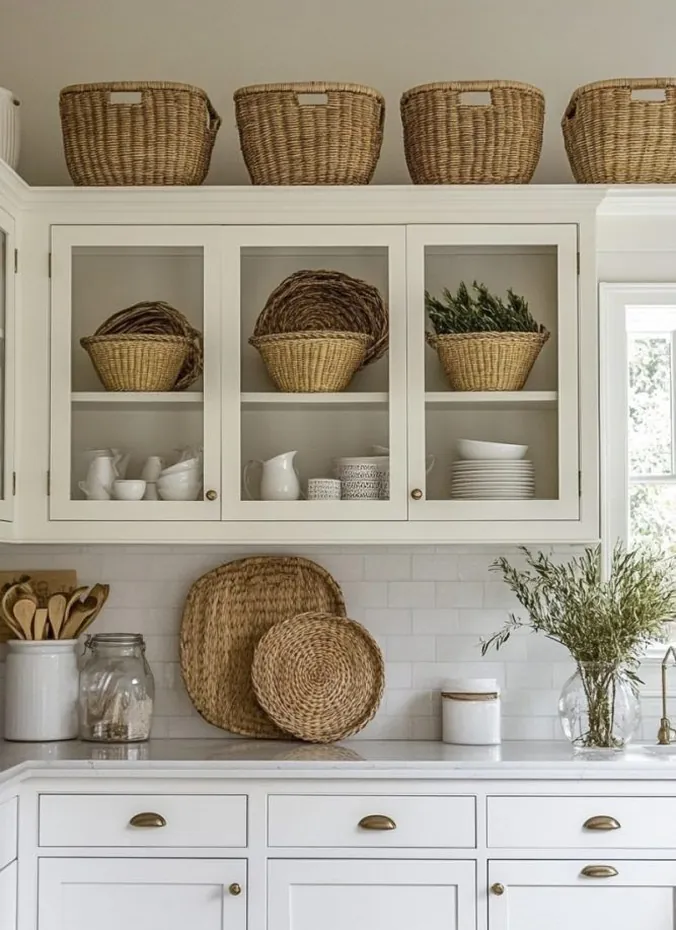
Three baskets in graduating sizes, small, medium, and large, spaced with clear gaps rather than pushed together edge to edge, keeps the display from reading as a solid, cluttered wall of texture. The gaps let each basket register as its own object instead of blurring into one mass.
This spacing detail is the one most people skip, and it’s usually the reason an otherwise nice collection of baskets still looks slightly off. A few inches of breathing room between each one solves it completely.
5. Add a single wide basket filled with faux greenery
A hybrid approach that combines two popular ideas into one piece.

One wide, shallow basket, filled with a low arrangement of faux eucalyptus or olive branches, sits centered above a stretch of cabinets and functions as both the woven texture element and the greenery element at once. This works particularly well above a shorter run of cabinets where there isn’t room for several separate pieces.
It’s an efficient choice for anyone who wants the layered look without managing multiple individual items. The greenery also softens the basket’s straight edges, which keeps the whole display from feeling too rigid.
Plants and Greenery
6. Let trailing pothos or ivy spill over the edge
This is the detail that makes an above-cabinet display feel genuinely alive rather than static.
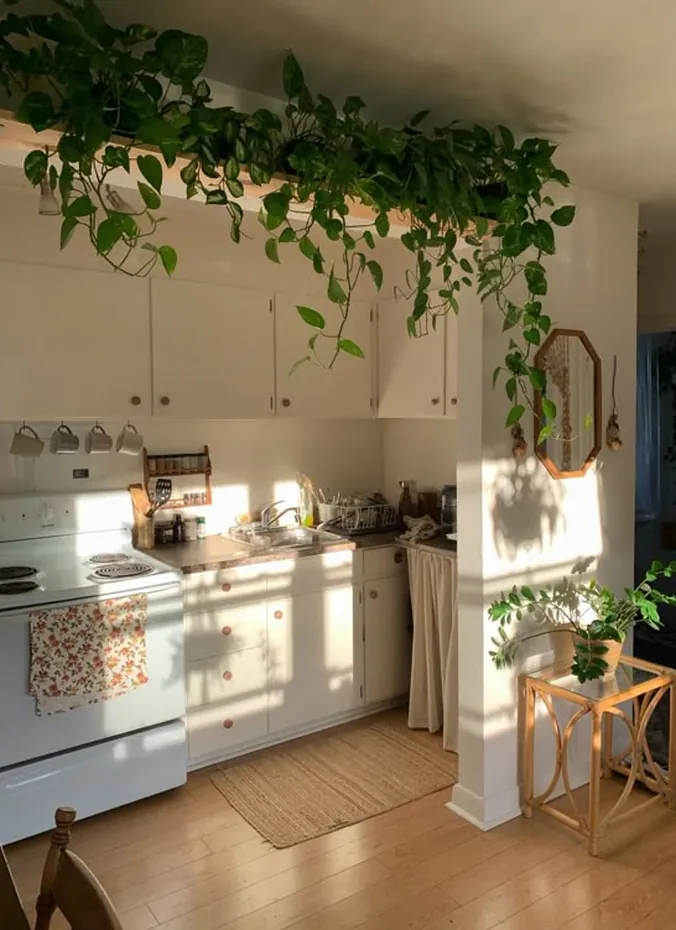
A faux or real trailing plant, like pothos or English ivy, placed in a pot toward the back of the cabinet top lets the vines spill down the front edge over time, softening the hard line where cabinet meets ceiling. Real plants need indirect light to survive up there, so a faux version is often the more practical choice for cabinets without a nearby window.
The cascading effect is what separates this from a plant that’s simply sitting there. It’s one of the most repeated details across current above-cabinet styling because it adds movement nothing else on this list quite achieves.
7. Add one oversized potted plant as a focal point
A single large plant can anchor an entire cabinet run on its own.
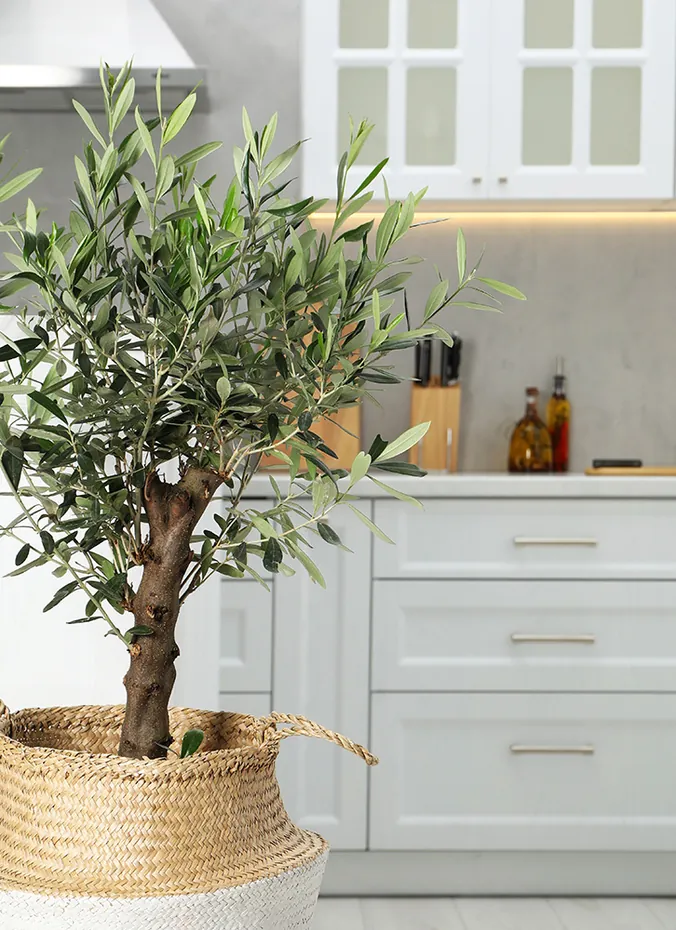
One substantial faux plant, like an olive tree or a large fern in a 10 to 14 inch pot, placed at one end of the cabinet top gives the whole display a clear focal point the way a piece of furniture would in a room. Everything else on the cabinet top can then be arranged in relation to it rather than competing for equal attention.
This approach solves the common problem of a display with several small items and no clear starting point for the eye. It also tends to photograph better than a scattered collection of smaller pieces would.
8. Use dried or preserved stems instead of fresh flowers
A maintenance-free way to add organic softness to the space.
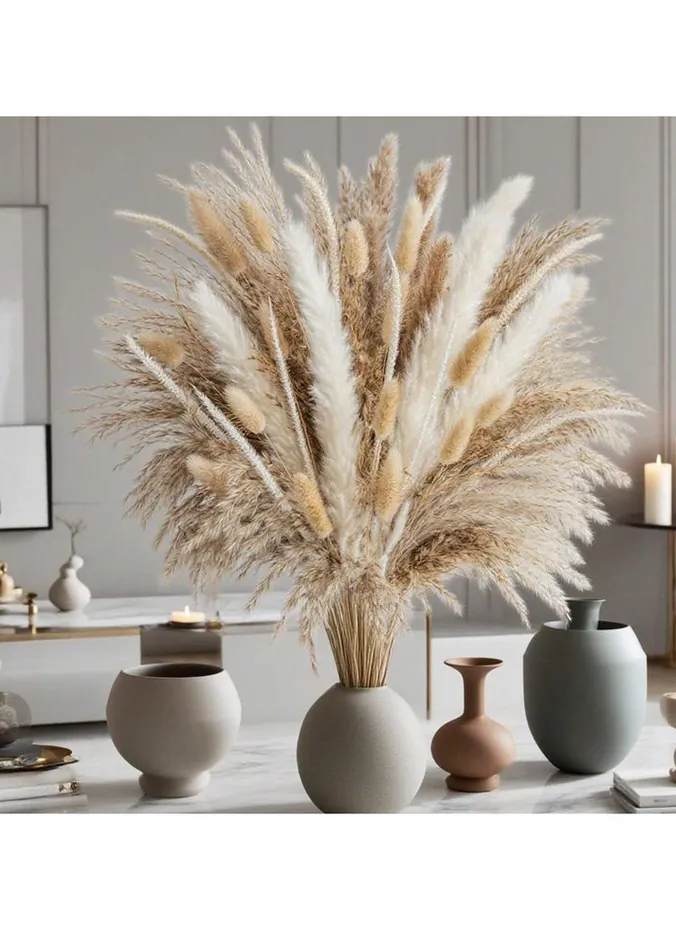
A tall vase filled with dried pampas grass, preserved eucalyptus, or dried wheat stems adds height and organic texture without the watering or wilting that fresh flowers would require up in a spot that’s genuinely hard to reach. Most dried arrangements last a full year or more before needing to be refreshed.
This solves the specific problem of above-cabinet space being awkward to access regularly for plant care. It’s a strong pick for anyone who wants the softness of greenery without adding a maintenance task to their week.
9. Group two or three small potted herbs for a farmhouse feel
A smaller-scale plant option that leans into a cozier, more functional-looking aesthetic.
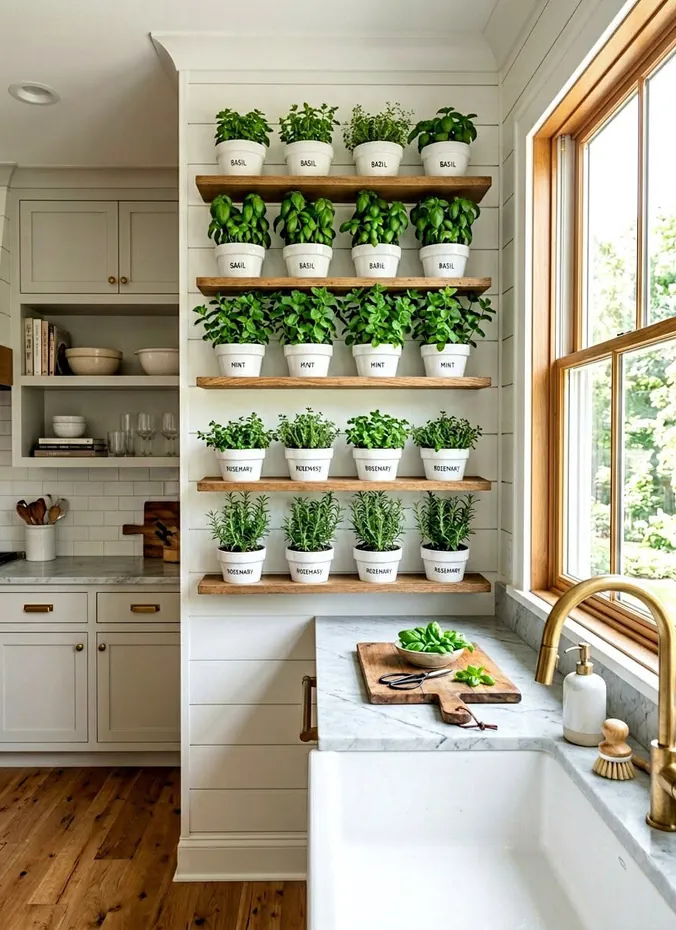
A trio of small faux herb pots, basil, rosemary, and thyme, grouped together toward one end of the cabinet top adds a farmhouse-leaning, kitchen-appropriate greenery touch without needing a single large plant. Real versions work here too if the cabinets sit reasonably close to a window for light.
This detail ties the greenery specifically back to the kitchen’s function, which is a subtle touch a generic houseplant doesn’t offer. It’s an easy, low-cost addition for a farmhouse or cottage-style kitchen specifically.
Vintage and Collected Display
10. Lean a collection of vintage frames at varying heights
A layered, gallery-style approach that works especially well for a vintage or eclectic kitchen.
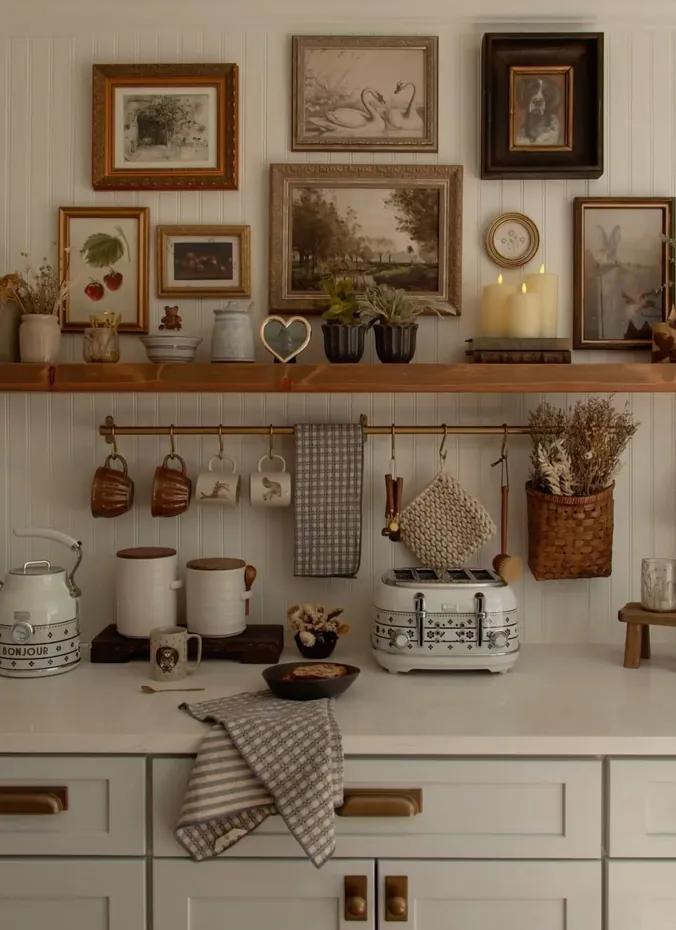
A handful of vintage picture frames, thrifted and varying slightly in size and finish, leaned against the wall rather than hung, creates a collected-over-time look that a matched set could never quite replicate. Refinishing mismatched metal frames with a gold or brass rub-on finish ties an otherwise random assortment together visually.
Leaning instead of hanging also means the arrangement can be rearranged in seconds without any new nail holes. It’s one of the more personal, character-driven ideas on this entire list.
11. Stack vintage cutting boards or bread boards
A texture-forward idea that leans specifically into a farmhouse aesthetic.

Several vintage or vintage-style wooden cutting boards and bread boards, stacked and leaned rather than laid flat, add warmth and a sense of everyday, well-used charm to the top of the cabinets. Varying the board sizes and shapes within the stack keeps it from looking too uniform or purchased as a matching set.
This idea works particularly well because it references the kitchen’s actual function rather than feeling purely decorative. It’s also one of the most budget-friendly options on this list if you’re sourcing boards secondhand.
12. Display a small collection of vintage pitchers or jugs
A curated, single-category collection reads as far more intentional than a mix of unrelated items.

A grouping of three to five vintage ceramic or glass pitchers, varying in size and glaze but sharing a similar color palette, arranged along the cabinet top creates a cohesive collector’s display rather than a random assortment of found objects. Sourcing them slowly over time from thrift stores keeps the cost low and the collection genuinely personal.
Sticking to one object type, rather than mixing pitchers with unrelated items, is what keeps this display feeling intentional. It’s a strong option for anyone who already enjoys thrifting and wants a real display purpose for what they find.
13. Add a single oversized vintage sign or piece of art
One large, character-filled piece can replace an entire collection of smaller objects.
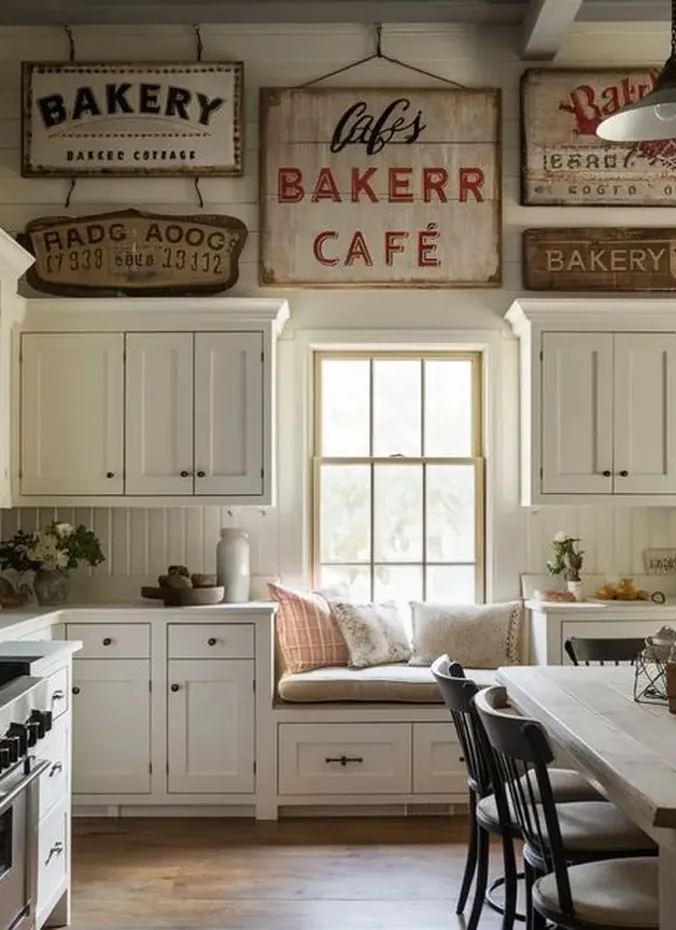
A single vintage advertising sign, a piece of reclaimed architectural salvage, or an oversized framed print, leaned or mounted flush against the wall above the cabinets, gives the space one clear statement instead of several competing small items. This works especially well above a shorter cabinet run where multiple objects would feel cramped.
It’s a strong choice for anyone who’d rather commit to one meaningful piece than manage an evolving collection. A single bold item like this also tends to be the detail people actually comment on first.
14. Mix in a stack of old cookbooks or hardcover books
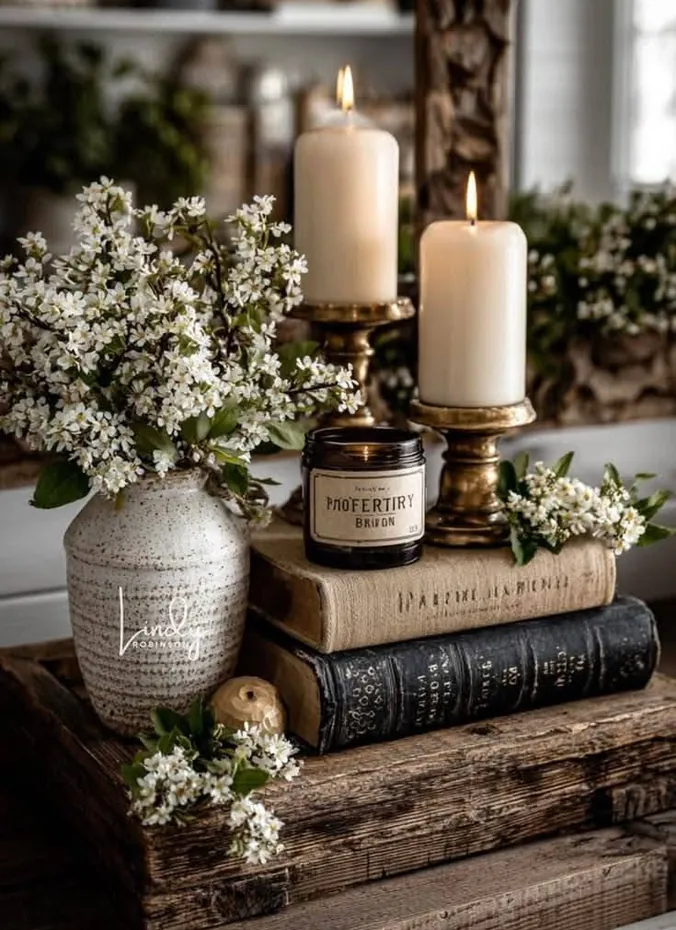
Books add both height variation and a genuinely lived-in feel to the display.
A short stack of two or three vintage cookbooks or hardcover books, placed horizontally with a small object like a candle or figurine on top, adds height variation and a personal, collected quality that purely decorative objects don’t achieve on their own. Choosing books with worn, textured spines adds more visual interest than glossy modern covers would.
This is one of the easiest ideas on the list to source, since most people already own books that would work. It’s also one of the few ideas here that doubles as a way to display something with real sentimental value.
Pottery and Ceramic Styling
15. Group oversized ceramic vases in a single tone
A pottery-forward look that leans into the bigger, sculptural pieces trending in kitchen styling right now.

Two or three oversized ceramic vases, in the 12 to 18 inch range and kept within one color family like warm terracotta or matte cream, create a sculptural, gallery-like display without needing anything inside them. Varying the vase shapes while keeping the color consistent is what makes the grouping feel curated rather than mismatched.
Oversized pottery has become one of the more requested above-cabinet looks recently, specifically because it reads as intentional and grown-up rather than cluttered. It’s a strong option for a kitchen that leans modern or organic-modern in its overall style.
16. Use one large decorative bowl as a centerpiece
A single wide, shallow piece can anchor a display the same way a large plant would.

One large ceramic or wood bowl, roughly 14 to 18 inches wide, placed at the center of the cabinet run, gives the eye a clear resting point and works especially well left empty rather than filled with additional small objects. It’s a restrained choice that suits a more minimalist kitchen aesthetic.
This idea proves that a display doesn’t need many pieces to feel finished. One well-chosen, well-proportioned object often reads as more considered than five smaller ones scattered along the same space.
17. Layer varying ceramic textures, matte and glossy together
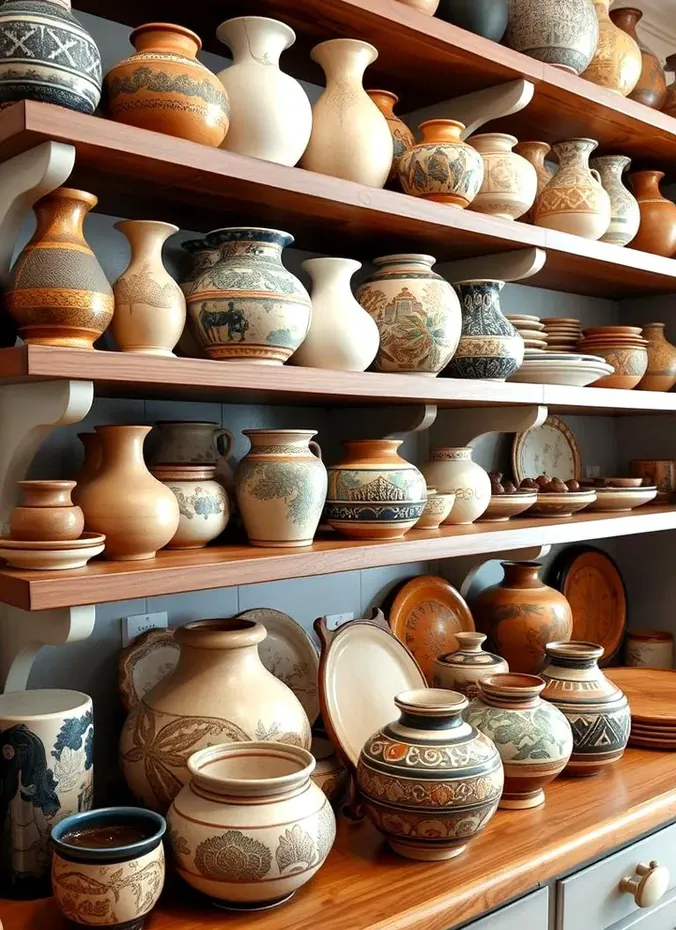
A subtle detail that adds depth without adding visual clutter.
Pairing a matte-finish ceramic piece with a glossy or textured one, rather than keeping every item the same finish, creates a layered look that catches light differently across the display. This works within almost any color palette, since it’s the finish variation doing the work rather than color contrast.
It’s a detail that’s easy to miss when shopping but noticeable once it’s arranged correctly. Mixing finishes is a simple way to make even a small collection of ceramics feel more considered.
18. Add a decorative jar or urn with a fitted lid
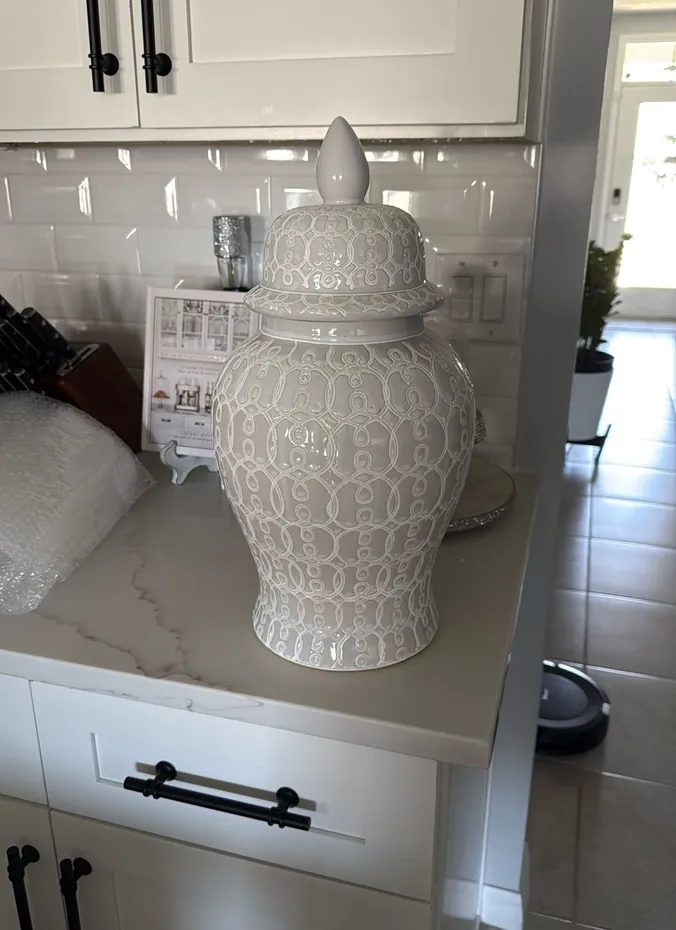
A slightly more formal option for a traditional or transitional kitchen style.
A single decorative jar or urn, roughly 16 to 20 inches with a fitted lid, adds height and a sense of permanence to the display, working especially well at one end of a longer cabinet run balanced by shorter items at the other. The closed lid also means it collects noticeably less dust than an open vessel would.
This is a practical choice for anyone who wants a striking piece without the ongoing maintenance an open container requires. It reads as more formal than a basket or open bowl, which suits a traditional kitchen particularly well.
Lighting and Seasonal Touches
19. Add rope or string lights on a timer
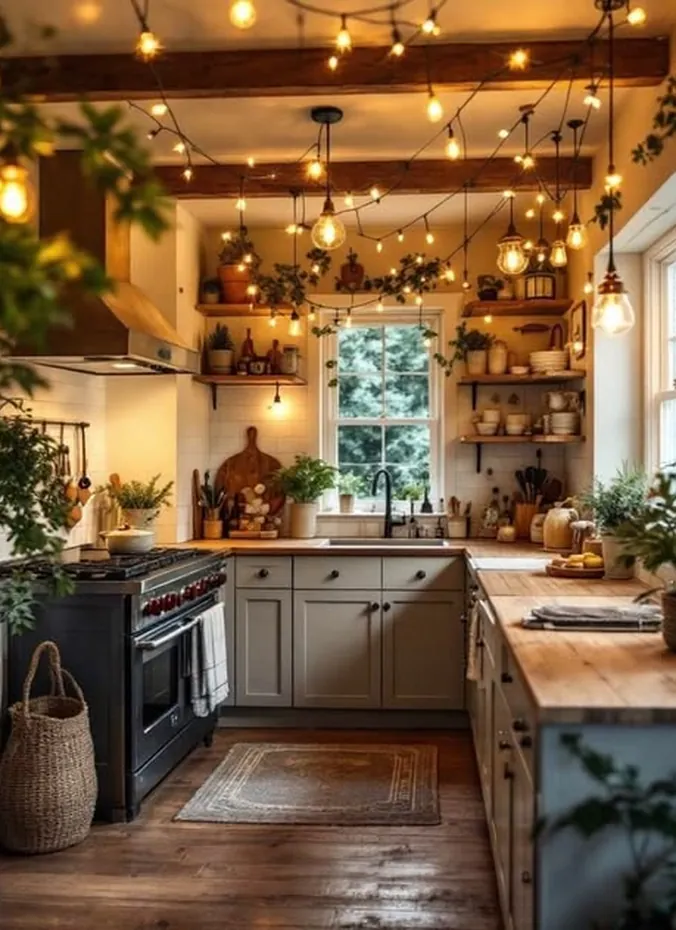
This single addition changes how the entire display looks after dark.
Warm white rope lights or a thin LED strand, tucked along the front edge of the cabinet top and set on a timer to switch on at dusk, adds a soft glow that highlights the baskets, plants, or pottery below it once natural light fades. Battery-powered strands with a timer function avoid the need for any visible cord or outlet nearby.
This is one of the most repeated tips found in above-cabinet styling specifically because it extends when the display actually gets seen and appreciated. It’s a small addition with a genuinely outsized effect on the overall feel of the kitchen in the evening.
20. Rotate in a seasonal wreath or garland

A simple habit that keeps a permanent display from feeling static year-round.
Leaning a seasonal wreath, fall foliage in autumn or fresh greenery around the holidays, against the wall above the cabinets alongside the existing display, gives the space a festive refresh without touching or removing any of the permanent pieces. This works especially well in a kitchen with crisp white cabinets, where the greenery reads clearly against the clean background.
It’s a low-cost way to keep an otherwise fixed display feeling current throughout the year. Swapping just this one element takes minutes but noticeably changes how seasonal the whole kitchen feels.
21. Use a battery-powered puck light behind taller pieces
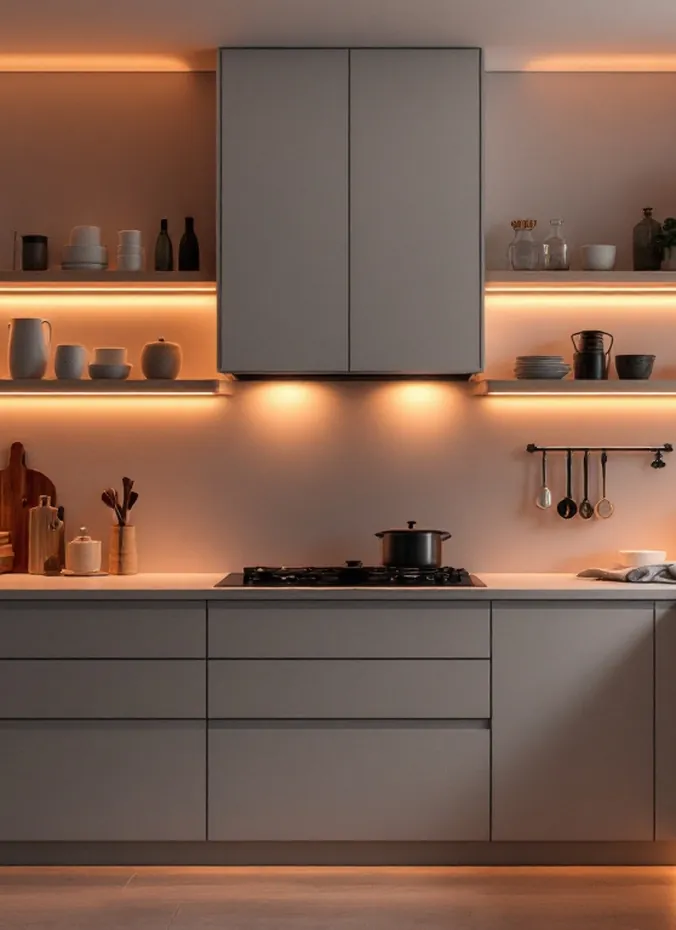
A subtler lighting option for anyone who wants ambiance without a visible light source.
One small battery-powered puck light, tucked behind a tall vase or plant, casts a soft, indirect glow upward without the light fixture itself being visible from below. It’s a simpler installation than a full rope light strand, since it requires no wiring or specific placement along an edge.
This is a strong option for a display with one or two tall focal pieces rather than a full row of items needing even lighting. It adds a subtle glow effect for very little cost or effort.
22. Swap in a fresh evergreen garland for the holidays

The most traditional seasonal above-cabinet update, and still one of the most effective.
A fresh or faux evergreen garland draped along the front edge of the cabinet top during the holiday season adds festive texture and scent without needing to remove or store the rest of the year-round display underneath it. Tucking in a few pinecones or small ornaments along the garland finishes the look.
This is one of the easiest seasonal swaps on this entire list to execute and reverse. It transforms the same cabinet-top display into something that feels specifically tied to the season without any permanent change.
Budget Tips
- Baskets are the cheapest way to fill the space. Thrift stores sell them for a few dollars each.
- Use faux greenery up high. Nobody can tell the difference at that height, and it never needs watering.
- Shop your own home first. Cutting boards, pitchers, and cookbooks you already own can carry the whole display.
- One oversized piece beats five small ones and usually costs less than the five combined.
- Battery puck lights cost a few dollars each and make the display look finished at night.
- Buy rope lights once with a built-in timer. No electrician, no rewiring, no running costs to think about.
- Rotate seasonal pieces instead of buying new ones. A wreath in fall becomes greenery in winter with small swaps.
Common Mistakes to Avoid
- Filling every inch. Negative space is what makes the display look styled instead of stored.
- Using all small objects. Tiny items disappear up high, so anchor with at least one large piece.
- Keeping everything at the same height. Stagger heights or the whole row reads flat.
- Forgetting about dust. Up high collects it fast, so choose pieces you can wipe down easily.
- Skipping lighting. Without it, the display vanishes the moment the sun goes down.
Frequently Asked Questions
What should I put above my kitchen cabinets?
Large, simple pieces work best: baskets, plants, vintage boards, or oversized pottery. When you decorate above kitchen cabinets, one anchor piece per section beats a row of small objects every time.
How do I keep the space above cabinets from looking cluttered?
Leave visible gaps between groupings and stick to a limited color palette. If every piece shares one or two tones, even a full shelf reads as intentional.
Is decorating above kitchen cabinets still in style?
Yes, when it looks collected rather than stored. The dated look is a dusty row of random small items. A few intentional pieces at varying heights reads current.
How do I light the area above kitchen cabinets?
Rope lights on a timer are the simplest option, tucked behind the front edge of the display. Battery puck lights behind taller pieces add depth with no wiring at all.
How often should I clean above the cabinets?
Wipe pieces down every few months, since grease and dust collect fast up there. Choosing smooth, wipeable pieces over fussy ones makes this a five-minute job.
Conclusion
The kitchens where the space above the cabinets actually works are the ones where every piece earns its spot through height, texture, or genuine visual weight, not just because there was empty room to fill. Start with one or two anchor pieces, a large basket, a tall plant, or a single vintage sign, before adding anything smaller, since the anchor is what gives the rest of the display somewhere to build from. Once that’s in place, lighting is the detail most people skip and the one that does the most to make the whole display feel finished after the sun goes down.